

 русский
  Español
 -
What to Consider When Buying Wholesale Pipe Clamps

Feb 09, 2026
Wholesale Pipe Clamp Buying: A Practical, No-Nonsense Guide for Buyers and Project Teams
A pipe clamp is, on paper, a small component: a ring, a bolt, maybe a rubber lining. On a construction site, though, clamps matter. They secure piping systems, control vibration, support insulation, and help ensure that joints don't fail years down the line. When you need hundreds or thousands of them, the quality of your supplier decides whether installation is smooth or whether crews face repeated rework.
Why one shipment can stop a project
A small anecdote before we dig in: a mechanical contractor once ordered 3,200 clamps for an eight-building project. Delivery showed up on time, but crews found many clamps had the wrong bolt length and the lining adhesive was peeling on a number of pieces. Fixing that problem required forklift time, extra hands, and a delayed commissioning for two buildings. The extra cost — in labor and schedule — beat any nominal savings the contractor had made on unit price.
That contractor's mistake wasn't choosing a cheaper supplier per se. It was failing to verify certain basic things: material certificates, pre-production samples, and a clear packaging plan. Those checks take a little time before ordering, and they pay off when product arrives.
What buyers usually check before placing a wholesale order
If you want a practical checklist, start here. These are the items that experienced buyers bring up in kickoff meetings.
Clear technical specs
Don't leave anything to interpretation. Provide pipe diameter ranges, operating temperatures, coating type, lining needs, and expected loads. Include drawings or photos if appearance or orientation matters. If you don't define tolerance, you get whatever the factory thinks is acceptable.
Pre-production samples
For significant runs, get physical samples from the same production process planned for your order. An actual sample reveals how the lining adheres, how the finish looks, and whether holes align with bolts and saddles.
Material certification
Request mill certificates for steel or stainless steel and datasheets for coatings and linings. For critical systems (chemical plants, hospitals, coastal installations), demand test results — salt spray, adhesion, and alloy traceability.
Packaging and labelling plan
Clamps dumped into a pallet with no labelling equal hours of sorting on site. Confirm how the factory will pack, label, and palletize. Ask for kits to include matching bolts, spacers, and washers if that saves on-site time.
Production and delivery timeline
Agree on staged deliveries if your project is phased. Confirm lead times and get a written delivery schedule tied to production milestones.
Quality control and traceability
Learn what in-process checks the factory performs and how they log batch numbers. Traceability helps you trace a field issue back to a batch or raw-material lot.
Warranty and defect handling
Know the process for dealing with defects. Who pays for return freight? How quickly will replacements be arranged? A good supplier has a documented approach.
These checks are straightforward and low cost. They prevent the "wrong product, on-time" problem which is surprisingly common.
How materials and order volume shape price
When you receive a quote, ask for the cost breakdown: raw material, processing, tooling and packaging. It’s surprisingly common for buyers to compare only the final unit price — without understanding the components behind it.
Material choices matter most
- Plain carbon steel with galvanizing is budget-friendly and fits many indoor applications.
- Stainless steel (e.g., 304, 316) costs more but resists corrosion in demanding environments.
- Special coatings (e.g., polyurethane, powder coating) add cost and processing time.
- Lining materials (EPDM, nitrile, PTFE) differ in price and in chemical resistance.
Match your choice to job conditions. Over-specifying for a benign environment wastes money; under-specifying for a corrosive environment shortens service life.
Design complexity increases cost
A clamp with integrated spacers, padding, or custom saddles requires more dies and likely additional manufacturing steps (welding, machining, pressing). Each added operation increases cost and tooling lead time.
Order volume drives per-unit price
Larger runs allow the factory to amortize tooling and set-up across more units. But be mindful of on-site storage limits. Ordering significantly more than you can store often creates handling and protection costs that erode the benefit of a lower unit price.
Hidden costs to watch
- Special fasteners or coatings that require separate sourcing.
- Extra packing for coastal transit or long storage.
- Customs or export paperwork that slows delivery and adds fees.
Ask for transparent pricing that lists these elements. It helps you make trade-offs intelligently.
Which industries commonly order wholesale pipe clamps
Knowing typical needs by industry helps you select suppliers with the right experience.
- Construction and HVAC: Favor cost-effective standard clamps, fast deliveries, and installer-friendly kits.
- Industrial process plants: Prioritize material certificates, high temperature ratings, and traceability.
- Marine and coastal projects: Need specific stainless grades and anti-crevice considerations.
- OEMs and equipment manufacturers: Often ask for private label runs and consistent product across batches.
- Utilities and district energy: Value tolerance for thermal expansion and repeatable configurations.
If you are in a specialized sector, ask the factory for references in that sector. A supplier who has shipped many similar projects will likely anticipate your needs better.
Why deliveries slip during peak seasons (and how to avoid it)
Construction peaks, weather windows, and large public projects can create predictable cycles of demand. Suppliers face several pressure points:
- Raw material availability: coil steel, fasteners, and chemicals for coatings can be constrained.
- Factory capacity: Tooling and machine hours are finite. Sudden demand spikes lead to rescheduling.
- Transport constraints: Port congestion or truck shortages add further delay.
- Labor shortages: Staffing peaks may force overtime or temporary hires, which can affect quality.
How buyers reduce risk:
- Share forecasted demand early and update it regularly.
- Schedule staged deliveries aligned with installation phases.
- Agree on alternative materials or finishes if primary supplies are constrained.
- Lock in tooling and production windows for custom runs.
Early planning is simple but effective. It smooths the peaks and keeps your site moving.
Practical ways to evaluate manufacturing consistency
You don't need a lab to get a sense of whether a factory controls production. These practical checks are effective.
Ask for production photos and videos
Request recent photos or a short video showing forming, welding, plating, and packing. A tidy, organized factory floor with visible QA checkpoints is a good sign.
Request test data and batch records
For critical jobs, ask for coating thickness measurements, adhesion tests, salt spray results, and bolt torque checks. Compare numbers across sample batches to see variability.
Get samples from separate runs
Ask for samples from different dates. If they vary visibly (color, finish, lining adhesion), the factory may have process drift.
Inspect how the factory handles tooling and dies
Tooling wear affects part dimensions. Ask about die maintenance schedules and replacement policies.
Audit traceability
Does the factory link each pallet to a batch number and raw material certificate? That documentation makes root-cause analysis practical if problems arise.
Factory transparency and willingness to share process evidence are strong reliability indicators.
Packaging, delivery sequencing and on-site handling
Good packaging isn't glamorous, but it is crucial. Damaged finishes, bent clamps or moisture-exposed lining material all cause rework.
Packaging best practices
- Separators or protective film between coated clamps to prevent abrasion.
- Moisture-proof packaging for lined or coated parts that will be stored outdoors.
- Clear labeling with size, installation zone and batch number.
- Pre-assembled kits with matching bolts, washers and spacers to reduce sorting.
Delivery sequencing
Staged deliveries aligned to installation zones or floors simplify storage and reduce double handling. For tight urban sites, small, frequent deliveries are better than a single large truck that blocks access.
On-site staging
Plan protected storage areas. Even coated clamps should not sit in prolonged rain or direct sunlight if liners can degrade.
Packaging and delivery planning save crews hours of manual handling — and save you money.
How to manage custom requests without adding chaos
Customization is normal: a project may require special saddles, integrated spacer blocks, or particular lining geometry. Manage it with structure.
- Engineering change control: A written sign-off on drawings, materials, quantities, and delivery dates reduces surprises.
- Pre-production validation runs: A small prototype batch confirms that tooling and adhesives work as expected.
- Tooling and MOQ clarity: Tooling costs and minimum quantities should be transparent from the start.
- Validation testing: Ask for tests that reflect field conditions (temperature cycles, chemical exposure).
Custom work thrives when expectations are documented and sample approval is mandatory.
Practical buyer's checklist (use this before ordering)
Here's a compact checklist to use with any factory quote:
- Do I have full technical drawings and material specs?
- Can the factory provide pre-production samples?
- Are material certificates and test reports available?
- How will products be packed and labeled? (Ask for photos.)
- What is the production schedule and staged delivery plan?
- How does the factory perform in-process quality checks?
- What is the traceability approach (batch numbers, raw material codes)?
- What are lead times and contingency plans for delays?
- Are warranty and defect processes documented?
- Can the factory provide references for similar projects?
Use this list during supplier evaluation. It reduces procurement risk and sets clear expectations.
Practical answers for common buyer questions
How many samples should I request?
Ask for at least three samples from different runs if possible. One sample from tooling, one mid-run, and one near the end of a small validation batch gives visibility into consistency.
What is a reasonable lead time?
For standard clamps, 3–6 weeks is common, depending on order size and a factory's backlog. Custom tooling or special treatments add time. Always get written timelines.
Should I visit the factory?
If the order is large or the application critical, a visit helps. If travel is not feasible, request a live video tour and recent batch records.
Can I reduce cost by compromising on coating?
Only if the environment allows it. Underestimating corrosive exposure leads to early failures. Match coating and materials to conditions rather than simply reducing cost.
Building a long-term supplier relationship
A one-off transaction is different from a multi-project partnership. For repeat buys, invest in the relationship.
- Share rolling forecasts so the factory can plan materials and capacity.
- Hold quarterly reviews to discuss quality trends and continuous improvement.
- Exchange installer feedback to refine product details that save time on site.
A factory that knows your projects becomes proactive, recommending small design changes that save cumulative hours during installation.
Choose for predictability, not just price
In the end, wholesale pipe clamps are a lesson in systems thinking. A cheaper unit price might cost you days on a job. A reliable partner gives you consistent parts, transparent processes, and predictable deliveries. The small upfront time you spend vetting suppliers — samples, certificates, photos, and a short packaging plan — pays off when bolts go in and systems hold without drama.
-
What Matters Most When Choosing a Pipe Clamp Factory
Feb 06, 2026
How to Choose a Pipe Clamp Factory: Practical Guidance for Buyers and Project Teams
A pipe clamp is, at first glance, a small thing. A strip of metal, a bolt, maybe a lining. But in practice, the right clamp — or the wrong one — can make the difference between a smooth installation and a string of on-site headaches. For builders, mechanical contractors and procurement managers, clamps are part of a larger choreography: they must arrive on time, match the piping, resist their environment, and be straightforward to install. Choose the right factory and the clamps disappear into the job as reliable, no-fuss details. Choose poorly and they become daily problems.
Why the choice of factory matters more than the part price
People often focus on per-piece cost. That's natural. But a 10-cent saving on a clamp is rarely worth the hours the crew will spend sorting, reworking, or chasing replacements when a batch is off-spec. Consider a mid-rise project needing 3,000 clamps. If 5% are damaged, incorrectly sized, or have paint flaws, you're looking at dozens of site stops, extra lifts, potential scaffold time and, worst, delays in testing and commissioning.
A robust factory reduces those risks by controlling inputs, stabilizing production processes and documenting batches — so if a problem occurs, you can trace it and fix it quickly. In short, good factories prevent problems; average factories react to them.
Matching factory capabilities to project needs
Not all piping is the same. The demands on a clamp for a chilled water riser in a hospital differ from those on a clamp for a storm drainage run outdoors. Successful factories recognize these differences and design production workflows around them.
Typical project profiles and what to look for
- Hospital or pharmaceutical buildings: Surface finish, traceability and cleanliness matter. Ask whether the factory can supply material certificates and if they handle final cleaning before packing.
- Marine or coastal structures: Corrosion resistance and crevice corrosion control are essential. Request salt-spray test data and ask about specific stainless steel grades used.
- District heating / power plants: Clamps must tolerate thermal cycles and load shifts. A factory's experience with high-temperature linings, movement accommodations, and spacers becomes vital.
- Residential plumbing: Cost-effective materials, efficient packaging and quick deliveries are often the priority.
- Food processing or cleanroom environments: Sanitary finishes, smooth welds and approved coatings are the focus. Certification of materials and processes can be contractual requirements.
Each scenario has its own "deal breakers." For the hospital job, a clamp with a rough underside or a poorly adhered lining is unacceptable. For a coastal plant, a clamp with the wrong stainless grade corrodes within months. The factory you select must demonstrate that it understands your operating environment.
How factories adjust materials and processes
A capable factory typically keeps a "toolbox" of materials and processes: several steel grades, different coating chemistries, lining options (EPDM, nitrile, PTFE), and die sets for multiple sizes. More importantly, they segment production runs to avoid cross-contamination — for example, running a batch of stainless clamps separately from galvanized ones, with cleaning between runs.
If your project is sensitive, ask how the factory handles material segregation and whether they maintain separate storage for each material type. A confident supplier will explain their batch rules without needing to be asked twice.
What "stable supply" actually means
When buyers speak of "supply stability," they often mean "will I get my order on time?" That's part of it. But there's more: stability includes predictable quality, consistent packaging, and communication about changes. A single late truck is an annoyance. A late truck that's also full of mixed or damaged products is a project risk.
Concrete practices that create reliability
- Inventory buffering: Good factories keep safety stock of common raw materials — bolts, washers, standard coil sizes. That buffer helps when suppliers have hiccups.
- Scheduled batch runs: For long-term contracts, factories schedule runs ahead of time, securing material and tooling. This reduces last-minute set-ups that introduce variation.
- Supplier diversity: Factories that rely on a single raw-material source are vulnerable. Ask whether critical items (coatings, specific fasteners) have alternative suppliers.
Digital visibility: Increasingly, mature suppliers offer production dashboards or simple progress reports for purchase orders. Being able to see that an order is "in forming" or "in plating" helps plan deliveries and on-site staging.
Buyer example: staged delivery for phased construction
Imagine a developer building three apartment blocks. The mechanical trades need clamps on staggered dates. A factory that can commit to staged delivery — delivering just-in-time for each block — reduces onsite storage headaches and the risk of damage from exposure. Ask the factory whether they handle staged runs, and whether they can provide a delivery schedule by pallet or by floor.
Factory behaviors that speed up onsite installation
A clamp that's designed and delivered in a way that matches the installer's workflow can save hours. That's not abstract. Hand-sorting thousands of parts onto benches, chasing for bolts, and finding incorrectly labeled sizes all add up.
Design and packaging practices that matter
- Pre-assembled kits: Clamps delivered with matched bolts, washers, and spacers in a labeled kit eliminate time spent matching parts on site.
- Size-coded labeling: Clear labels with size, location code (e.g., "Block A — Level 2 — Riser 3"), and batch number reduce sorting.
- Installation-friendly features: Slight design touches — a chamfer on bolt holes, a defined torque range, or a softer lining edge — can make installation faster and safer.
- Sequence packaging: For long pipeline runs, some factories pack clamps in installation order, reducing travel time across the site.
Installer feedback loop
Some manufacturers actively gather feedback from the installers who use their products. That feedback can reveal recurring friction — maybe the bolt head gets stuck in certain access spaces, or a liner tends to bunch. Factories that take this feedback and adapt designs show they are thinking beyond production and more about finished job efficiency.
Quality control is the practical front line
Quality control should be integrated into the production flow, not left as an afterthought at the end. The smarter factories implement checks at every stage.
Practical QC checkpoints
- Incoming material inspection: Verify steel grade, coating batch, bolt tensile strength and lining material properties before production begins.
- Mid-line checks: During forming, stamping and welding, a factory should sample and measure key dimensions to maintain tolerance.
- Coating and adhesion testing: Use standard tests like coating thickness and adhesion pulls to confirm protective layers meet spec.
- Final inspection and packing audit: Random sample torque tests, liner adhesion checks and packaging inspections help catch issues before shipment.
Traceability: why it helps
Traceability — the ability to trace each delivered item back to its raw material batch and production run — turns a reactive supplier into a proactive partner. If a problem shows up in the field, traceability helps determine whether it's an isolated incident or a systemic issue, and whether a recall or partial rework is necessary.
Examples of failure modes to watch
- Flaking or blistered coating: Often the result of poor surface prep or contamination pre-coating.
- Loose or incorrect bolts: Can stem from wrong fastener batch or incorrect torque specs.
- Delaminated lining: Adhesive selection, surface cleanliness and cure process matter; failures often look like small maintenance tasks but become large when multiplied.
Ask for test reports and, if possible, witness a trial sample. A factory that is hesitant to show its test data is a red flag.
Customization: how to get what you need without creating chaos
Customization matters. Architects or plant engineers may need special clamps: wider saddles for insulation, integrated spacers for movement, or stainless grades with different finish levels. Custom work adds complexity, but handled properly it's manageable.
How a factory should handle custom runs
- Clear engineering change control: A documented process that describes how changes are requested, reviewed, priced and approved.
- Pre-production samples: Before a large run, produce a small validated batch that the buyer can test and sign off.
- Tooling and minimums: Understand tooling needs and minimum order quantities. Custom dies and tooling have costs; good factories share this upfront.
- Validation tests: For specialty clamps (e.g., HVAC with vibration isolation), include validation tests that are relevant to field conditions.
Custom doesn't have to mean expensive and slow — but it does need structure. If a factory treats every custom request as "we'll figure it out," you'll pay in delays and inconsistency.
A practical checklist to use before placing a bulk order
Here's a buyer's checklist you can use verbatim. It cuts to the essentials.
Documentation and materials
- Material certificates for steel, stainless and coatings.
- Coating datasheets (thickness, adhesion, recommended cleaning).
- Lining material certificates (if applicable).
Production and quality
- Sample test reports showing coating thickness, adhesion and salt-spray results.
- Evidence of in-process checks (photos or logging examples).
- Batch traceability method documented.
Logistics and packaging
- Packaging mock-up or photos.
- Delivery sequencing options (staged, mixed pallets, labeled kits).
- Handling instructions and recommended storage conditions.
Lead time and planning
- Clear lead times for standard items and for custom orders.
- A contingency plan if raw materials are delayed.
- Minimum order quantities and batch scheduling policy.
Support and after-sales
- Installation guides and torque values.
- Warranty terms and defect handling process.
- Reference customers in similar industries (ask for contactable references).
On-the-ground verifications
- Request a production video or virtual walk-through if you can't visit.
- Ask for recent photos of completed batches and packaging.
- Obtain samples from the same family of materials the factory will use for your order.
Using this checklist as part of the supplier selection process will save you time during procurement and reduce surprises later.
Real-world purchase scenarios and recommended approaches
Below are three typical procurement situations, each with practical steps.
Medium-volume residential project
You need several hundred clamps for a multi-unit complex. Reliability matters, but the product can be standard grade.
Actions: Ask for standard samples, confirm packaging for multiple deliveries, and secure a few weeks of safety stock. Staged delivery by block reduces onsite congestion.
Industrial plant (high temperature)
You require clamps for steam lines; higher temperatures and movement tolerance are needed.
Actions: Demand material certificates and thermal movement diagrams. Insist on pre-production validation and on-site mock-up if possible. Smaller batch validation is prudent.
Coastal desalination facility
Salt spray and high chloride exposure require special alloy choices and finishing.
Actions: Require salt-spray testing and crevice corrosion data. Review supplier's supplier chain for alloys. Plan for smaller deliveries and tighter storage controls to prevent corrosion during staging.
Logistics, packaging and on-site handling — the details that matter
A clamp that arrives bent, with scuffed paint or a wet lining, is an immediate source of rework. Packaging is a practical final mile problem.
Key packaging details
- Use separators or film barriers for coated clamps to prevent abrasion.
- Protect lining materials from moisture and UV if they will be stored before use.
- Label pallets clearly by product type, size and install zone.
Delivery sequencing and staging
- Coordinate delivery windows with the site schedule to prevent over-stacking materials outdoors.
- Consider smaller, more frequent deliveries to a tight urban site to avoid storage issues.
- Palletize by installation zone (floor, riser, bay) to speed crew pickup.
Building long-term supplier relationships
A transactional relationship is fine for small jobs, but long projects benefit from a partnership approach. Share forecasts, provide feedback promptly, and set up quarterly reviews to iron out process improvements. Even a short monthly update call can reduce surprises.
Successful long-term practices
- Provide a rolling 6–12 month forecast to the factory.
- Jointly review quality trends and corrective actions.
- Encourage factory visits or workshops if big changes are planned.
Sustainability and regulatory considerations
Sustainability is increasingly important: contractors, architects and owners ask about recycled content, VOCs in coatings, and end-of-life recyclability.
Practical sustainability questions
- Does the steel content include recycled material?
- Are coatings low-VOC when used in indoor projects?
- Does the factory recycle scrap or have waste-reduction processes?
Buyers often don't need to make sustainability the driver, but it is an increasingly relevant tie-breaker between two comparable suppliers.
Frequently asked practical questions
How many pre-production samples should I ask for?
At minimum, three samples: one from tooling run-in, one from mid-run and one from near the expected completion of the batch. That reveals batch-to-batch drift.
What lead time should I expect?
For standard clamps, 3–6 weeks is common depending on the factory's backlog and your order size. Custom runs need more lead time; ask for an explicit schedule.
Should I insist on factory visits?
If the order is large or the environment critical (pharma, food, marine), yes. If travel isn't feasible, request a live video walk-through and recent batch records.
What tolerance levels are typical?
Tolerance depends on application. For general plumbing, standard tolerances are acceptable. For precision systems (chilled water with particular insulation fits), tighter tolerances may be necessary — discuss with the factory.
Practical reliability over shiny claims
It's tempting to be wooed by flashy brochures and neat product photos. But what saves a project is consistent execution: clear communications, predictable deliveries, documented quality and thoughtful packaging. A predictable factory is worth paying a little more for, because it lowers site costs, reduces stress for the crew, and shortens the path to project completion.
Use the checklist in this article. Talk to installers and site supervisors during supplier evaluation. Ask for test reports and production photographs, and insist on pre-production samples for custom runs. These steps are not glamorous, but they are how resilient projects are built.
-
How to Choose the Right Radiator Bracket for HVAC Projects?
Feb 04, 2026
When installing radiators in residential or commercial buildings, choosing the right radiator bracket is just as important as selecting the radiator itself. A poorly designed bracket can lead to instability, installation delays, or long-term maintenance issues.
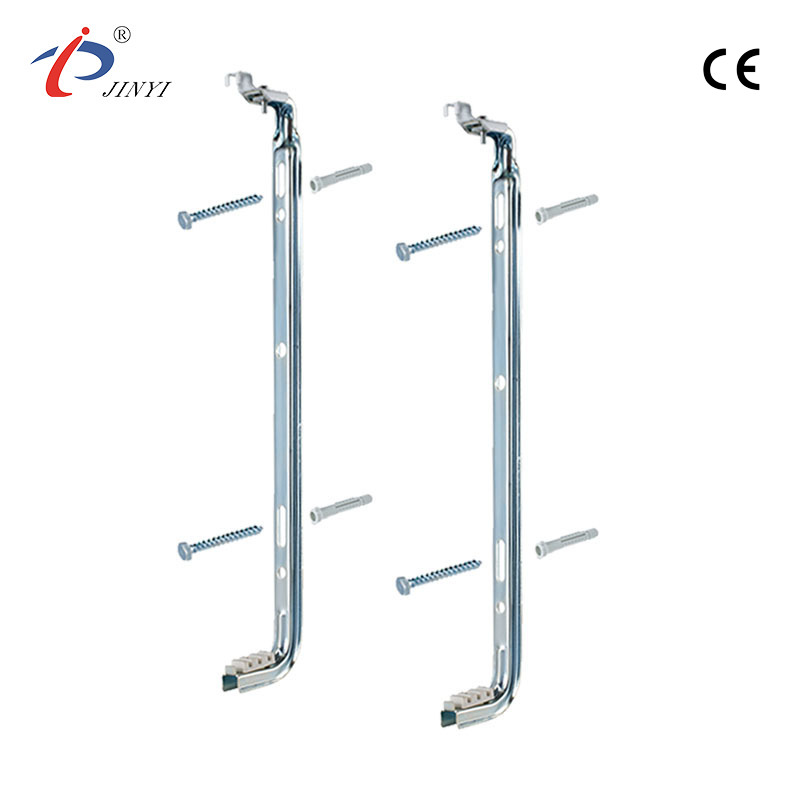
The first factor to consider is load capacity. Radiators filled with water are significantly heavier than they appear. A reliable radiator wall bracket or support bracket should be designed to handle both static weight and long-term stress. This is especially critical in apartment buildings, offices, and public facilities.
The second key point is installation method. Wall-mounted radiator brackets are commonly used in residential projects, while floor-mounted or adjustable support brackets are preferred for larger radiators or uneven walls. In some applications, radiator top clamps are used to improve stability and alignment.
Material and surface treatment also matter. In European HVAC projects, corrosion resistance is often required due to humidity and long service life expectations. Zinc-plated or powder-coated steel brackets are widely accepted, while stainless steel is used for demanding environments.
As a professional manufacturer, JINYI supplies a full range of radiator wall brackets, support brackets, and radiator top clamps for HVAC systems. With stable production, CE-compliant designs, and OEM customization based on drawings or samples, JINYI supports European customers looking for reliable and cost-effective radiator mounting solutions.
Choosing the right radiator bracket ensures safer installation, easier maintenance, and long-term performance for any heating system project. Discover more about our products and global supply solutions at https://www.yh-jinyi.com
-
Why Are Shower Tray Feet Important for Bathroom Safety
Feb 02, 2026
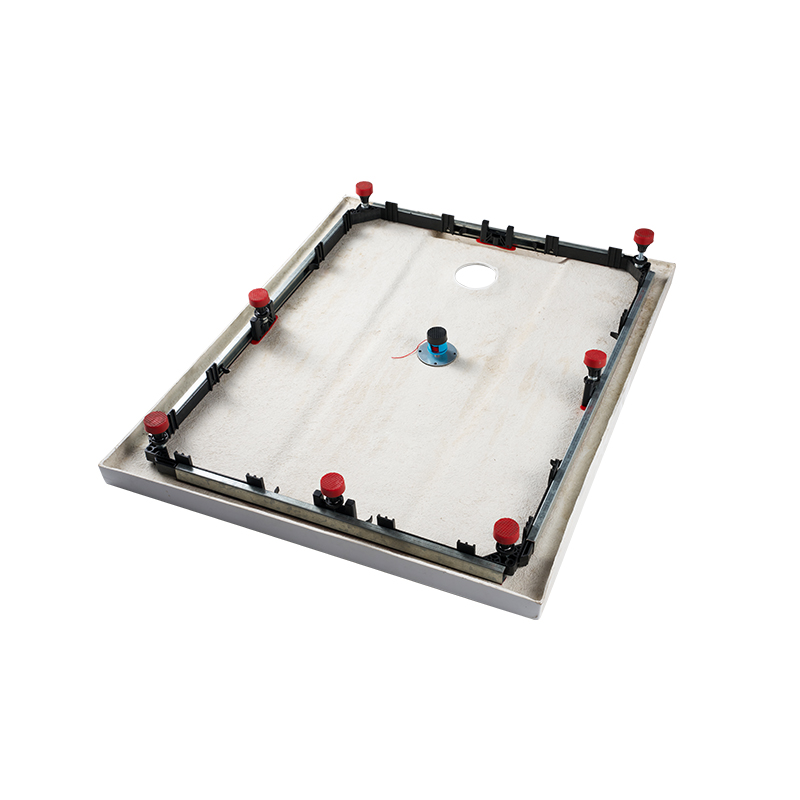
What Factors Make Shower Tray Feet Important for Stable Bathrooms
Shower Tray Feet play a quiet but essential role in bathroom installations. Often overlooked during planning and purchase, these small components affect how a shower tray sits, how evenly weight is distributed, and how well drainage performs. When chosen and installed thoughtfully, the supports beneath a tray reduce movement, protect finishes, and help prevent plumbing and tile issues that can be costly to fix later.
Why the support system under the tray matters
A shower tray is only as stable as the structure beneath it. Many modern trays are thin to keep profiles low and improve accessibility. Thin does not mean weak, but it does mean the support should carry load evenly.
When a tray sits on a solid and well-distributed set of supports, several benefits occur:
- Weight is spread across multiple points rather than centered on a few spots. That reduces flexing and material wear.
- Sealant joints around the tray are less likely to be stressed by movement, reducing the risk of leaks.
- Tiles and grout adjacent to the tray see less movement-based cracking over time.
- Drain alignment and fall remain consistent, improving drainage performance and reducing ponding.
If the support scheme is poor, problems can start slowly. Slight movement may cause grout hairline cracks, which then let moisture through. Or a tray may gradually depress in one corner, changing drainage slope and causing water to pool. Those issues are avoidable with a suitable support plan.
Types of support designs and when to use them
Not every bathroom needs the same support approach. The layout, floor construction, tray size and shape, and expected user load all matter. Below are common design types, with a practical take on when each is appropriate.
- Adjustable feet: Often threaded, with a vertical adjustment range. Useful when the subfloor is uneven or when installers need a precise level after tiling.
- Fixed feet: Simpler cast or molded feet with a set height. Common for standard installations with reliable subfloors.
- Continuous frame or base: Provides uniform support across the whole tray underside. Effective for larger trays or when floor strength is a concern.
- Pedestal blocks or panels: Sheets or blocks placed under the tray to create a solid platform. Sometimes used in retrofit scenarios.
- Anti-slip base pads: Rubber or high-friction pads applied under feet to reduce lateral movement on smooth substrates.
Each approach carries trade-offs. Adjustable feet offer flexibility during installation but can be fiddly if many legs need setting. A continuous frame is less forgiving to site irregularities but can give a very stable surface once installed correctly.
Design Type Key Benefit Best Use Cases Adjustable feet Fine leveling; compensates for uneven floors Most remodeling projects; uneven subfloors Fixed feet Simple, robust support New builds with level substrates Continuous frame Uniform support; reduces flex Large trays or heavy-traffic bathrooms Pedestal blocks Easy retrofit; solid platform Retrofit installations over uneven floors Anti-slip pads Prevents lateral slip Smooth tile or concrete floors Materials matter — practical choices and trade-offs
Material selection for the support elements affects durability and maintenance. Common materials include plastics (high-density polymers), stainless steel, galvanized steel, and composite systems. Consider these characteristics when selecting:
- Plastic / Polymer feet: Lightweight, corrosion-resistant, and often less expensive. They work well in residential interiors where mechanical loads are moderate. However, not all polymers resist long-term creep under constant load; check manufacturer specifications for load ratings and expected lifetime.
- Stainless steel components: Resist corrosion very well, especially in humid or coastal environments. The alloy grade matters — for marine or chemically exposed settings, higher-grade stainless is preferable.
- Galvanized steel: Provides a sacrificial coating that protects the steel substrate in many indoor installations. It's commonly used for metal frames and brackets where exposure is not extreme.
- Composite frames (metal + polymer): Combine rigidity with corrosion resistance. These are often used where a balance of cost and performance is required.
Rather than hoping a material will perform, look for test data. If a manufacturer publishes load ratings, creep tests, and salt spray or humidity test results, that information can help match product to environment.
Installation steps that reduce future problems
Good products help, but installation practices create long-term results. Here are practical steps to follow on site.
Assess and prepare the subfloor
Clean, level, and dry the substrate. Remove debris that could cause point loading beneath a foot. If the subfloor is soft or damaged, repair it with appropriate screeds or patches before placing supports.
Measure and mark support points
Use manufacturer guidance for foot spacing. For non-standard trays, spread support points to prevent long unsupported spans. Marking locations ahead reduces guesswork during assembly.
Install adjustable supports and level the tray
If using adjustable feet, raise the tray slightly above the final height and adjust feet to establish level. Then lower the tray gently onto supports and re-check level; small adjustments are common.
Check the drain alignment and fall
A trap or waste requires a consistent fall; the tray should maintain slope to the drain. Confirm alignment and make slight height corrections as needed.
Use anti-slip pads where recommended
On polished substrates, friction pads prevent lateral movement during use. Apply pads at each support point; they also protect finishes.
Secure and seal correctly around edges
Use compatible sealants for tray-to-floor joints, but do not rely solely on sealant for structural support. The seal should provide water-tightness while the supports provide mechanical stability.
Test after installation
Fill the tray and watch for movement or ponding. Apply walk tests to replicate actual use; if the tray flexes, re-check support distribution.
Following these steps reduces rework and ensures the installed tray behaves predictably under user loads.
Drainage considerations and why support choice can change flow
When a tray is not uniformly supported, the drainage slope can be altered. A half-millimeter deflection over a tray can change the flow path enough to leave water pooled in a corner. Pools not only look bad; they encourage bacteria growth and can lead to grout or tile discoloration.
There are two aspects to watch:
- Slope integrity: Confirm that the tray maintains manufacturer-recommended fall to the waste when supported. Continuous frames typically provide the best stability here.
- Drain alignment: If the drain pipe enters at a fixed point, adjust support heights so the tray sits correctly over the waste without compressing the connection.
When testing drainage, allow a few minutes of standing water to see whether it clears fully. If not, review support heights rather than relying entirely on sealing or tiling adjustments.
Common mistakes that lead to callbacks
Installers and buyers often encounter the same sources of trouble. Avoid these to minimize callbacks and complaints.
- Relying on sealant to hide poor support: Sealant is not a structural fix. A tray that moves will eventually break sealant or stress edge joints.
- Using mismatched supports: Combining different foot types under one tray can cause uneven settling. Choose a consistent system for a single tray.
- Ignoring subfloor condition: A soft or crumbling substrate cannot reliably hold feet; repairs are needed first.
- Underestimating live load: Consider dynamic loads—someone stepping in, leaning, or placing heavy objects—when choosing support strength and spacing.
- Poor packing and handling during delivery: If feet or frames get bent during transit, installation will be compromised. Inspect components on arrival.
Recognizing these common pitfalls allows you to plan corrective steps before tiles and finishes lock the situation in place.
Maintenance and inspection tips to extend service life
Routine checks make sense. A quick inspection after several months, or after heavy usage periods, can catch small issues early.
- Check for movement: Apply moderate pressure near edges; no significant flex should occur.
- Inspect seals: Look for cracks or gaps in adhesive lines that might indicate stress.
- Confirm drain performance: Pooling can signal solved or emerging support shifts.
- Observe corrosion or abrasion: Particularly around metal parts in wet environments, look for early signs of corrosion and address them before failure.
If an issue is found, correct support heights first. Often a simple readjustment of an adjustable foot or replacement of a worn pad fixes performance without major work.
Choosing the right product for different bathroom types
A one-size-fits-all approach rarely works. Match product features to site needs.
- Small urban bathrooms with limited access: Adjustable feet with anti-slip pads provide flexibility and protect existing finishes.
- High-use public bathrooms: Consider continuous frames for uniform support and heavier duty materials rated for high traffic.
- Wet-room conversions: Where the tray is close to floor level with integrated tiling, precise leveling with adjustable supports or a continuous mortar bed is essential.
- Retrofits over uneven floors: Pedestal blocks or a combination of leveling supports and local floor repair can work well.
When specifying supports, include the site context and any unusual loads in procurement documents so manufacturers can recommend suitable systems.
How manufacturers test and rate their support systems
Reputable suppliers perform tests and publish performance data. Practical tests include:
- Static load testing: Apply steady loads (e.g., several hundred kilograms) to confirm no plastic deformation or unacceptable deflection.
- Fatigue cycling: Repeated loading to simulate years of stepping and movement.
- Salt spray or humidity testing: For coated metal parts, assess corrosion resistance under accelerated conditions.
- Adhesion tests for coatings: Verify that plating or coatings will remain bonded under expected use.
When a product comes with published test results, buyers can make informed comparisons. If a vendor does not publish data, ask for recent test reports or at least clear load ratings.
Packaging, delivery, and on-site checks
How a support system arrives affects installation speed and final quality.
- Protective packing: Components should be wrapped or separated to prevent scratches or bending.
- Clear labeling: Each support item should be labeled with location or code matching the installation plan.
- Spare parts: Request a small set of spare feet or pads with large orders to handle unexpected damage during installation.
- Quick arrival checks: Inspect for visible damage and verify the part count and labels match packing lists. If something is damaged, document it and notify the supplier promptly.
A small time investment at delivery avoids headaches during the critical finishing phase.
Practical selection checklist for installers and buyers
Use this brief checklist to confirm choices before committing to an installation:
- Subfloor condition assessed and addressed.
- Support type selected based on tray size, load, and access.
- Material and finish specified for the site environment.
- Drain alignment plan confirmed.
- Pilot leveling (dry run) completed with foot settings recorded.
- Sealant type chosen and compatibility checked with tray edge material.
- Packing and parts checked at delivery.
- Post-installation testing scheduled and documented.
Keeping a record of the initial foot heights and placement helps during future maintenance and in case of warranty inquiries.
Cost matters, but fixation on the lowest price rarely saves money over a project life cycle. A tray installation that avoids rework and prevents recurring maintenance cost delivers better value. Focus on systems that offer clear performance data and compatibility with the expected site conditions.
-
What to Check Before Selecting a Clamps Factory
Jan 30, 2026
How Buyers Evaluate a Clamps Factory Today: Practical Guidance for Safer Sourcing
In many building and industrial projects, the small items often cause the biggest headaches. Clamps are one of those deceptively simple parts: when they work, nobody notices; when they fail, everything from a pipe run to a support system can need rework. That's why more buyers are starting to evaluate the Clamps Factory behind the product with the same care they apply to critical suppliers. You want pieces that fit, finish that endures, delivery that's predictable — and a partner who understands what your jobsite actually needs.
Why the factory matters more than the catalog photo
A catalog picture can only tell you so much: hole spacing, outer diameter, maybe the coating. What photos don't show is how the clamp was formed,whether the factory tested that batch under relevant conditions. Those hidden details affect fit, fatigue life and even installation time.
Consider two scenarios:
- A contractor orders 2,000 pipe clamps for a multi-floor HVAC install. Half the deliveries fit perfectly; the other half need re-drilling because hole centers were off by a millimeter. Suddenly the crew spends hours reworking, the schedule slips, and the project accrues cost.
- A second contractor works with a factory that retains tooling logs and performs first-piece inspection. Samples are signed off before bulk production. The installed run flows with no rework.
Which outcome would you prefer? The practical difference is often the factory's production discipline — the systems behind the parts.
What to check first: a compact buyer's checklist
When you're shortlisting suppliers, focus on observable evidence that the factory runs methodically. Here's a compact checklist you can use during a phone briefing or a site visit:
- Can they provide material certificates (with batch or heat numbers) for the metal used?
- Do they perform first-piece inspections and retain the reports?
- Is there a clear workflow layout (raw material → forming → finishing → inspection → packing)?
- Can they show in-process sampling or acceptance test records?
- How do they manage coating or plating — do they measure thickness?
- What is their typical lead time and how do they handle peaks?
- Who is the technical contact for drawings and tolerances?
- Do they support pilot runs before full production?
Material and finish: more than "stainless" or "galv"
Material selection strongly influences long-term performance. But don't stop at a generic name. Ask for specifics — grade, heat number, test certificates. A few distinctions matter:
- Carbon steel may be fine for interior, dry applications. Expect cost advantage and good strength.
- Hot-dip galvanized finishes are typically used outdoors; they offer robust corrosion resistance when applied correctly. But coating quality varies with bath control and post-treatment.
- Electroplating gives a smoother finish but may be less sacrificial than hot-dip galvanizing in harsh soils.
- Stainless steel is chosen for corrosive or hygienic environments; which adds molybdenum for better resistance in marine or chemical settings.
A practical tip: for repeated orders, ask your factory to keep a slice of material as a retained sample tied to the batch number. Years later you can still reference exactly which heat went into a project.
Production processes that actually change outcomes
Some production steps have outsized effects on performance. Understanding them helps you ask the right questions.
Tooling and die condition
Tooling sets the geometry. A worn die may produce consistent parts initially, but dimensions can drift. Ask whether the factory records tooling life, performs regrind cycles, and stores tooling data.
Welding and joining practices
If a clamp includes welded joints, verify whether welding follows qualified procedures and whether welders are certified for that process. For critical applications, request non-destructive test options.
Forming and bending controls
Controlled bending avoids stress concentrations. Good shops use fixtures and jigs to repeat radii and avoid sharp bends that can create fatigue points.
Surface preparation before coating
Cleaning before coating matters. A factory that masks holes, verifies adhesion and measures coating thickness is likely to produce better corrosion performance in the field.
A small table that helps compare material and finishing options
Below is a concise comparison table you can use in buyer discussions. It highlights common choice tradeoffs and practical uses.
Material / Finish Typical Use Cases Service Traits Buyer Questions to Ask Carbon steel (plain) Indoor, dry, light structural Economical, strong but needs protection What corrosion protection is planned? Hot-dip galvanizing Outdoor, buried, external piping Thick sacrificial layer, robust in soil Provide coating thickness and bath records? Electroplated zinc Indoor/outdoor lighter exposure Smooth finish, thinner sacrificial layer Adhesion tests and salt spray data? Stainless steel 304 Food, indoor, moderate outdoor Corrosion resistance, easy cleaning Grade certs and traceability? Stainless steel 316 Marine, chemical, harsh environments Better chloride resistance Heat numbers and alloy certs? You can paste this table directly into an evaluation memo to score options side-by-side.
Why staged inspection beats final inspection only
Final inspection is necessary but not sufficient. Problems that slip into the assembly area may be expensive to correct. Better factories stage inspections:
- Incoming material check — verify grade and dimensions.
- First-piece verification — after setting up the die or tool, confirm the first parts match drawing critical dimensions.
- In-process sampling — periodically check dimensions and coatings during the run.
- Final random inspections — before packing, verify a random sample for major traits.
- Retention of samples — keep one or more sample pieces from each batch for future comparison.
Implementing these checkpoints reduces surprises. When you're onsite, ask to see first-piece reports and recent in-process logs.
Communication and documentation: the invisible quality control
A factory's documentation habits tell you as much about reliability as machinery. Good documentation shows discipline and reduces finger-pointing later.
- Drawing revision control — ensure the factory uses versioned drawings.
- Order confirmation — it should list exact specs, coatings, and acceptance criteria.
- Sample sign-off form — this protects both buyer and factory by documenting agreed acceptance.
- Inspection checklists — the factory should be able to show the checks for a sample job.
- Shipment records — traceable packing lists tied to batch numbers.
Transparent paperwork speeds dispute resolution and keeps projects on schedule.
Small pilot runs: how to do them right
A pilot run is not a "small order"; it's a controlled test. Use it to validate assumptions rather than just to receive product.
Pilot structure suggestion:
- Ask for a run that matches your production method (same forming tools, same coating, same packing).
- Require a small field trial: install 50–100 items in a real application and check fit and surface behavior over a few weeks.
- Collect install feedback: did installers need to rework parts? Was fit consistent? Any unexpected burrs or sharp edges?
- Review packing and labelling during the pilot: did parts arrive protected and correctly marked?
After a successful pilot, move to staged deliveries for the main order rather than one huge dispatch.
Practical field examples and what they teach
Real projects show how small choices ripple into major impacts. Here are three condensed examples drawn from common field experience.
Mismatched finish
A multi-storey residential job used clamps specified as "galvanized." The supplier changed the plating process mid-run due to cost, creating color and thickness differences. Installers rejected parts, delaying the schedule. Lesson: require coating thickness records and batch traceability.
Better with standardization
A hospital project worked with a factory that standardized clamps into modular kits with matching bolts and washers. Onsite assembly time dropped and inventory control simplified. Lesson: ask vendors about kit packaging and assembly compatibility.
These practical stories emphasize that the small stuff is often the most costly if it goes wrong.
Negotiating terms that protect both sides
A fair contract keeps the relationship productive. Here are practical clauses to include:
Sample approval clause: production starts only after buyer signs off samples.
- Acceptance criteria: define dimensional tolerances, coating thickness, packaging method.
- Rework/replacement terms: who pays for rejected batches and return shipping?
- Lead time and ramp clause: specify production slots and contingencies for peak demand.
- Batch traceability: require retention of material certificates and sample pieces for each shipment.
Clarity here prevents disputes and keeps the project moving when schedules are tight.
Logistics, packaging, and delivery: details that save time
Factory-to-site delivery is more than freight cost. Small decisions in packaging and labelling can save hours on site.
- Bundle by run or zone: if you're installing in phases, ask the factory to pack parts by zone and label clearly.
- Protective packing: prevent coating abrasion with separators and soft packing material.
- Consistent labelling: barcodes or clear part numbers reduce receiving time and misplacement.
- Palletization for efficiency: pallets that match your site handling equipment speed unloading.
When you plan logistics with the factory, you reduce handling time and minimize damage in transit.
Building a long-term relationship: what to expect
If you plan multiple projects or long maintenance cycles, a steady supplier relationship pays off. Over time a factory learns your preferences, tooling needs, and packaging style. That reduces setup time and improves predictability.
Practical steps to build the relationship:
- Run small pilot orders across initial projects.
- Keep a re-order schedule and communicate forecasted volumes.
- Offer feedback after installation to help the factory refine processes.
- Consider annual or semi-annual QA reviews to align standards.
A good supplier partnership behaves like a trained subcontractor — familiar, predictable, and easy to work with.
Quick action checklist for a procurement meeting
Use this checklist when you have a short window to evaluate a new supplier.
- Request material certificates from the last three batches.
- Ask for a first-piece report and an in-process sampling log.
- Request a 10-minute video showing the die setup and forming operation.
- Confirm coating method and ask for thickness data (µm).
- Agree on sample sign-off and pilot run terms.
- Clarify rework and replacement terms in writing.
- Ask about peak capacity handling and lead time under high demand.
This gives you a realistic snapshot without a full factory audit.
Emerging trends to watch
- Digital traceability: dashboards tied to production status and inspection logs will become more common. Ask whether suppliers offer production status updates.
- Sustainability: some buyers will expect information about material sourcing and waste management. It's increasingly relevant for public tenders.
- Modular kits: pre-kitted clamp assemblies reduce onsite handling and errors. Consider whether a factory can deliver kit options.
These trends don't change fundamentals but influence what "good" looks like in sourcing.
Small parts, big impact
Clamps are small, but they hold systems together — literally. Choosing the right Clamps Factory influences installation speed, system reliability, and long-term maintenance. Focus your evaluation on the production systems behind the parts: material control, tooling discipline, staged inspection, and clear documentation. Combine a practical pilot with a clear contract and packaging plan, and you'll reduce field rework and improve schedule performance.
-
Cold Corridor Support Brackets for HVAC Systems
Jan 28, 2026
In HVAC installations, cold corridor or cold zone areas require reliable support solutions for pipes, radiators, and related components. Cold corridor support brackets are designed to provide structural stability while accommodating temperature changes and long-term operation.
Unlike standard mounting hardware, HVAC cold corridor support brackets must offer higher strength and precise positioning. Improper support may lead to misalignment, noise, or stress on connected systems.
JINYI manufactures cold corridor support brackets and related HVAC installation hardware for commercial and industrial projects. These brackets are designed to support heating and piping systems in demanding environments, with options for different mounting methods and load requirements.
By supplying standardized models as well as customized solutions, JINYI supports HVAC contractors, system integrators, and equipment manufacturers seeking reliable support hardware. Well-designed cold corridor support brackets contribute to safer installations and more durable HVAC systems.Discover more about our products and global supply solutions at https://www.yh-jinyi.com
-
Why Do Radiator Mounting Brackets Matter in Equipment Design
Jan 26, 2026
Radiator Mounting Bracket plays a quiet but essential role in keeping equipment running day after day. People rarely notice it—until something goes wrong. At that moment the bracket is suddenly very visible: bent, corroded, loose, or otherwise failing. The good news is one of these headaches are avoidable if buyers and engineers pay a little attention at the design and procurement stage.
Vibration is the usual culprit behind many late-life problems. Even modest vibration, repeated thousands of times, will fatigue joints, wear fasteners, and loosen hoses. A bracket that is too rigid and bolted directly to a vibrating frame will transfer stress. A bracket that is too flexible will let components move out of alignment. The practical solutions balance stiffness with local damping—simple rubber isolators or engineered bushings can absorb energy and greatly extend component life. Have you ever compared two machines side by side and wondered why one seems quieter? Often the mounting strategy makes the difference.
Fit and alignment matter more than many expect. A radiator mounted a few millimeters off-center may cause the fan and cowling to rub, or force hoses into sharp bends that shorten their lifespan. Small misalignment also impairs airflow, which can raise operating temperature by a few degrees—enough to accelerate wear or trigger protective shutoffs. For repeatable production and reliable field service, favor mounting designs that include slotted holes or adjustable interfaces: they let technicians fine-tune position quickly during assembly or maintenance.
Think about the environment. Corrosion, salt spray, chemical splash, and constant moisture all shorten the life of ordinary steel. In coastal installations or outdoor equipment, corrosion-resistant materials or protective coatings pay off. Stainless steel brackets, zinc-plated steel with appropriate passivation, or polymer-coated alternatives each have tradeoffs in strength, cost, and longevity. The right choice depends on whether weight savings, cost, or corrosion resistance is the priority. Don't let material choice be an afterthought—describe the site conditions clearly to your supplier.
Maintenance access is another practical point often missed in early design. A bracket that tucks the radiator tightly into the frame may look neat, but it can complicate oil changes, hose inspections, and fan servicing. If technicians need to spend extra time disassembling surrounding components just to reach a few bolts, maintenance intervals will stretch out or be skipped—both bad outcomes. Design for the workers who service the equipment: removable panels, quick-release fasteners, and service clearances mean faster, safer field work and fewer chances for small issues to grow into big ones.
Customization makes sense when off-the-shelf parts won't fit. Retrofitting newer radiators into older frames, tight engine bays, or bespoke mobile platforms often demands tailored brackets. Custom brackets can incorporate integrated vibration mounts, added reinforcement where loads concentrate, or special flanges for nonstandard bolt patterns. Work with a supplier who asks detailed questions about your application: load cases, expected vibration spectra, and service routines. A short design dialogue upfront can avoid costly rework later.
Material selection also affects thermal behavior. Radiators need to dissipate heat without introducing thermal stresses to the support structure. Bolted steel supports that expand at one rate while the radiator body expands at another can create stress concentrations. In high-temperature cycles, consider combinations of materials or flexible joints that accommodate differential expansion. Simple design touches—like locating bolt holes to allow slight movement—prevent fatigue cracking over thousands of thermal cycles.
When should you replace a mounting bracket? Visible deformation, creeping fasteners, cracking around holes, or worsening vibration and noise are clear signs. But don't wait for visible failure. If inspection reveals progressive looseness, paint flaking near joints, or minor cracks appearing at weld toes, schedule replacement during the next service window. Proactive replacement during regular maintenance keeps unscheduled downtime at bay and protects connected parts like hoses and sensors.
Installation technique matters nearly as much as the design itself. Proper torque values, correct use of washers and lock-nuts, and attention to corrosion protection at fastener interfaces all extend bracket life. During installation, use a calibrated torque wrench and follow a cross-pattern tightening sequence where appropriate. Avoid over-tightening: it can distort the bracket or strip threads. A short checklist for installers—torque specs, alignment tolerances, and inspection points—reduces human error on the shop floor and in the field.
For production lines, consider repeatability. Brackets that allow a technician to position a radiator quickly and consistently help reduce cycle time and lower rework. Locating features, simple jigging, or captive fasteners streamline assembly and reduce the chance of misinstallation. When you scale from prototype to production, those small minutes saved per unit add up to meaningful throughput gains.
Noise and operator comfort are important in many applications. Unwanted rattles and buzzing distract operators and can mask other warning sounds. A thoughtful mounting approach that isolates vibration not only improves equipment longevity but also enhances user experience. In installations where noise limits are enforced—urban equipment, indoor facilities, or hospitality settings—planning vibration reduction into the mounting design avoids costly retrofits later.
Supply chain reliability also deserves attention. For large projects or replacement programs, you need a source that can deliver consistent parts with predictable times. Choose suppliers who provide clear documentation—material certificates, dimensional drawings, and batch traceability—so you can audit and replicate installations across fleets. Standardized part numbers and packaging help procurement teams manage inventory and reduce confusion during high-pressure maintenance windows.
A few practical tips to help buyers choose the right bracket:
- Share full context with suppliers: not just radiator dimensions, but expected loads, vibration conditions, exposure to chemicals or salt, service access needs, and projected service life.
- Prioritize brackets with adjustable or slotted mounting features for fine tuning during assembly.
- Insist on corrosion protection appropriate to the environment—this often saves more over a product lifetime than small initial savings on raw materials.
- Verify that the supplier supports testing or provides references from similar applications. Real-world feedback is invaluable.
- Include maintenance considerations in the design spec so field teams can perform routine checks without dismantling adjacent systems.
Use cases show how varied requirements can be. In construction equipment, brackets often need extra reinforcement and vibration damping because machines work on rough terrain. In data center chillers, the emphasis is on precise alignment and quiet operation, while in marine applications corrosion resistance and secure fastenings take precedence. A single bracket type seldom suits all these needs, which is precisely why good vendor collaboration matters.
Remember that radiator mounting brackets are small components that can have outsized consequences. A failure that seems minor—like a loose bolt—can cause cascading problems: hose chafing, coolant leaks, fan damage, and ultimately more extended downtime. Investing a little effort up front to choose a well-designed, well-installed bracket repays itself many times during service life.
-
Why Do Shower Tray Feet Matter for Bathroom Stability
Jan 23, 2026
How Shower Tray Feet Make Installations Last: A Practical, On-the-Ground Guide
If you've ever stepped into a shower and felt a hollow thunk underfoot, or seen a tray crack months after installation, you know the finish can hide real problems. The visible parts — tiles, tray, glass — get all the attention. But the bits underneath, especially support feet, decide whether a job stays trouble-free. Choose the right system, install it carefully, and the whole bathroom behaves itself for years. Get this wrong and you'll be back on site sooner than you want.
What shower tray feet actually do (more than you might think)
At a basic level, shower tray feet support the tray. Seems obvious. But support involves a few distinct jobs:
- Leveling — compensating for an uneven floor so the tray sits true with the proper fall to the drain.
- Load distribution — spreading weight so the tray doesn't flex or stress at isolated points.
- Vibration control — reducing movement that leads to creaks, seal fatigue, and loosening joints.
- Corrosion resistance — standing up to moisture, cleaning agents, and humidity over time.
- Serviceability — being accessible and predictable if the tray ever needs adjustment or removal.
Put a tray directly onto an irregular floor and you create stress points. Over time those stress points produce hairline cracks or seal failures. Adjustable feet let you dial the tray into a stable, evenly supported position without rebuilding the entire subfloor.
Common subfloor realities installers face
Understanding the subfloor you're working with changes how you pick support components. Here are typical situations and why they matter:
- Old buildings — joists, uneven screeds, settling. Expect variations and small dips that need corrective adjustment at each support point.
- New builds — even concrete slabs aren't perfectly level after screeding or curing. There may be areas higher or lower than expected.
Retrofits and refurbishments — tile heights, underfloor heating, or layers of existing material can create limited clearances. You need low-profile feet or a system that works with the build-up.
Lightweight subfloors — timber or OSB sheets can flex more under point loads; you need more support points or larger load-bearing pads.
The realistic answer is rarely "rip it out and pour new concrete." Labour and programme constraints make adjustable supports the practical fix on many projects.
Materials and design: what to pick for durability
Feet are made in different materials and configurations. Pick according to use and environment.
Common materials
Engineered plastics / reinforced polymers
- Pros: corrosion resistant, light, cost-effective.
- Cons: some grades compress under load over many years — choose high-grade engineering plastics.
Stainless steel
- Pros: strong, durable, high load capacity.
- Cons: must be properly finished (passivation/coating) to resist long-term corrosion in wet rooms.
Hybrid/composite (metal core with plastic outer)
- Pros: good compromise — metal strength, plastic corrosion protection.
- Cons: slightly higher cost, but often the best balance.
Design considerations
Adjustment range — how many millimetres of height you can correct. Small jobs need modest range; poor floors need more.
Footpad size — larger pads spread load, reduce local compression, and work better on thin subfloors.
Anti-rotation / locking mechanism — once adjusted, feet should lock solidly so they don't drift under load.
Access for tools — installer-friendly designs cut time and risk (you don't want to wrestle with awkward keys in tight spaces).
Compatibility with adhesives/bed systems — some trays are bonded; others sit on feet only; check the tray spec.
Pre-install checks: what to do before the tray arrives
Good installation starts with measurement.
- Measure floor flatness: a simple straightedge across several axes tells you a lot. Mark high and low spots.
- Check clearances: underfloor heating, pipework, or structural beams may limit adjustment depth.
Confirm drain and waste location: ensure the support layout doesn't obstruct the trap or waste assembly.
Plan access: can you adjust feet after tiling? If not, set them precisely before finishing.
Getting these checks right avoids improvisation when the tray shows up and the client is waiting.
Hands-on installation sequence (step-by-step)
Follow a checklist, not guesswork. Below is an installer's sequence that tends to work on most jobs.
Dry fit the tray on the floor to see how it sits. Don't apply adhesive yet.
Sketch support locations based on tray ribs and drain position. Mark them on the floor.
Set initial foot heights — approximate so the tray can be placed and nudged into position.
Place the tray carefully onto the feet. Use shims if needed for temporary support.
Adjust feet methodically:
- Start at one corner, then the opposite, then centre points.
- Tighten gradually to bring the tray level; don't crank one foot down and leave others high.
- Check level and fall: measure the fall to the waste. There should be a continuous drop where specified (typically a small gradient).
Apply final fixings (if the system requires mechanical fixing) or proceed with adhesive bed as per tray manufacturer.
Test: apply weight across various points on the tray (step tests) and re-check level/fall and any movement.
Seal around the waste and edges as required but avoid over-constraining the tray movement — some systems need slight movement to relieve stress, others need full bonding; follow the tray guidance.
Common installation mistake: tightening feet before the tray is properly aligned. This locks in an out-of-level support and often causes problems.
Avoid these rookie mistakes
These errors repeat across many sites. Avoid them:
- Using too few support points for a large tray — leads to sagging.
- Relying on adhesive alone on uneven floors — adhesive can bridge gaps short term but will fail under movement.
- Over-torquing metal feet without locking features — parts can strip or create concentrated stress.
- Not allowing for thermal movement — bathroom temperatures vary; rigidly fixed systems can cause cracking.
- Ignoring manufacturer instructions — tray manufacturers often specify support patterns and bonding methods. Follow them.
Drainage and fall: getting the water moving
A good support system helps maintain the small fall needed for effective drainage. If the tray is slightly out of plane or flexes, water can sit and create hygiene and leak risks.
- Target fall: often between 1–3 degrees depending on product spec.
- Uniformity: avoid local high spots near the drain that trap water.
- Drain compatibility: ensure the foot layout doesn't obstruct trap seals or access for cleaning.
If you must route around existing drainage, plan the support layout first. Never sacrifice fall for convenience.
Maintenance, inspection and long-term checks
A well-installed tray will need little intervention. Still, a periodic check is sensible:
- Seasonal visual check: step on the tray in several places — listen for creaks or movement.
- Inspect seals around the waste annually. Early signs of movement show up here first.
- Check fixings if accessible: any loosening can be tightened before stress accumulates.
- Watch for corrosion on older metal feet and replace if required.
In high use or rental properties, incorporate these checks into routine maintenance schedules.
Special situations and solutions
Timber floors or suspended decks
Use larger footpads and more support points. Timber flexes; spread the load. Consider tying the supports into joists where feasible.
Underfloor heating
Keep electrical components clear. Some adhesive beds may not be suitable; follow both tray and heating manufacturer instructions. Avoid over-insulation under feet — you need solid contact.
Wet rooms and flush installations
These require robust waterproofing and often closer support spacing. The waterproof membrane and support system must be compatible.
Retrofit over tiles
If you're fitting a new tray over old tiling, assess tile adhesion first. Floating tiles can move and undermine support; sometimes a localized screed or spot re-bedding reduces risk.
Product selection checklist (quick practical list)
When choosing a set of feet, ask these questions:
- Does the adjustment range match the unevenness you measured?
- Are the pads large enough for your subfloor type?
- Is the material suited to the environment (stainless vs polymer)?
- Is there a clear locking mechanism to prevent creep?
- Do the manufacturer's tray specs confirm this layout?
- Is there support documentation for installers?
- What is the expected lifespan or warranty of the system?
Buying cheap can cost more in remedial visits. Small investment in the right components often saves time and reputation.
Case studies from the field (real patterns, no names)
Here are three short, anonymised examples that illustrate how feet choice matters.
Case A — 12 unit apartment block
Problem: Several trays developed slow leaks at the third year mark.
Cause: Installer used adhesive-only method on slightly uneven screed. Over time, micro-movements opened grout joints at the waste.
Fix: Retro-fit adjustable feet and re-seat trays with manufacturer-specified bonding. Result: leak incidents dropped to none in following 3 years.
Case B — Hotel refurbishment
Problem: Guests complained of hollow or creaky sensation underfoot in a cluster of rooms.
Cause: Installer used too few support points on long, narrow trays.
Fix: Added intermediate supports matching tray ribs; re-leveled trays. Result: clients noticed the improved feel immediately; maintenance calls dropped.
Case C — Old building conversion
Problem: Tile cracking around showers in bathrooms over timber floors.
Cause: Point loads from existing small feet caused localized stress.
Fix: Swapped to larger pad composite feet and tied supports to joists. Result: cracking stopped and inspections showed reduced movement.
These examples are common and useful when planning projects: think ahead or budget for retrofit support.
Installer habits that save time (and headaches)
A few habits can make quality consistent across teams:
Two-person dry fitting: one holds, one adjusts; saves damage and speeds up levelling.
Label adjustments: mark final heights on a plan — makes rework faster.
Keep a reference tool: a short spirit level and feeler gauge for quick checks.
Document as you go: photo the layout before final bedding — handy if client complains later.
Use shims sparingly: they're fine for temporary alignment, but don't be tempted to rely on them as a permanent fix.
Good habits make margin for error smaller.
What installers should tell clients (setting expectations)
Clients don't usually care about feet — until something goes wrong. A quick, clear explanation before handover avoids trouble:
Explain that the tray sits on adjustable supports to compensate for floor irregularities.
Point out the maintenance check schedule (annual visual).
Note what the warranty covers and what it doesn't (movement from misuse vs manufacturing fault).
If you had to use more remediation than planned (e.g., additional supports), mention it in the handover notes.
Clear communication reduces call-backs.
Final checklist before you walk away from the job
Before you close up the bathroom, run this quick checklist:
- Tray is level and has the correct fall to the waste.
- No point loads or visible gaps beneath the tray.
- All adjustment points are locked and, if required, sealed to prevent moisture ingress.
- Waste assembly is accessible or removable without tearing out the tray.
- Client has been shown where to inspect and sign-off.
You photographed the final setup.
If all that's green, you've done the practical bit right.
Supporting a shower tray properly is not glamorous. Nobody posts about feet on social media. But these components guard against the kinds of failures that lead to repeat visits, bad reviews, and wasted time. Treat support design as part of the finish. Get the layout right. Choose materials with the job in mind. Adjust carefully. And document so everyone knows what was done.
Do that and the finished bathroom won't just look good — it will work quietly and reliably for a long time.
-
Why Choose a Shower Tray Frame Instead of Cement Installation?
Jan 21, 2026
When it comes to installing a shower tray, many homeowners and contractors still rely on traditional cement installation. However, more and more professionals are switching to shower tray frames — a smarter, cleaner, and more adjustable solution for modern bathrooms.
What Is a Shower Tray Frame?
A shower tray frame (also called a shower base support frame) is a modular metal structure designed to hold and level a shower tray securely. Compared with cement or foam installations, it offers flexibility, faster installation, and long-term stability.
Why Use a Shower Tray Frame?
- Easy Installation & Adjustment
No messy cement mixing. The height-adjustable legs allow installers to achieve a perfect level in minutes — ideal for uneven floors or renovation projects.
- Maintenance & Accessibility
Frames make it easier to access the plumbing system beneath the tray for inspection or repair — something impossible once cement hardens.
- Lightweight but Strong
Made of stainless steel or galvanized steel, shower tray frames provide solid support while remaining lightweight and corrosion-resistant.
- Clean, Modern & Eco-Friendly
No dust, no waste, and fully recyclable materials — meeting modern environmental standards for sustainable construction.
About JINYI – Your Reliable Shower Tray Frame Manufacturer
Yuhuan Jinyi Hardware Co., Ltd. is a professional manufacturer of shower tray frames and support systems, with over 30 years of export experience serving European markets.
Our shower tray frames are widely used with brands across the UK, Germany, and Northern Europe — compatible with popular shower tray models from leading bathroom manufacturers.
Why Choose JINYI?
- CE Certified products ensuring compliance with EU safety standards
- ISO9227 NSS tested for anti-corrosion performance、
- OEM & ODM support – customized sizes, structure, and packaging
- Flexible MOQ to support both distributors and brand owners
- 30 years of global export experience with professional logistics and documentation support
OEM / ODM Cooperation
Whether you are a shower tray manufacturer, bathroom brand, or distributor, JINYI provides one-stop OEM/ODM solutions.
From frame design and mold development to sample testing and certification, our team ensures that every project runs smoothly and efficiently.
Contact Us
Looking for a reliable shower tray frame supplier in China?
Let JINYI help you simplify installation, improve efficiency, and enhance your product competitiveness.
Visit: https://www.yh-jinyi.com
Email: [email protected]
-
Why Does a Bathtub Mounting Frame Matter
Jan 19, 2026
How Can a Bathtub Mounting Frame Improve Bathroom Installation Safety
A bathtub mounting frame does a simple job, but it changes how an installation behaves over time. Put a tub on a wobbly base and problems show up later: leaking joints, cracked tiles, awkward plumbing. Put it on a proper frame and those headaches drop a lot.
Here's a practical look at what a mounting frame actually does on site, and why installers are choosing them more often.
Hold the tub steady from day one
Floors are rarely perfect. Even new builds have small dips or slopes. A mounting frame lets you set the tub level without shoveling in a bunch of mortar or hacking out the subfloor.
That matters because a level tub spreads weight evenly. No one corner does all the work. Sealants stay put. Wall finishes aren't pulled when someone climbs in and out. Simple, but effective.
Protect the plumbing
Tubs connect to drains and overflow pipes. If the tub shifts, those joins can be strained. A mounting frame keeps the tub where it should be, so pipes stay aligned and less likely to leak.
On renovation jobs especially, the frame gives you control. You can set the tub at the right height and keep the drain slope correct without guesswork. That saves time and avoids awkward fixes later.
Cut down hidden moisture risks
Water under fixtures is a slow killer — it ruins adhesives and makes timber rot. Frames often lift the tub slightly, which creates a small airflow gap underneath. It's not flashy, but that little breath of air reduces trapped damp and slows down hidden damage.
Over years, that makes a difference to the subfloor and the finishes above it.
Make maintenance simpler
When drains block or a gasket needs attention, removing tiles to reach the problem is a pain. A frame-based installation can make minor service work easier — sometimes you only need to move a trim or a panel rather than demolish the floor.
Less disruption for occupants, less fuss for trades. That's worth planning for.
Fit a range of site conditions
Whether you're working on timber joists, concrete slabs, or an older uneven floor, mounting frames adapt. Adjustable feet and brackets let you fine-tune the position on site. That flexibility is a big advantage in refurbishments where nothing lines up quite as the drawings promised.
It's also handy when fitting tubs next to wet-room thresholds, under heated floors, or alongside linear drains.
Improve perceived quality
A tub that wobbles or sounds hollow gives a cheap feel to an otherwise tidy bathroom. Proper support reduces flex and vibration. The tub feels solid underfoot. That quiet confidence matters to homeowners and to property managers in rental units.
Small comfort, visible effect.
Practical tips for installers
- Check the underside of the tub before you pick a frame — know where it needs support.
- Set the tub level first, then lock the frame. Don't rely on sealant to hold alignment.
- Use corrosion-resistant fixings in wet areas.
- Plan a small service access where possible — it saves time later.
- Take photos of final settings for future servicing notes.
These steps cost little time on site and save larger headaches later.
When a frame is the smart call
If you're working on a renovation, handling an awkward subfloor, or installing in a multi-use building, a mounting frame is worth considering. Even on new builds, the control and serviceability it brings make life easier for installers and occupants.
It won't fix poor planning, but it does reduce the common failures that show up after handover.
A mounting frame is a small item with a practical payoff. It keeps the tub stable, protects plumbing, improves moisture behaviour, and makes future work less destructive. Treat it as part of the build's structure rather than an optional add-on — that one choice makes the whole installation more reliable and less trouble to live with.
What Are the Key Factors to Choose the Right Bathtub Mounting Frame
Picking the right mounting frame matters. It's one of those small choices that shows up later if it's done wrong. A good frame keeps a tub steady, protects plumbing, and makes future work less disruptive. Below are practical points to check on site.
Check the site first
- Look at the floor and the room before you pick a frame.
- Is the subfloor concrete, timber, or raised access? Each behaves differently under load.
- How flat is the surface? Small dips are normal; big slopes need attention.
- Where is the drain and how will you get the fall right?
- Will there be underfloor heating, insulation, or a linear drain to work around?
Make adjustability a priority
- Few floors are perfect. Choose a frame you can tweak on site.
- Smooth, small increments are better than coarse steps.
- The locking should hold firmly once set. A slipping lock means movement later.
- Pick a system that's easy to access while you're installing it.
Match the frame to the tub shape
- Look under the tub before you buy a frame.
- Flat bases like broad, distributed supports.
- Ribs or molded feet need targeted contact points.
- If the tub maker recommends a support pattern, use it.
Think about moisture and materials
Bathrooms are damp. Choose parts that cope with that.
- Metal: corrosion-resistant or coated parts work better in wet rooms.
- Plastics: pick types that stay tough after repeated wet-dry cycles.
- Timber: if you must use it, keep it treated and away from direct moisture.
Don't forget noise and feel
A tray that flexes often sounds hollow. It also feels less secure.
Use multiple supports to reduce movement.
Add thin dampening where timber joists might transmit sound.
Tighten locking points so small shifts don't happen underfoot.
Plan for service access
- Pipes need attention at some point. Think about that now.
- Can you add a small service panel or hatch? It pays off later.
- If a hatch isn't possible, make sure plumbing runs are reachable from elsewhere.
Document where access points are for the owner.
Match strength to use
- Not every bath sees the same traffic.
- Home ensuite: light-duty support often suffices.
- Rental, hotel or public shower: pick more robust systems and extra support points.
- Adding seating or grab rails changes loads — account for that.
Coordinate with other systems
Don't install the frame in isolation.
- Ensure clearance for underfloor heating and insulation.
- Confirm drain interfaces for point or linear drains.
- Check how the frame affects tile thresholds and trims.
- Choose a supplier who helps on site
A good vendor does more than ship boxes.
Ask for clear install guides.
- Check for spare parts availability.
- See if they can share job references.
- Quick on-site checklist
Before you fix the frame, tick these:
- Subfloor type noted.
- Tray underside inspected.
- Drain alignment confirmed.
- Frame adjustment tested and locked.
Access point planned.
Corrosion resistance verified.
Photos of final settings taken.
A bathtub mounting frame is a small item that does heavy work. Choose it based on the site, the tub shape, and how the room will be used. Prioritise adjustability, moisture resistance, and future access. That way the installation stays quieter, simpler to maintain, and less likely to cause problems down the line.
Why Do Contractors Recommend Adjustable Bathtub Mounting Frames
Contractors talk about these frames because they solve everyday site headaches. A tub looks fine at first. Weeks or months later, small movements show up as cracks, leaks, or noisy floors. A frame that adjusts on site removes a lot of that guesswork.
Fix the floor, fast
Few floors are perfect. Timber joists sag a bit. Concrete can slope. With a frame you can tweak the tub's height at several points. No waiting for mortar to cure. No bulky packing. You set it, check the level, then lock it down. That's quicker and cleaner.
Keep the plumbing steady
Tubs hide drains and overflow pipes. If the base shifts, those joins take strain. Frames spread the load so pipes stay lined up. That means fewer leaks and less fiddly patchwork later. On a retrofit job, that stability is worth its weight in saved hours.
Make future repairs easier
Plumbing needs work sometimes. Gaskets wear, drains clog. A tub set on a rigid bedding often means breaking tiles to get in. With a framed base, you can plan small access points or move the tub a little without wrecking the finishes. Less demolition. Less mess.
Cut noise and feel solid underfoot
Hollow-sounding tubs are common in apartment blocks. They make the installation feel cheap. Firm supports reduce vibration and flex. Steps sound quieter. The tub feels firmer. It's a small comfort that owners notice right away.
Fit modern systems without hassle
Underfloor heating, linear drains, insulation layers—these add complexity. Frames give you clearance and fine adjustment so the tub works with other systems. You can align tiles and thresholds cleanly without compromising structure.
Save time on site
Mortar beds take time and can go wrong. A tweakable frame speeds the job. Teams waste less time reworking levels or chasing leaks. That efficiency keeps projects moving and reduces costly callbacks.
Practical checklist for installers
- Inspect the tub underside before picking the frame.
- Dry-fit the frame and confirm drain alignment.
- Adjust each support until level, then lock.
- Use corrosion-resistant fixings in wet areas.
- Plan a small access panel if possible.
- Photograph final settings for future reference.
These small steps cut future headaches.
When a framed solution matters most
Renovations, uneven subfloors, high-traffic bathrooms, and jobs with underfloor systems—these are the cases where a frame pays off. On simple, straight new builds you can still gain from the control and serviceability it brings.
A mounting frame won't replace good planning, but it makes the installation forgiving. It keeps the tub steady, protects plumbing, eases later repairs, and gives a firmer feel underfoot. For many contractors, that combination is why they specify framed supports as a standard part of the job.
When Should Homeowners Inspect or Replace a Bathtub Mounting Frame
Most people forget about the bits under the tub. That's fine — until the tub starts to rock, grout cracks, or a slow leak shows up. A brief inspection at the right time stops small problems from turning into big repairs. Here's a straightforward, no-fluff guide you can use.
Why check the support under the tub
A mounting frame spreads weight and keeps the tub steady. Without it, a corner can take too much load. Over months that shows up as cracked grout, pulled seals, or loose tiles. A simple frame gives you control when installing and makes later fixes easier.
Think of it as insurance: small cost, but it saves a lot of hassle later.
Quick signs that deserve a look now
You don't need special tools to notice trouble. Walk through the room and check for:
- A wobble near the tub edge when you press down.
- Tiny gaps or cracks in the grout around the tray.
- New damp smells or staining near the base.
- Soft or springy spots on the floor beside the tub.
- Silicone or sealant that pulls away after light use.
If any of these show up, plan a closer inspection. Don't ignore one sign and hope the rest stays fine.
Best times to open things up
There are moments when inspecting or swapping a frame is much easier:
- During a full bathroom renovation — the floor is open anyway.
- After a leak or water damage repair — you already have access.
- When changing the bath to a walk-in shower — geometry changes.
- Before laying new floor finishes — avoid blocking access later.
If the room's use increases — a guest bath becoming a daily shower.
Pick one of those windows and deal with the frame while the place is already open.
How often to inspect
No hard rule, but a handy rhythm is:
- Quick visual check once a year.
- Do a hands-on press test every time the room is emptied for cleaning.
- Full inspection when you renovate or after any leak.
High-traffic bathrooms need checks more often. If the space gets heavy daily use, shorten the rhythm.
What to look for — a short checklist
CheckWhat to do
- Edge stabilityPress each rim and corner — feel for movement
- Grout & tilesLook for cracks, gaps or fresh stains
- Floor feelWalk around — any spring or bounce?
- SealsInspect silicone and joints for gaps
- Visible hardwareLook for rust or brittle plastic parts
- AccessIs there a hatch or removable panel?
Take photos of anything odd. A picture helps a tradesperson diagnose the issue later.
Materials age differently — keep that in mind
Frames come in metal, plastics or composite mixes. Each shows wear in its own way:
- Metal: check for rust or pitting, especially in damp spots.
- Plastic: look for cracks or brittleness from long wet-dry cycles.
- Composite: check the joins and screws for movement.
If adjustable parts won't lock or move smoothly, that's a red flag.
Maintenance that actually helps
- A little effort now keeps the job tidy later.
- Keep a small access panel near the tub if you can. It saves breaking tiles.
- Tighten lock nuts after a few months of use. Small slips can creep over time.
- Note any adjustment settings — a quick photo with a ruler saves time later.
Use corrosion-resistant fixings in wet rooms.
These moves take minutes but prevent messy work later on.
When to replace the frame
Replace the frame when:
- Movement persists after tightening and adjustment.
- Corrosion or material fatigue is visible.
- Plumbing is misaligned and can't be corrected with adjustments.
- You already have access during a renovation — do it then.
Replacing is cheaper and neater when the floor is already open. Don't wait for a leak to force the issue.
A few realistic scenarios
- Apartment renovation: owner swapped the tub and left a small hatch for service. No tiles were damaged later when the drain needed attention.
- Old house: timber joists had settled. Installer used an adjustable frame and removed the need for heavy mortar packing.
- Rental property: frequent turns increased wear. A switch to a sturdier, adjustable system cut callbacks.
Real jobs like these show why a bit of planning pays off.
Simple advice for homeowners
Inspect casually every year. It's quick.
If you notice wobble or damp, act sooner rather than later.
Plan to check the frame when doing other bathroom work.
Keep a photo record of the frame and any settings.
Ask for corrosion-resistant parts in wet areas.
A small habit prevents big costs.
Frames are small parts that do a lot of heavy lifting. They keep tubs steady, plumbing aligned, and repairs easier down the line. A short check now saves time, money, and mess later. If you've got a renovation coming up, include the frame in the plan — it's the practical choice.
-
Why Are Shower Tray Support Legs So Important
Jan 16, 2026
What Makes Shower Tray Support Legs Essential for Modern Bathroom Installations
People rarely notice what sits under a shower tray — until something goes wrong. Yet those unseen components do a lot of work: they keep the tray level, protect piping, allow airflow under the base, and help the whole installation last longer. In practical terms, adjustable support legs are one of the simplest ways to improve durability and reduce headaches later on.
This article looks at why these small parts matter. I'll cover how they help with stability, water management, installation flexibility, and future maintenance — with examples that contractors and homeowners will recognize.
Why a solid foundation matters
Imagine a tray sitting on an uneven floor. At first, it might look fine. Over time, however, movement adds up. Grout cracks, seals loosen, and tiles can separate. Those are costly repairs and they're avoidable.
Support legs let installers level the tray precisely. Instead of hoping the bedding mortar sets flat, the legs give multiple adjustable points under the base. That spreads weight evenly and prevents single-point stress. The result: a tray that stays put and a finish that stays tidy.
Short version: a stable base saves money and trouble.
Fine-tuning on the job
No two jobs are identical. Subfloors vary. Pipe runs differ. Sometimes the drainage slope needs minor tweaks. Mortar beds can work, but they take time and they're not forgiving.
Leg systems let an installer tweak height and angle on-site, fast. That makes it easier to match drains, route pipes, and keep the finished level exactly where it should be. It also shortens the installation time — one reason many crews prefer leg systems on tight schedules.
Practical point: this flexibility reduces rework and keeps projects on track.
Moisture control you can't see but can feel later
Bathrooms are wet places. Trapped moisture under a tray is a slow, hidden problem. It can soften adhesives, encourage mold, and damage subfloors over months and years.
Raised support with a small air gap improves airflow beneath the tray. That ventilation helps moisture evaporate rather than staying trapped. It's not a dramatic fix you'll notice today, but it prevents a lot of small failures down the road. In other words, it's cheap insurance for the build.
Handling repeated use without complaint
Homes, hotels, gyms — some bathrooms see a lot of traffic. Repeated stepping, shifting, and weight cycles add mechanical stress. If the tray sits on a single unsupported area, that stress concentrates and material fatigue follows.
Distributed support spreads those loads across multiple points. The tray flexes less, seals stay intact longer, and finishes keep looking good. In places with heavy use, this is the difference between routine upkeep and constant repairs.
Easier access for maintenance
Here's a fact some clients don't think about until it's necessary: plumbing needs attention. When drains clog or a pipe joint needs checking, a fully mortared tray can make access awkward and destructive.
A raised tray with discreet service access makes inspection and minor repairs simpler. Technicians don't have to demolish finishes; they can reach service points more easily. Less disruption for occupants, lower repair bills, and fewer emergency calls — all practical wins.
Match design with function
Design trends often favour slim trays and flush floors. Achieving that look while keeping the build reliable is a technical challenge. Support legs let designers keep the slim aesthetic while still leaving room for plumbing, drainage tolerances, and necessary clearance.
They also allow integration with underfloor heating, insulation layers, or linear drains without compromising structural support. In short: good engineering underpins good design.
Reduce waste and support sustainability
A fully mortared base uses a lot of material and can be wasteful if onsite adjustments are needed. Adjustable leg systems reduce the need for excessive bedding material and lower the chance of remakes. Over time that means fewer resources used, less demolition waste, and fewer replaced components.
When projects aim for longer service life and fewer renovations, that kind of efficiency matters.
Quieter, more comfortable showers
Hollow or poorly supported bases can sound hollow underfoot. In multi-storey buildings, that noise carries and becomes a nuisance to people below.
Leg support reduces flex and vibration, which cuts down on hollow-sounding footsteps and improves the perceived quality of the installation. Acoustic comfort is subtle, but occupants notice it — and appreciate it.
What installers and specifiers tell me
From conversations on site, two points come up again and again. First: installers value anything that reduces rework. Second: property owners value installations that stay reliable with little fuss.
Leg systems tick both boxes. They're quick to adjust, forgiving during installation, and they reduce hidden failures later. For specifiers, they're a low-cost choice that gives predictable results across multiple job types.
A few practical tips
- Check that legs are corrosion-resistant if used in moist environments.
- Level the tray properly using a spirit level and final fine adjustments with the legs.
- Keep a small service access area where feasible — even a tiny hatch helps.
- Consider heat and sound insulation when installing over timber floors.
- If reuse is possible, leg-mounted trays are easier to remove and reinstall during refurbishments.
Shower Tray Support Legs may be invisible after handover, but they do visible work. They protect finishes, simplify installation, support plumbing, and reduce long-term issues. For anyone building or renovating a bathroom, they are a practical detail worth specifying early in the design process.
How Do Shower Tray Support Legs Improve Long-Term Bathroom Stability
Most people never look under a shower tray. They don't need to — until something fails. Loose tiles, cracked grout, damp smells: these problems often start at the base. Support legs are small, simple parts. Yet they change how a shower behaves for years.
Stop movement before it shows up
Floors settle. Buildings shift a little over time. That's normal. The trouble starts when a tray sits on a spot that flexes or sinks. One corner doing all the work will put stress on tiles and seals.
Support legs spread the load across many points. Installers tweak each leg so the tray sits level. The result: less flex, fewer micro-cracks, and a finished surface that stays tidy longer.
Leveling on the job — fast and accurate
Mortar beds can work, but they're slow and messy. If the subfloor is uneven, you often have to build up or dig out. That eats time.
Leg systems let teams adjust height and tilt right on site. That makes matching drains and routing pipes simpler. No waiting for mortar to cure. No last-minute rework.
In practice, that saves hours on every job and reduces the chance of awkward fixes after tiling.
Moisture control you won't notice — until it's gone
Trapped moisture under a tray is a slow problem. It softens adhesives and corrodes timber. You won't see it for months, but the damage is real.
Raising the tray a little creates airflow underneath. That breathes the subfloor and helps any damp dry out. It's not dramatic, but it prevents a lot of hidden failures. Think of it as passive moisture management.
Spread the load — protect finishes and joints
Every shower use cycles weight and movement into the base. If that force hits one area repeatedly, materials fatigue. Tiles chip, edges break, silicone joints pull away.
Distributed support keeps those forces even. The tray flexes less. Grout stays intact. Seals remain snug. In high-use places — hotels or gyms, for example — that difference shows up quickly in reduced repairs.
Makes maintenance less painful
Plumbing rarely stays perfect forever. Drains clog, gaskets need checking, pipe joints leak. A fully mortared tray often means breaking tiles to access components.
A tray on legs with planned service access avoids that. Technicians can reach problem points without ruining the finish. Less demolition. Less downtime. Less upset customers.
That alone can justify using leg support on larger projects.
Helps keep things quiet
A hollow-sounding shower base is annoying in flats or hotels. It also signals flex in the structure.
Firmly supported trays vibrate less. Steps sound solid, not hollow. That adds perceived quality. People notice it even if they can't name why.
Simple tips installers use on site
- Check leg material for corrosion resistance in moist rooms.
- Level with a spirit level, then fine-tune with the legs.
- Keep a small access panel where possible — it saves hours later.
- Use insulation where timber floors might transmit sound or cold.
- Plan service routes before tiling to avoid surprises.
These are low effort and make a big difference later.
Why designers and builders specify them more often
Design trends favour slim trays and flush finishes. Those looks leave little margin for error. Legs give installers the margin they need without building up heavy bedding.
They also reduce material waste. You use less mortar and make fewer site adjustments. Over time that helps a project stay on schedule and budget.
Support legs are modest parts with outsized impact. They help level the tray, manage moisture, spread load, and keep maintenance simple. They also make flush designs more reliable and quieter underfoot.
Why Are Shower Tray Support Legs Gaining Attention In Renovation Plans
People renovating bathrooms want fewer surprises. Cracked grout, loose tiles, hidden leaks — these often start beneath the tray. That's why adjustable support legs are showing up more in renovation specs. They're a simple fix for a lot of common headaches.
Fixing uneven floors without demolition
Old floors rarely match the drawings. Timber can sag, concrete can slope, previous work can leave bumps. Pulling up the whole floor to level it takes time and money.
Support legs let installers adjust the tray on site. No big rebuild. No waiting for mortar to cure. Teams set each leg and get the tray perfectly level. For renovations, that saves days and keeps dust down.
Less rework after tiling
Rework is the worst part of a job. If a tray settles after tiles are laid, you'll see cracks or leaks later. With leg systems the tray stays stable. That means fewer callbacks and less upset from owners.
Moisture control that happens quietly
Trapped damp under a tray is a slow problem. You don't see it right away. Months later, adhesives fail and timber can rot.
A small gap under the tray improves airflow. Moisture dries out instead of sitting. It's a low-effort way to protect the subfloor and the finish above.
Quieter floors in flats and hotels
Hollow-sounding shower bases are a common complaint in multi-storey buildings. Legs reduce flex and vibration. Steps feel solid, not hollow. That improves perceived quality — guests notice it even if they don't know why.
Easier servicing when things go wrong
Pipes and drains need attention at some point. A fully mortared base often means breaking tiles to get in. A tray on legs with planned access makes life easier for plumbers. Less demolition, less mess, lower repair bills.
Design-friendly and efficient
Slim trays and flush thresholds are trendy. They leave little room for error. Adjustable supports let you achieve that look without risking the build. They also work well with linear drains, underfloor heating, or insulation layers.
Practical on-site tips
- Check leg material for corrosion resistance in wet rooms.
- Level with a spirit level, then fine-tune each leg.
- Keep a small service hatch where possible.
- Add insulation in timber floors to cut noise.
- Plan plumbing runs before tiling to avoid surprises.
When Should Contractors Replace Or Upgrade Shower Tray Support Legs
Renovation timing matters. Replacing or reinforcing the support system under a shower is one of those jobs that's easier and cheaper to do early. Wait until something fails, and the repair becomes messier and costlier.
Below are clear signals and practical moments when change makes sense.
Spot the warning signs early
Look for small clues during inspection. If you see any of these, take action:
- Cracks appearing at tray edges or in the nearest grout
- Slight movement when someone stands on the tray
- Soft or springy spots underfoot
- Persistent damp smells or staining near the base
- Joints or seals that pull away after light use
One sign alone might not force a replacement. Several together usually do. If something feels off, plan for repair rather than hope it will settle.
Best times to upgrade during a remodel
There are renovation stages when swapping out supports is efficient and smart:
- Full strip-out remodels — base is exposed, so replacement adds little extra labor.
- When changing floor finishes — you already have access to the subfloor.
- Drain repositioning — new drainage geometry often needs fresh leveling.
- After water damage repairs — replace any parts that were soaked or weakened.
- When converting a bath to a walk-in shower — different loads and clearances demand review.
If the job already exposes the tray area, upgrading is usually the right call.
Old materials don't always show their limits
Some older support methods hide damage until it's expensive to fix. Timber blocks can rot. Cheap plastics may crack. Metal parts can corrode where moisture collects.
Signs the existing kit has aged badly:
- Adjustable parts stick or won't hold position
- Corrosion on metal pieces or fittings
- Crumbling or soft timber beneath support points
- Brittle plastics or visible cracks
Use patterns change the game
A bathroom's use can evolve. A guest shower might become a daily-use facility. A family home could switch to short-term rental. Increased foot traffic shortens the life of an unchanged base.
Consider replacement when:
- The room's daily use will increase significantly
- Accessibility works add weight or altered traffic patterns
- A shower area is enlarged or reconfigured
- Matching support to actual use prevents premature wear.
Spend smart now to save later
It's tempting to patch and move on. That can backfire. Tiny movement under a tray lets moisture find weak spots. That damage spreads to subfloors, adhesives, and finishes. Fixing the fallout costs more than upgrading the support during the scheduled work.
Planned replacement:
- Reduces callbacks after handover
- Cuts hidden moisture risk
- Keeps tile finishes intact longer
For contractors, predictable outcomes mean fewer headaches and better reputations.
Quick on-site checks contractors rely on
Use these tests before deciding:
- Press test: apply weight near edges to feel for movement.
- Visual sweep: check for cracked grout or displaced joints.
- Tap test: hollow sounds can indicate poor contact or voids.
- Mechanism check: if adjustable parts don't move or lock properly, replace.
- Moisture check: damp or stained areas under or around the tray spell trouble.
If several tests fail, plan to replace the legs or the whole support system.
Replacement isn't always required. Use judgment. If the existing system is sound and matches the new design and use, keep it. If not, upgrade while you have access. The goal is stable performance, not unnecessary expense.
When in doubt, choose the path that reduces future work for you and future problems for the owner.
Practical Tips for Choosing Shower Tray Support Legs for New Bathrooms
When you plan a new bathroom, the visible finishes get most of the attention: tile patterns, taps, glass screens. What's easy to miss is what sits below the tray. Yet the right support system determines how the installation behaves for years. Get that wrong and you'll see grout cracks, damp spots, or loose tiles — problems that show up well after handover.
This article gives straightforward, site-tested advice for picking support legs that suit the room, the tray design, and the expected use. It's written for contractors, specifiers, and anyone responsible for reliable, low-hassle bathroom builds.
Start with the site survey, not the catalog
Before comparing products, walk the space. The subfloor, access routes, plumbing layout and intended use all shape your choice.
Key things to note on site:
- Subfloor type: concrete, timber, screed, or raised access. Each behaves differently under load and moisture.
- Level and flatness: small variations are normal; large dips or humps are a red flag.
- Drain location and fall requirements: where the water needs to go affects tray height and orientation.
- Future access: is this a private bathroom, or a room that may be repurposed or serviced often?
- Load pattern: is this a light-use ensuite or a heavy-use facility such as a gym shower?
A good site check prevents choosing a system that looks fine on paper but fails in practice. Invest ten minutes here — it saves hours later.
Why adjustability matters
The single most practical feature to demand is adjustability. Floors are rarely perfect, and plumbing doesn't always land exactly where drawings placed it. A support system that allows fine-tuning on site means the installer can achieve correct slope, perfect level, and tidy transitions without rebuilding the subfloor.
When assessing adjustable supports, look for:
- Smooth, incremental adjustment rather than coarse steps. You want to dial in the height precisely.
- A reliable locking method so the setting holds under load and over time. If the lock slips, the tray will move.
- Ease of access during installation — some systems require you to remove significant finishes to make adjustments; that's clumsy on a tight schedule.
- Serviceability: can parts be adjusted later without major demolition?
- Avoid systems that feel fiddly to set up; those often lead to mistakes on busy sites.
Match support to tray geometry
Not all trays are built the same. Some have flat undersides, others feature ribs or defined seating points. Matching the support design to the tray's underside reduces point loads and avoids stress risers that cause cracks or tile edge damage.
A few simple checks:
- Inspect the tray underside. Note whether contact areas are broad or localized.
- Choose supports that provide distributed support for flat bases and targeted contact for ribbed designs.
- If the tray manufacturer has a recommended support type, give that priority — many trays are designed with a certain support pattern in mind.
When tray and support are in harmony, the finished floor feels solid and the drainage stays consistent.
Consider moisture and corrosion resistance
Bathrooms are wet environments. Materials that resist rust and degradation pay back through longevity.
Material considerations:
- Metal parts should be stainless or have robust protective coatings in constantly damp areas.
- Plastics must be UV-stable and not become brittle after repeated wet-dry cycles.
- Timber blocks need to be treated and kept isolated from direct moisture.
It's also sensible to think about the salts that can be present in seaside locations or chemicals used in maintenance. Choose components that tolerate realistic site exposures rather than assuming the room will stay perfectly dry.
Sound and comfort: a real user concern
A tray that feels solid underfoot makes a house feel better. In multi-storey buildings, footsteps transmit as noise; hollow-sounding bases annoy occupants below.
Support details that reduce sound:
- Multiple support points that minimize flex.
- Dampening layers or thin insulation between supports and subfloor in timber installations.
- Firm locking mechanisms that avoid micro-movement every time someone steps in.
- Acoustic comfort is often a silent selling point — end users notice it, even if they don't mention it in feedback.
Think about maintenance access before you tile
Plumbing issues don't announce themselves politely. Drains clog, seals age, and joints loosen. If the tray is mortared solid without any access, fixing a problem can mean removing finished surfaces.
Plan for serviceability:
- Locate service hatches or removable panels where practical.
- Use support systems that allow limited access beneath the tray without full demolition.
- Where a hatch is impossible, ensure the plumbing layout is simple and reachable from elsewhere.
- Better access saves time and money years from now. It's a small planning step that avoids awkward, high-cost repairs.
Match the support choice to expected use
Not every bathroom needs the same level of reinforcement. A private ensuite sees far less wear than a hotel block or a gym changing room. Tailor the investment to the context.
Guiding principles:
- For light domestic use, a straightforward adjustable system with corrosion resistance and good locking may be enough.
- For frequent public use, choose more robust supports and consider redundancy — more support points spread the stress.
- For areas with heavier objects or accessibility aids (grab rails, seating) make sure the support system accounts for altered load patterns.
Right-sizing prevents overbuilding but also avoids under-specifying for tough conditions.
Material choices and their trade-offs
You'll encounter metal frames, polymer supports, composite systems and hybrid kits. Each has pros and cons.
Metals are strong and fixed in position; they can be heavier and need corrosion protection.
Engineering plastics are lightweight and resist moisture; older plastics can become brittle.
Composite supports combine elements to balance weight, strength, and durability.
Rather than sticking to brand claims, consider the installation context and ask for real-world references. A system used successfully in similar jobs gives more confidence than marketing copy.
Integration with underfloor systems
Modern bathrooms often include underfloor heating, insulation layers, and linear drains. These systems require space and careful planning.
Key points:
- Ensure the support height and clearance work with underfloor heating manifolds and fixings.
- Keep insulation continuity in mind; don't create thermal bridges that reduce heating efficiency.
- Linear drains may need particular fall or surround details — confirm how the support system accommodates them.
- A support solution that fits neatly with other services avoids rework and keeps systems accessible.
Supplier selection: what to ask for
A good supplier does more than ship parts. They support specification, provide documentation, and stand behind their product.
Ask suppliers for:
- Installation guides and recommended best practices.
- Case studies or references for projects similar to yours.
- Clarity on warranty terms and what they actually cover (serviceability, failure modes).
- Availability of spare parts and reasonable lead times.
A supplier's responsiveness matters on site. Quick, reliable support reduces delays and keeps projects flowing.
Site workflow: installation tips that prevent callbacks
Even a great product performs badly if installed sloppily. Standardize the workflow so crews produce consistent outcomes.
On-site best practices:
- Pre-check the tray underside and subfloor. Clean contact surfaces and remove debris.
- Dry-fit the supports first. Confirm alignment and drain position before any adhesive or permanent work.
- Level the tray using a spirit level and make fine adjustments with the supports. Small corrections now save large repairs later.
- Lock supports in place only after confirming drainage slope and perimeter alignment.
Document final settings. A photo and a short note help future servicing.
Leave access instructions for the client. Explain where service points are and how to reach them.
A disciplined approach reduces surprises and the need for re-visits.
Cost control without cutting corners
Budget pressures are real. Still, skimping on the support system often leads to expensive callbacks.
Ways to control cost:
- Standardize on a small range of compatible supports across jobs to buy in bulk.
- Train crews so installations are efficient and error-free. Time saved on site lowers labor costs.
- Use condition-led replacement strategy: replace supports only when inspection shows compromised performance, but plan for it during other works to avoid repeated access.
- Consider lifecycle cost, not just upfront price. A slightly higher-cost system that needs less maintenance can be cheaper over the building's life.
Practical thrift beats penny-pinching that invites future trouble.
Sustainability: small choices add up
Choosing materials that last and can be serviced aligns with sustainability goals. Fewer replacements and less demolition waste mean lower lifecycle impact.
Simple sustainability steps:
- Pick recyclable materials where possible.
- Avoid single-use timber packing; use serviceable shims or adjustable supports instead.
- Document materials and redlines so future renovators can repair rather than replace.
- These actions help projects meet broader environmental targets without complicated schemes.
Common pitfalls and how to avoid them
Some mistakes crop up again and again. Recognize them early and you dodge unnecessary work.
- Pitfall 1: Using fixed bedding on uneven floors instead of adjustable supports.
- Fix: Prefer adjustability; it mitigates unknown subfloor issues.
- Pitfall 2: Ignoring access for future servicing.
- Fix: Plan a hatch or an accessible routing before tiling.
- Pitfall 3: Mismatching tray and support geometry.
- Fix: Check the tray underside and choose supports that spread the load appropriately.
- Pitfall 4: Overlooking acoustic effects on multi-storey builds.
- Fix: Include thin dampening layers and avoid big hollow voids beneath trays.
Short FAQ for installers
- Q: Can I reuse existing supports during a remodel?
- A: Only if they pass inspection for movement, corrosion, and locking function. When in doubt, replace while the base is open.
- Q: Are timber packers acceptable under trays?
- A: Treated timber can work, but it must be isolated from direct moisture and inspected for long-term performance.
- Q: Do I need a service hatch?
- A: If plumbing access is likely, yes. Hatches avoid demolition when servicing drains or seals.
- Q: How important is matching the tray manufacturer's guidance?
- A: Very. Many trays are designed with specific support patterns. Follow their guidance for best results.
Choosing the right support system for a new bathroom is a practical decision with long-term consequences. It affects how the tray behaves, how the floor sounds, how moisture is managed, and how easily the space can be serviced in future. Focus on site conditions, adjustability, compatibility with the tray, corrosion resistance, and a sensible installation workflow.
A little extra attention at this stage saves time, money, and headaches down the line. And it keeps the finished space working — quietly and reliably — for years.
-
Why Shower Tray Frames Are Essential for Modern European Bathrooms
Jan 14, 2026
The Growing Demand for Efficient Shower Support Systems in Europe
In recent years, the European bathroom market has shifted toward smarter, more efficient, and durable installation systems. Homeowners and contractors alike are paying greater attention to the foundation of their shower areas — the shower tray frame.
Unlike traditional full-floor supports, a shower tray frame system provides strong yet adjustable support for the shower base, ensuring easy installation, better drainage, and long-term stability.
Across Europe, particularly in countries such as Germany, the UK, France, and Italy, builders are prioritizing modular and adjustable shower tray support frames to meet the growing demand for easy maintenance and sustainable construction.
What Is a Shower Tray Frame and Why It Matters
A shower tray frame (also known as shower tray support frame or shower base support system) is a metal structure designed to hold the shower tray securely above the floor. It typically consists of:
Adjustable legs (feet) for leveling the tray on uneven surfaces
Sturdy brackets for stability and strength
Optional stainless-steel support bars for additional load capacity
These frames not only provide physical support but also create space for plumbing and drainage systems beneath the shower tray — making installation faster and easier.
Benefits of Using Shower Tray Frames in Bathroom Projects
European contractors prefer OEM shower tray frames because they offer several key advantages:
Quick and clean installation – No need for full mortar bedding or time-consuming leveling.
Adjustable height – Perfect for modern bathroom renovations and new builds alike.
Improved durability – Stainless steel or galvanized materials ensure long life and corrosion resistance.
Easy maintenance – Access to pipes and drains without dismantling the entire shower base.
Eco-friendly solution – Reduces waste compared to cement installation and aligns with Europe’s sustainability goals.
For both residential and commercial projects, a reliable shower base support frame has become a standard solution for professional installers.
OEM & ODM Opportunities for European Brands
Many European bathroom brands are now outsourcing their OEM shower tray feet and frame systems to trusted Asian manufacturers.
Partnering with an experienced supplier like Yuhuan Jinyi Hardware Co., Ltd. can help brands expand their product lines with:
- Customizable sizes and designs
- CE-certified quality
- Fast delivery and stable supply
- Cost-effective OEM/ODM cooperation
With over 30 years of manufacturing experience, JINYI offers a full range of shower tray support systems compatible with European bathroom standards and design trends.
The Future of Shower Tray Frames in the European Market
As bathroom designs continue to evolve, demand for lightweight, modular, and adjustable support systems will only grow. European consumers increasingly value products that combine easy installation, long lifespan, and modern design — exactly what high-quality shower tray frames deliver.
Choosing the right OEM partner for shower tray support frames can make all the difference in maintaining brand reputation and customer satisfaction.
The shower tray frame is more than just a structural component — it’s a critical part of modern, efficient, and sustainable bathroom construction.
For distributors, wholesalers, and OEM partners across Europe, JINYI stands ready to provide reliable shower tray support systems that meet CE standards and European quality expectations.
Visit: https://www.yh-jinyi.com
Email: [email protected]

![]()
- 210 Jinhai Avenue, Lupu Economic Development Zone, Yuhuan City, Taizhou City, Zhejiang Province.
- +86-576-87423248 / +86-576-87499120
- +86-17769979117 / +86-18967666977
- +86-576-87425996
- [email protected] / [email protected]

