

 русский
  Español
 -
Why Are More Bathroom Project Buyers Paying Attention to Shower Tray Installation Systems?

Jun 12, 2026
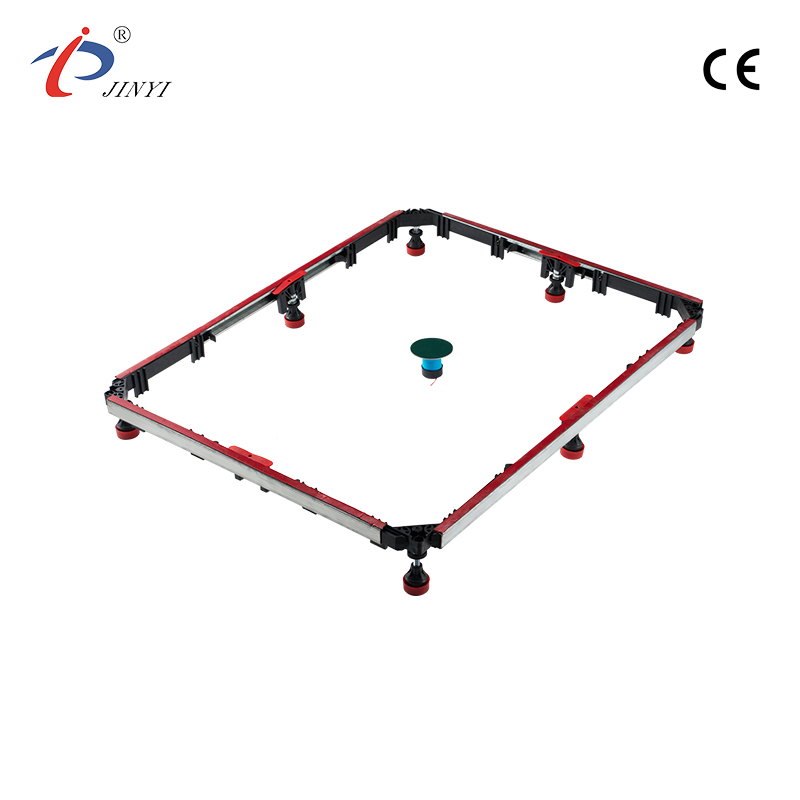
As modern bathroom design continues to evolve, architects, contractors, distributors, and sanitary ware manufacturers are paying closer attention to the components behind a successful installation. While shower trays often receive most of the visual attention, the supporting structure underneath plays a crucial role in long-term stability and performance. Recently, search interest for terms such as adjustable shower tray frame, heavy-duty shower tray support system, bathroom installation accessories, and shower tray support frame supplier has been growing among industry professionals. This trend reflects a broader focus on durability, installation efficiency, and maintenance reduction. As a result, the Shower Tray Support Frame has become an increasingly important consideration for commercial and residential bathroom projects.
The Hidden Challenges Behind Shower Tray Installations
Many installation problems do not originate from the shower tray itself but from inadequate support underneath. Uneven flooring, insufficient load distribution, and improper leveling can lead to long-term issues that increase maintenance costs.
Common concerns among buyers include:
- Structural instability after installation
- Difficulty achieving accurate leveling
- Increased installation time on-site
- Potential movement under repeated use
- Compatibility with different tray sizes
For contractors and developers, avoiding these issues at the installation stage helps improve project quality and customer satisfaction.
Why Installation Efficiency Is Becoming a Purchasing Priority
The construction industry continues to face pressure to reduce labor costs and shorten project timelines. Consequently, buyers are increasingly searching for products that simplify installation without compromising reliability.
A well-designed shower tray support system can help installers:
- Reduce adjustment time during fitting
- Improve leveling accuracy
- Minimize installation errors
- Adapt to uneven floor conditions
- Streamline bathroom renovation projects
These benefits are particularly valuable in large residential developments, hotels, and commercial construction projects where efficiency directly affects profitability.
Growing Demand for Adjustable and Flexible Support Solutions
Bathroom layouts vary significantly from project to project, making flexibility an essential feature in support frame design. Procurement teams increasingly prefer systems that accommodate multiple tray dimensions and installation environments.
Popular search terms currently include:
- Adjustable shower tray support frame
- Universal shower tray installation frame
- Heavy-duty support frame for shower bases
- Metal frame for shower tray installation
Flexible support solutions help distributors and contractors serve a wider range of customer requirements while reducing inventory complexity.
Why Structural Strength Matters for Long-Term Performance
Modern bathrooms are expected to provide years of reliable service. For this reason, engineers and project managers pay close attention to the load-bearing performance of installation components.
Key purchasing considerations often include:
- Strong weight distribution capability
- Corrosion-resistant materials
- Stable frame construction
- Long-term structural integrity
- Resistance to moisture-related deterioration
As a manufacturer, we understand that a support frame is not simply an accessory—it is a critical component that contributes to the overall performance of the bathroom system.
Supporting Current Bathroom Design Trends
Across social media platforms and interior design communities, homeowners and developers continue to embrace minimalist, walk-in shower concepts. These designs emphasize clean lines, seamless aesthetics, and efficient use of space.
However, modern visual appeal must be supported by reliable installation systems. Behind every elegant shower enclosure is a carefully engineered support structure that helps ensure safety, stability, and long-term durability.
This growing awareness is driving demand for professional-grade shower tray installation accessories among both commercial and residential buyers.
Why Buyers Prefer Reliable Manufacturing Partners
In today's competitive market, buyers are evaluating more than just product specifications. Consistent quality, production reliability, and technical expertise are becoming equally important.
Manufacturers with experience in bathroom installation systems can provide:
- Consistent product quality
- Reliable production capacity
- Technical support for project requirements
- Flexible solutions for different markets
- Long-term supply stability
These advantages help distributors, sanitary ware brands, and project contractors build stronger customer relationships and reduce procurement risks.
Smarter Installation Systems Will Continue to Gain Attention
As bathroom construction standards continue to rise worldwide, demand for reliable installation solutions is expected to grow alongside the sanitary ware market. Buyers are increasingly looking for products that improve installation efficiency, enhance structural stability, and support long-term project performance.
For distributors, contractors, and bathroom equipment suppliers seeking dependable installation components, the Shower Tray Support Frame remains an essential solution that helps deliver safer, more efficient, and more professional bathroom installations in today's evolving construction industry.
-
Stainless Steel vs Galvanized Manifold Brackets:Which One Is Better?
Jun 12, 2026
When sourcing manifold brackets for heating, plumbing, or HVAC systems, material choice matters more than most buyers realize. The two most common options — stainless steel and galvanized steel — look similar at first glance, but perform very differently over time. Here is a straightforward comparison to help you decide.
What Is a Manifold Bracket?
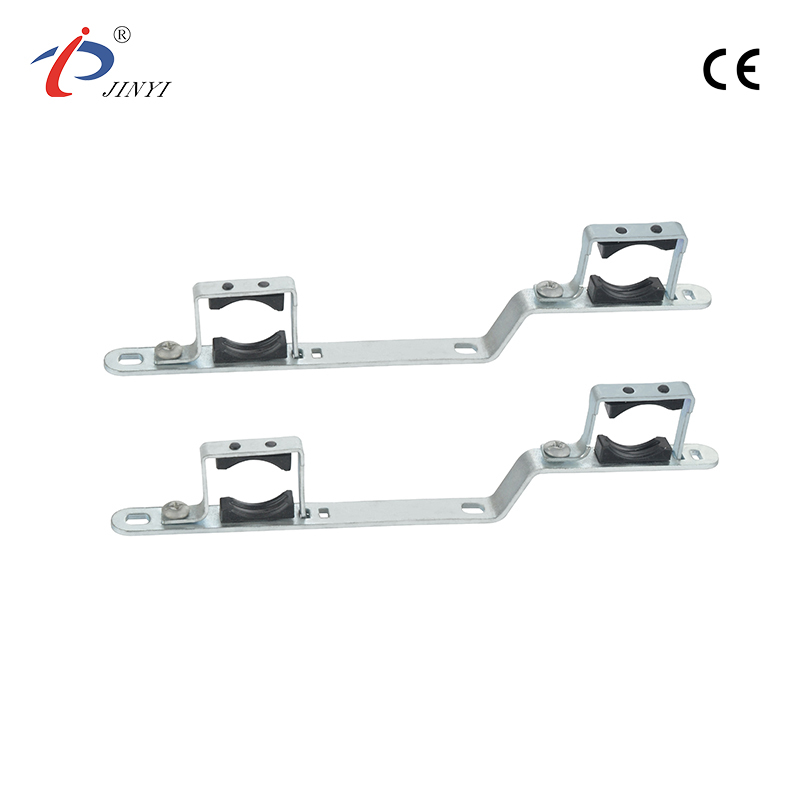
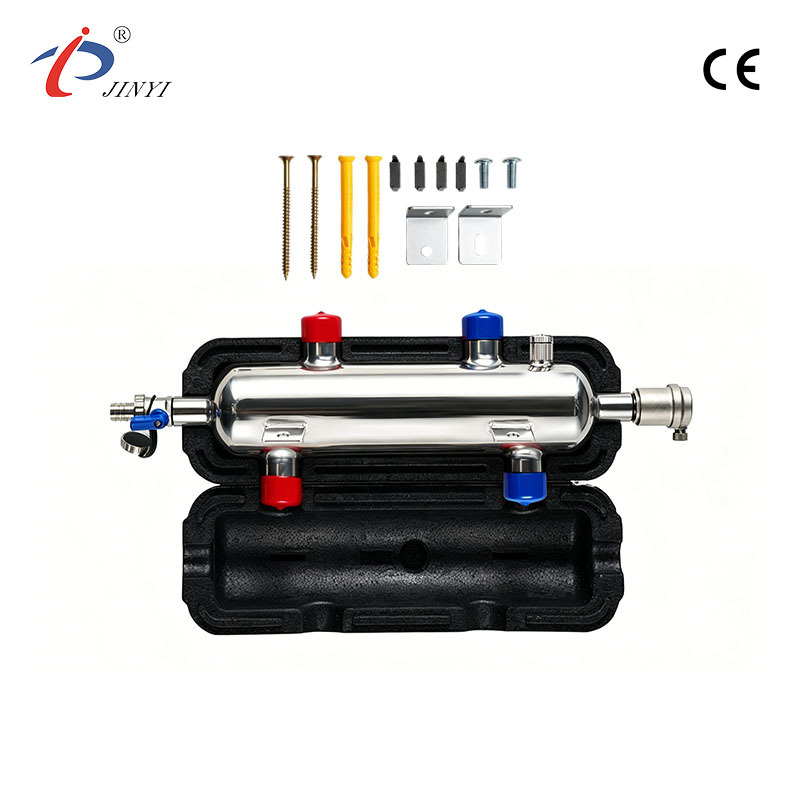
A manifold bracket is a mounting support that holds a manifold securely in position within a piping system. It is a critical component in underfloor heating, radiator systems, and water distribution — keeping the manifold aligned, stable, and properly supported under pressure and thermal cycling. Manifold brackets come in two main types:
- Single manifold brackets — supporting one pipe
- Double manifold brackets — supporting both flow and return pipes together
Stainless Steel Manifold Brackets
Stainless steel contains at least 10.5% chromium, which forms a self-repairing oxide layer on the surface — making it inherently resistant to rust with no coating required.
Key advantages:
- Excellent corrosion resistance — performs reliably in wet, humid, and chemically exposed environments
- Long service life — 25 to 50+ years with minimal maintenance
- Temperature resistant — handles repeated heating and cooling cycles without degradation
- No maintenance coating — the protection is built into the material
- Clean professional finish — meets visual and technical standards required in European markets
Galvanized Manifold Brackets
Galvanized steel is carbon steel coated with a zinc layer. The zinc acts as a sacrificial barrier — it oxidizes first, delaying rust in the underlying steel.
Key advantages:
- Lower initial purchase cost
- Adequate performance in dry, indoor environments
- Widely available and easy to source
Key limitations:
- Once the zinc coating is scratched or worn through, the steel beneath starts to rust
- Not suitable for wet or humid environments
- Risk of galvanic corrosion when installed near copper or brass fittings
- Shorter service life means higher replacement costs over time
Side-by-Side Comparison
Feature
Stainless Steel
Galvanized Steel
Corrosion Resistance
Excellent (inherent)
Moderate (coating-dependent)
Service Life
25–50+ years
10–20 years
Wet Environment
Excellent
Poor to moderate
Initial Cost
Higher
Lower
Lifetime Cost
Lower
Higher
Maintenance
Minimal
Periodic / recoating
Galvanic Corrosion Risk
Low
Higher
Which Should You Choose?
For most heating and plumbing applications — especially underfloor heating, radiator systems, or any environment with moisture — stainless steel manifold brackets are the better long-term investment. The higher upfront cost is consistently offset by lower maintenance, fewer replacements, and better system reliability.
Galvanized brackets can work in purely dry, indoor environments where upfront cost is the main priority. But for professional installations designed to last, stainless steel is the global standard.
JINYI Stainless Steel Manifold Brackets
Yuhuan JINYI Hardware Co., Ltd. has manufactured stainless steel manifold brackets since 1995. Our product range covers single and double manifold brackets (JY-5001 to JY-5011 series), as well as stainless steel manifolds — so buyers can source both from one trusted supplier.
We serve distributors, wholesalers, and OEM customers across Europe and beyond, with custom sizes, configurations, and private label options available.
Contact JINYI for a Quote
www.yh-jinyi.com/product/manifold-bracket-1/
+86-576-87423248 | +86-576-87499120
210 Jinhai Avenue, Lupu Economic Development Zone, Yuhuan City, Zhejiang Province, China
Keywords: manifold bracket · stainless steel manifold bracket · galvanized manifold bracket · double manifold bracket · single manifold bracket · underfloor heating bracket · manifold bracket supplier China · manifold bracket manufacturer · JINYI Hardware
-
How Can a Shower Tray Support Frame Prevent the Most Common Bathroom Installation Failures?
Jun 05, 2026
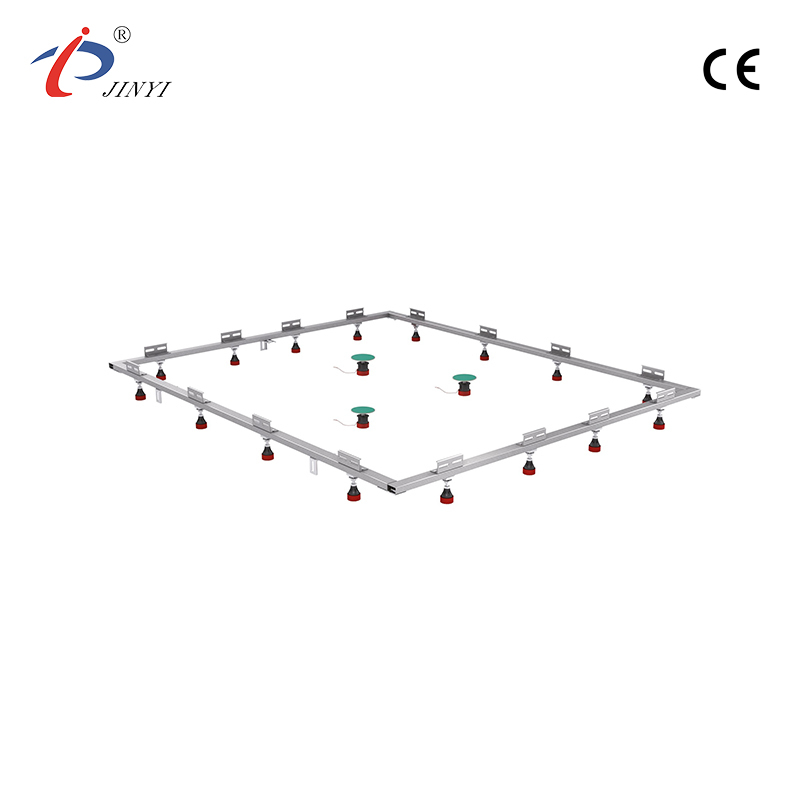
As bathroom renovations continue to trend across Europe, North America, and the Middle East, installers, distributors, and project contractors are paying closer attention to what lies beneath the shower tray. While consumers often focus on tile design and shower enclosures, professionals know that structural support is what determines long-term performance. A properly engineered Shower Tray Support Frame can help prevent movement, cracking, drainage issues, and costly callbacks. For buyers sourcing products for residential developments, hotels, and commercial washrooms, choosing the right support system has become a critical purchasing decision rather than an afterthought.
Why Shower Tray Failures Often Start Below the Surface
One of the most common complaints in bathroom projects is tray movement after installation. Even a small amount of flexing can lead to sealant failure, water leakage, or cracking around surrounding tiles.
Many installers have discovered that relying solely on mortar beds or uneven floor surfaces can create long-term stability problems. This is why demand for adjustable shower tray support systems has increased. A well-designed frame distributes weight more evenly and provides consistent support across the entire base of the tray, reducing stress concentration during daily use.
For developers managing large residential projects, minimizing future maintenance claims is often a major priority.
The Growing Demand for Faster and Cleaner Installation
Recent discussions among contractors and construction professionals highlight a common challenge: labor shortages and tighter project schedules.
Modern bathroom installations are expected to be completed more efficiently without sacrificing quality. An adjustable Shower Tray Support Frame allows installers to level the tray quickly without extensive floor preparation. This helps reduce installation time while maintaining structural reliability.
Benefits often include:
- Easier height adjustment on uneven floors
- Simplified drainage alignment
- Reduced dependence on wet construction methods
- Faster project turnover
- Improved consistency across multiple installations
These advantages are particularly valuable for hotels, apartment complexes, and modular bathroom manufacturers.
Stability Matters More in Larger Shower Designs
Walk-in showers continue to gain popularity in both residential and commercial projects. However, larger shower trays create greater load distribution challenges.
Without sufficient support underneath, larger trays may experience gradual deformation over time. This can affect drainage performance and increase the risk of water pooling.
As manufacturers, we frequently work with customers who require support solutions for oversized shower trays, custom bathroom layouts, and accessibility-focused designs. A reinforced frame system helps maintain tray alignment and supports long-term durability in demanding environments.
Corrosion Resistance Is No Longer Optional
Bathrooms are naturally humid environments. Moisture exposure can accelerate corrosion if inferior materials are used.
Procurement teams increasingly ask about protective coatings, galvanized steel construction, and long-term corrosion resistance. These factors directly influence product lifespan, especially in coastal regions, hotels, fitness centers, and public facilities.
When evaluating support frame suppliers, buyers should look beyond appearance and focus on material specifications, structural design, and manufacturing consistency. Long-term reliability often depends on details that are not immediately visible after installation.
What Professional Buyers Are Asking Manufacturers
Based on inquiries we receive from distributors and project contractors, several questions appear repeatedly:
Key Evaluation Points
- Is the frame compatible with multiple tray sizes?
- Can the height be adjusted during installation?
- Does the design support heavy daily traffic?
- What anti-corrosion measures are used?
- Can customized dimensions be supplied for special projects?
- Is the product suitable for both residential and commercial applications?
These practical concerns reflect the industry's shift toward durability and lifecycle value rather than simply choosing the lowest-priced option.
The Importance of Manufacturer Expertise
Not all support systems are produced to the same standards. Engineering experience plays a significant role in product performance.
As a manufacturer, we understand that structural strength, welding quality, dimensional accuracy, and load distribution must work together. A support frame should not only fit the tray correctly but also maintain its performance throughout years of use.
Project buyers increasingly prefer suppliers that can provide technical support, customization options, and stable production capacity for large-volume orders. Reliable manufacturing processes help ensure consistency from the first shipment to the last.
Looking Ahead: Building Bathrooms for Long-Term Performance
The bathroom industry is moving toward higher installation standards, smarter construction practices, and greater emphasis on durability. While shower trays remain a visible component, the foundation beneath them often determines whether the installation succeeds or fails.
For distributors, contractors, and project developers seeking dependable bathroom solutions, investing in a high-quality Shower Tray Support Frame can help reduce installation risks, improve customer satisfaction, and support long-term project performance. As market expectations continue to rise, choosing the right support structure today can prevent many of the costly issues that emerge years after installation.
-
Sourcing Shower Tray Frames from China? Here's Why B2B Buyers Trust Jinyi
Jun 05, 2026
CE-Certified · Factory Direct · OEM/ODM Available · 10,000+ Units/Month
For bathroom hardware distributors, importers, and project procurement managers, choosing the right shower tray frame supplier is more than a product decision — it's a supply chain decision. A wrong call means delayed shipments, failed certifications, and costly returns. That's exactly why a growing number of B2B buyers across Europe and North America have been quietly relying on one factory: Yuhuan Jinyi Hardware Co., Ltd.
What Is a Shower Tray Frame — and Why Is It Replacing Cement?
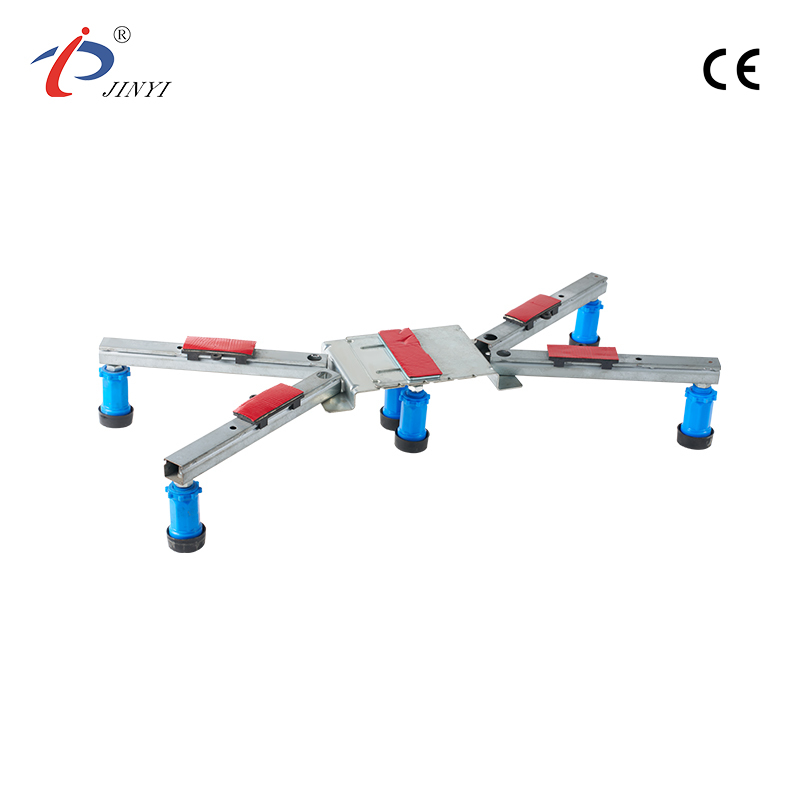
A shower tray support frame (also known as a shower tray riser frame or shower tray leg frame) is an adjustable steel or galvanized metal structure installed beneath a shower tray. It completely replaces the traditional cement-bed installation method — eliminating wet work, curing time, and the risk of uneven settling.
For today's contractors and bathroom renovators, this shift is significant: a frame-supported tray can be installed and leveled in under an hour, offers access to plumbing underneath, and is fully repositionable. For your customers, that means faster project completion and fewer call-backs.
Jinyi: A Shower Tray Frame Factory Built for Global B2B Supply
Founded in 1995 in Zhejiang Province, Jinyi has spent nearly three decades focused on precision metal hardware for the global bathroom and construction market. Their shower tray frame product line is engineered specifically for high-volume B2B procurement:
Universal Sizing: Compatible with shower trays from 70×70 cm to 100×180 cm — one frame range covers most of your catalog needs.
CE Certified: Fully compliant with European safety and quality standards. Ready for EU market distribution without re-certification delays.
Adjustable Leveling: Independent leg adjustment allows fast, accurate leveling even on uneven subfloors — fewer installation issues, fewer returns.
High-Load Capacity: Engineered to support stone resin, acrylic, and composite trays under heavy daily use in both residential and commercial settings.
OEM/ODM Accepted: Custom dimensions, load ratings, and private-label packaging available for buyers building their own branded product lines.
Production Capacity: 10,000+ units per month with a standard lead time of 4–8 weeks. Consistent delivery for steady-volume orders.
The Sourcing Advantage: Factory Direct, No Middleman
Working directly with a shower tray frame manufacturer like Jinyi means you're not paying agent markups or absorbing delays caused by third-party intermediaries. Jinyi maintains in-house R&D and a dedicated testing lab, so product specifications can be verified, adjusted, and locked before production begins — protecting your procurement timelines and margin.
Their export track record spans Europe, North America, Japan, and beyond. Whether you need standard catalogue products or a fully custom shower base support frame solution, the factory infrastructure is in place to execute at scale.
Request Samples or a Bulk Quote
If you're evaluating shower tray frame suppliers for your next import cycle, Jinyi is worth a direct conversation. Browse the full product range, download spec sheets, and submit an RFQ at : www.yh-jinyi.com/product/shower-tray-frame
-
Why Choose a Decoupling Tank Factory for HVAC System Design
May 22, 2026
In many water-based systems, the behavior of flow is not always stable when different loops start interacting directly. Small changes in one part of the system can show up somewhere else without warning.
This is where a Decoupling Tank Factory becomes relevant, not because it adds complexity, but because it gives space for circulation paths to stop interfering with each other.
In real installations, designers often deal with situations like:
- One loop reacting too quickly to another
- Pumps working against each other without intention
- Flow direction shifting depending on load behavior
The purpose of introducing a separation point is not to control everything, but to let each part of the system behave in a more predictable way.
What Is a Decoupling Tank Factory and How It Supports Modern HVAC System Design
A Decoupling Tank Factory is usually linked to manufacturing vessels that sit between connected water circuits. These vessels do not actively push flow, but instead provide a physical zone where movement can settle before continuing.
Inside system layouts, this kind of structure often appears when multiple units share the same water loop but do not always operate at the same time or under the same demand.
Instead of forcing direct interaction between supply and return lines, the tank allows water to pass through a shared space where velocity drops and flow direction becomes less aggressive.
In practice, this means:
- Less direct feedback between loops
- More stable circulation behavior
- Reduced sensitivity to sudden load changes
- Smoother transition between operating states
Which System Conditions Require Hydraulic Decoupling for Stable Operation
Not every system needs separation between loops, but certain behaviors make it difficult to maintain stable operation without it.
One common situation is when multiple circulation paths keep influencing each other in a way that is hard to predict. Another is when flow demand changes frequently within short time periods.
In these cases, a buffer structure from a Decoupling Tank Factory can act as a neutral zone between active circuits.
Typical situations include:
- Systems where flow direction is not constant
- Multiple devices switching between operating states
- Uneven distribution of circulation demand
- Interaction between pumps that creates instability
The key issue is not the equipment itself, but how easily one change spreads through the entire network.
Why Pressure Separation Matters in Chilled Water Loop Performance
When pressure is not evenly managed across a loop, flow tends to take the path of least resistance. This can lead to parts of the system receiving more circulation than others without clear intention.
A separation zone helps reduce this direct transmission of pressure changes. Instead of pushing disturbances across the entire loop, changes remain more local.
In systems where this structure is applied, the behavior often shifts from aggressive redistribution to more gradual adjustment.
Condition Without separation With separation Flow response spreads quickly stays localized Pressure shift affects entire loop partially contained System behavior harder to predict more steady The difference is not in power, but in how changes travel through the system.
How Internal Flow Path Design Affects System Stability in Buffer Tank Manufacturing
Inside a buffer tank, flow does not simply move from one side to another in a straight line. The internal space shapes how energy is transferred between inlet and outlet.
If the flow enters too directly, it tends to create strong mixing zones. If it is too dispersed, circulation can become uneven.
Design work in a Decoupling Tank Factory often focuses on balancing these two behaviors so the internal movement is neither too aggressive nor too passive.
What usually matters in practice is:
- How water enters the tank space
- Whether movement is guided or left to spread naturally
- How quickly flow loses directional force
- How outlet conditions pick up stabilized water
These small differences inside the tank can influence how the entire loop behaves once connected.
How CFD Simulation Helps Improve Flow Behavior Inside Industrial Tanks
In design work related to water circulation systems, internal movement inside a tank is often difficult to judge only from geometry. Flow does not always behave in a straight or predictable way once it enters a confined space.
CFD simulation is used to give a visual reference of how water may move under different operating conditions. It does not change the system itself, but it helps reduce uncertainty in how flow behaves once the structure is built.
A Decoupling Tank Factory may use this type of analysis during early design stages to check whether flow tends to concentrate, swirl, or slow down too abruptly in certain areas.
Typical points observed in simulation work include:
- Whether inlet flow spreads too directly into the outlet zone
- Where movement slows down inside the chamber
- How strongly mixing zones form in confined spaces
- Whether flow paths remain balanced or become uneven
The goal is not to create a fixed pattern, but to avoid unexpected behavior after installation.
What Engineers Should Consider When Planning Custom Buffer Tank Designs
When a buffer tank is planned for a real system, the design rarely follows a single fixed template. Each installation has its own layout constraints, flow behavior, and operating rhythm.
In many cases, engineers working with a Decoupling Tank Factory focus less on the tank itself and more on how it fits into the surrounding piping structure. Small changes in position or connection direction can influence how the entire loop behaves.
Some practical considerations usually include:
- Space available in mechanical rooms or plant areas
- Direction of incoming and outgoing lines
- Alignment with pump behavior and system circulation paths
- Maintenance access after installation
It is common that design decisions are adjusted several times before final placement is confirmed, especially when multiple loops interact within the same system.
How Buffer Tanks Integrate Into Primary Secondary Piping Architectures
In systems where multiple circulation loops exist, piping is often divided into different functional sections rather than one continuous path. Buffer tanks are placed in between to reduce direct interaction between these sections.
A Decoupling Tank Factory typically produces tanks that act as a neutral zone in this arrangement. The tank does not force flow in a specific direction but allows movement to transition between circuits.
Situation Without buffer tank With buffer tank Loop interaction Direct influence between circuits Reduced direct interaction Flow transition Immediate change response Gradual transition System behavior More sensitive to load shifts More tolerant to variation In real layouts, this structure helps reduce the feeling that one loop is constantly reacting to another. Instead, each part of the system behaves with more separation, while still remaining connected through a shared medium.
The overall effect is not about increasing capacity or intensity, but about reducing unnecessary interaction between different operating sections.
In many practical installations, system behavior tends to become clearer only after the loop has been in operation for a period of time. Interactions between different circulation paths are not always fully visible at the design stage, so layout decisions are often refined based on how the system responds under real conditions.
In water-based networks, buffer and separation structures mainly influence how different parts of the system interact rather than changing the function of individual equipment. Their role is usually reflected in how smoothly or independently each loop can operate within the same framework.
Because operating conditions can vary from one project to another, leaving some flexibility in early planning often helps with later adjustments. This approach allows the system to adapt more naturally when flow patterns or load behavior shift over time.
-
Water Meter Brackets Used in European Plumbing Installations
May 22, 2026
Introduction
Water meter installation systems vary across Europe, but mounting brackets play an important role in ensuring stable and safe installations. A properly designed water meter bracket helps simplify installation, improve system stability, and reduce maintenance issues.
Common Water Meter Bracket Designs in Europe
European plumbing systems usually use three types of brackets:
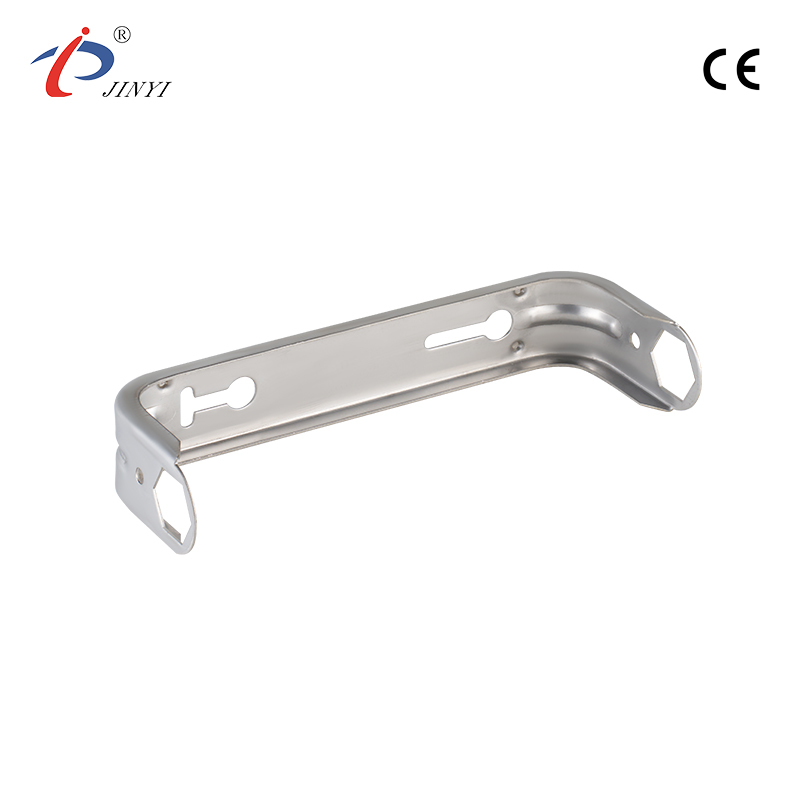
1. Wall-Mounted Brackets
These brackets are fixed to walls and support the water meter in residential installations.
Advantages: - Easy installation - Stable structure - Suitable for apartments and houses
2. Cabinet Mounting Brackets
Many buildings use water meter cabinets or boxes. Brackets inside the cabinet help secure the meter and maintain pipe alignment.
3. Adjustable Brackets
Adjustable brackets are designed to support different water meter sizes. They are commonly used by installers who need flexible installation solutions.
Materials Used in Europe
Typical materials include: - Stainless steel - Galvanized steel - Reinforced plastic
Plastic brackets are lightweight and cost-effective, while stainless steel brackets offer higher durability.
Why Installation Accessories Matter
Even though water meter brackets are small components, they improve: - Installation efficiency - Pipe stability - Maintenance convenience
For plumbing distributors, supplying reliable installation accessories can significantly improve customer satisfaction.
Product page: yh-jinyi.com/product/bracket-of-water-meter
Email: [email protected]
Phone: +86-13750801289
-
How Does China Pipe Strap Work in Pipe Support Systems
May 18, 2026
Pipes rarely stay stable on their own once they are installed across walls, ceilings or frames. Movement from equipment vibration, fluid flow, or simple structural gaps can slowly affect alignment. That is why fastening parts are introduced into the system.
China Pipe Strap is one of the common components used to hold pipelines against a fixed surface. It does not change the pipe itself, but it controls how the pipe behaves once it is placed in a structure. The idea is simple: keep the pipe where it should be, without stressing the pipe wall.
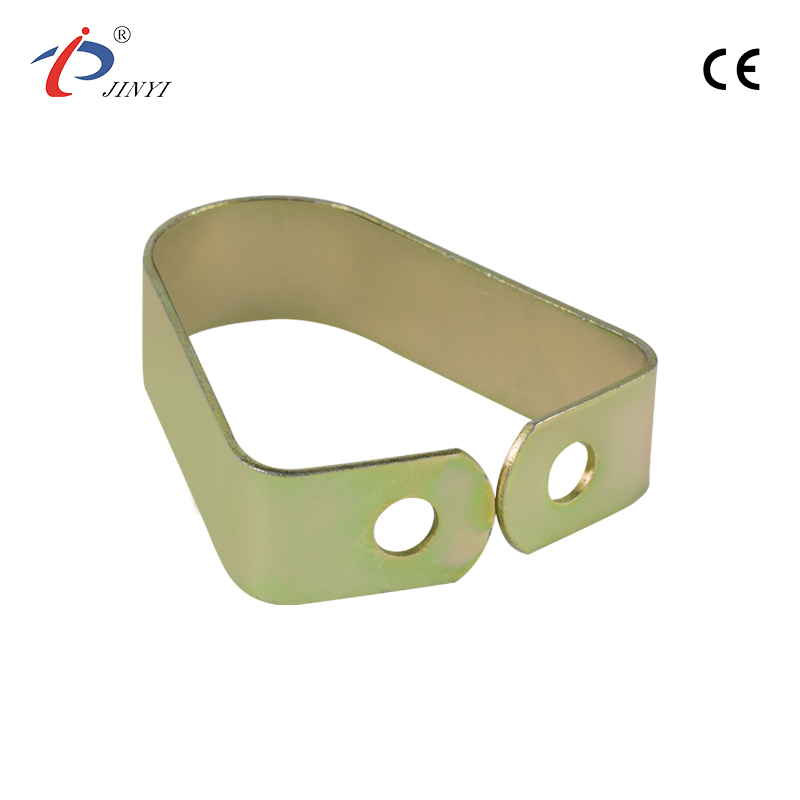
What Is a China Pipe Strap and How It Supports Pipe Systems in Real Installations
A China Pipe Strap is usually shaped as a curved or semi-closed metal band. It wraps around the pipe and is fixed to a surface using screws or bolts.
In actual installations, it often appears in places like ceiling pipe runs or wall-mounted lines where space is limited.
Instead of carrying load like a bracket system, it mainly works by holding position. Once tightened, the pipe sits inside the strap and stays aligned with the layout path.
Typical functions include:
- Keeping pipe from shifting sideways
- Holding pipe close to mounting surface
- Reducing movement caused by vibration
The performance depends less on appearance and more on how tightly it matches the pipe size.
Which Materials Are Commonly Used and How They Affect Long Term Use
Different materials behave differently once exposed to real environments. In pipe fixing systems, this difference becomes more obvious over time.
Material type Practical behavior Common use condition Carbon steel Stable but needs surface protection Indoor or covered systems Stainless type Holds shape under moisture exposure Humid or exposed locations Coated steel Balanced protection with surface layer Mixed environments Material choice is usually not about appearance. It affects how long the strap keeps its shape and whether surface wear appears early.
In some installations, even small differences in material thickness can change how tightly the pipe sits inside the strap.
How China Pipe Strap Is Manufactured from Steel Sheet to Finished Hardware Product
The production process starts from flat steel material. It is not complex in concept, but each step affects final fitting accuracy.
First, the sheet is cut into required strips. After that, forming equipment bends it into curved shapes that match pipe profiles. Holes are added for fastening points, allowing bolts to pass through during installation.
Then the surface is treated to reduce direct exposure to air and moisture. This step often decides how the product behaves in different environments.
Before packing, simple checks are done on shape consistency and connection alignment. If the curve is slightly off, installation will feel uneven later.
Why Surface Coating Matters in Outdoor and Humid Environments
Once installed in open or humid conditions, metal surfaces start interacting with the environment immediately. This is where coating becomes important.
A coated China Pipe Strap does not change the pipe function, but it changes how the strap surface reacts over time.
Coating mainly works by:
- separating metal from direct moisture contact
- slowing down surface change caused by air exposure
- keeping contact surface smoother during installation
In real use, straps without proper surface treatment often show early surface marks, especially around edges or bolt areas. These small changes can affect how stable the fastening feels during maintenance cycles.
How to Select Pipe Strap for Different Pipe Sizes Without Installation Issues
Pipe size looks like a simple parameter, but in real installation it often decides whether the fastening feels stable or slightly loose after tightening. A strap that is too wide creates movement space, while a tight one can stress the pipe surface.
Selection usually starts from the actual outer diameter rather than nominal size. On site, pipes are not always perfectly uniform, especially after insulation or coating is added.
A practical selection approach often considers:
- actual pipe outer dimension after finishing work
- allowance for thermal expansion space
- whether lining material is needed for surface protection
- consistency across repeated installation points
Small deviations in fit can show up later as noise, vibration marks, or uneven contact pressure. That is why matching is not treated as a purely theoretical step.
Where Pipe Straps Are Commonly Used in HVAC Plumbing and Industrial Projects
In real layouts, pipe straps are rarely used in isolation. They appear as part of a larger routing system where pipes need to follow walls, ceilings, or structural frames.
Common placement conditions include:
- ceiling mounted pipe lines running along beams
- vertical wall fixed plumbing routes
- equipment-connected piping sections with vibration
- bundled pipe runs where spacing needs control
In HVAC environments, straps are often spaced along long straight runs to maintain alignment. In plumbing systems, they help prevent pipe sagging over distance. Industrial setups tend to use them where vibration or repeated movement is expected.
The role is less about holding weight and more about controlling position along a designed path.
How Installation Methods Influence Stability of Pipe Strap in Pipe Fixing Systems
Installation method has a direct effect on how the strap behaves after tightening. Even with the same material, different fixing approaches can lead to different stability levels.
Installation factor Practical effect on system Tightening force control Affects pipe contact pressure and movement allowance Mounting surface condition Influences long term grip stability Spacing between supports Changes pipe deflection behavior Alignment during fixing Impacts stress distribution along pipe line A common issue in practice is uneven tightening. When one side is fixed tighter than the other, the pipe may shift slightly under vibration. Another factor is mounting surface flatness, which can reduce effective contact area if not properly prepared.
Installation is usually not treated as a single step, but as a sequence that affects final behavior.
What Causes Pipe Strap Loosening and How to Reduce Risk During Installation
Loosening does not usually happen immediately after installation. It often develops gradually under repeated vibration, thermal movement, or small shifts in the supporting structure.
Typical influencing factors include:
- continuous vibration from connected equipment
- insufficient tightening control during installation
- mismatch between pipe diameter and strap curvature
- uneven load distribution along the pipe run
Once loosening begins, the pipe may start to shift slightly within the strap. Over time, this can lead to noise or visible movement during operation.
Reducing this risk often depends on consistent installation practice rather than a single adjustment point.
In practical manufacturing and supply discussions, product consistency and installation adaptability are often considered together. In this context, production experience and process control from Yuhuan JINYI Hardware Co.,Ltd. is typically associated with maintaining stable forming and fitting behavior across different pipe strap specifications.
-
Why Is Choosing the Right Wholesale Floor Drain So Important for Different Building Projects
May 15, 2026
Picking a drainage part is rarely just a size match. In real projects, the floor layout, daily water use, and cleaning habits all affect how well the system works. A suitable Wholesale Floor Drain can help reduce slow drainage, keep maintenance simpler, and avoid small issues turning into repeated trouble.
Different spaces ask for different things. A bathroom may need quiet, steady flow. A kitchen may deal with more residue and faster use. A basement may have its own moisture pattern. That is why the choice should follow the space itself, not just the product appearance.
When the drain fits the project from the start, installation feels smoother and later adjustments are less likely. That is often where practical value shows up.
What Should Be Considered When Selecting a Wholesale Floor Drain for Different Building Environments
Every building area works in its own way. A drain used in a home restroom will not face the same conditions as one used in a hotel corridor or a commercial wash area. For that reason, the surrounding environment should guide the selection first.
A few points usually deserve attention:
- How often water reaches the floor area
- Whether the space is cleaned often
- How much space is available under the floor
- Whether odor control matters in daily use
- How easy it is to reach the drain for cleaning
A Wholesale Floor Drain that suits a dry guest area may not feel right in a busy service zone. The more active the space, the more attention should go to flow, access, and upkeep. In quieter areas, compact design and simple installation may matter more.
The right match is usually the one that works with the room instead of asking the room to adapt around it.
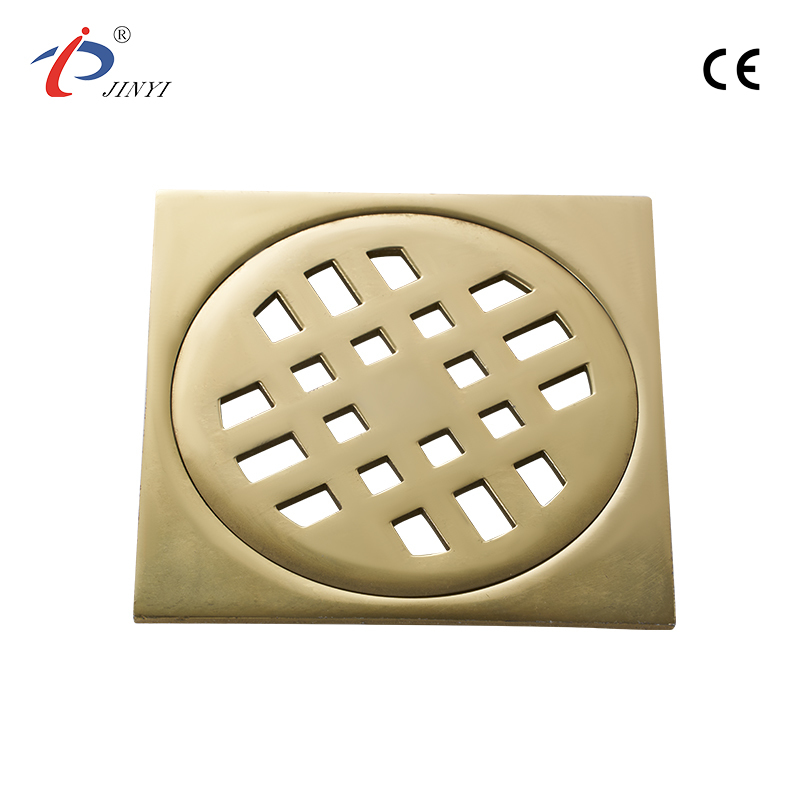
How Does Floor Drain Structure Influence Water Flow Performance in Daily Use Systems
The internal shape of a drain affects the way water moves through it. If the path is too tight or has awkward turns, water may slow down and small debris can settle more easily. A smoother path often gives the water a clearer way out.
Surface opening design also plays a role. Wider openings can help water enter more freely, while a more controlled structure may be useful where hair or small particles are a concern. The point is not to make every opening larger. The point is to make the design fit the real use case.
Some parts that often change the result include:
- The shape of the inner passage
- The way the cover sits on the body
- Whether the core can be removed for cleaning
- How well the outlet lines up with the floor pipe
In a Wholesale Floor Drain, structure is not just a technical detail. It can shape how the drain behaves after daily use starts, which is where many product differences become clear.
Which Materials Are Commonly Used in Wholesale Floor Drain Production and How They Perform in Moist or Corrosive Conditions
Material choice affects how a drain holds up over time. Moist spaces, regular cleaning, and contact with mild cleaning agents can all change how a product ages. Some materials stay steady in these settings, while others are chosen more for light weight or easy handling.
Material type General use feeling Practical notes Metal-based body Firm and stable Often chosen for regular wet use Polymer-based body Light and easy to handle Can suit simple installation needs Mixed material build Balanced feel Depends on the actual blend For a Wholesale Floor Drain, the material should match the room’s condition and the cleaning routine, not only the budget. A space that stays damp for long periods may need a more stable surface and a body that handles moisture well. A lighter solution may work in places where handling and replacement are simpler concerns.
The more closely the material fits the setting, the more natural the product tends to feel in use.
Why Do Some Floor Drains Reduce Odor More Effectively in Low Water Flow Conditions
Odor control often depends on how well the drain keeps a barrier between indoor space and the pipe system. In areas where water flows frequently, that barrier is naturally refreshed and stays more stable. In places with lighter or occasional use, the situation is different, and the sealing condition can gradually become less consistent if the structure is not designed for it.
This is why sealing methods can behave differently in real use. Some rely on a water layer that needs regular replenishment. Others use a mechanical closing structure that reacts when there is no flow. Each approach responds in its own way depending on how often the space is used and how stable the surrounding conditions are.
Odor performance is usually influenced by several practical factors working together, such as how stable the sealing element remains over time, how often fresh water passes through the system, whether air pressure in the space changes during daily use, and whether small residues collect near the opening. None of these works alone, but together they shape the overall result.
A Wholesale Floor Drain used in low flow environments needs to account for these conditions. In quieter spaces, the behavior of the drain is less about constant water movement and more about how well the structure maintains balance when there is little activity.
How Does a Dry Seal Floor Drain Compare With a Water Seal Structure in Practical Applications
Drainage systems usually rely on a separation layer between indoor air and the pipe network below. The way this separation is maintained can differ depending on structure, and in real use, the difference becomes more noticeable in spaces with uneven water usage.
A water seal structure depends on a retained water layer. When that layer stays stable, it forms a simple barrier. In practice, this works better in places where water flows regularly, since the water level is naturally refreshed.
A dry seal structure behaves differently. Instead of relying on stored water, it uses a mechanical closure that reacts when water is not flowing. When the system is idle, it returns to a closed state, which makes it less dependent on usage frequency.
In actual projects, the choice is often shaped by daily conditions rather than theory alone. A Wholesale Floor Drain may use either structure depending on how the space is used and how often maintenance can be expected.
What Design Features Help Reduce Clogging in High Traffic Spaces Like Kitchens and Hotels
In busy areas, drainage systems rarely deal with clean water alone. Small particles, grease residue, and frequent flow changes all influence how easily the system stays open over time. Because of that, internal design details become more noticeable during long-term use.
Some design choices that often help reduce clogging include:
- A removable inner section that allows direct cleaning access
- A wider internal passage that reduces early blockage points
- A surface opening layout that slows down debris entry before deeper flow
- A structure that avoids sharp internal corners where residue tends to settle
Beyond structure, daily use conditions also matter. In kitchens or hotel service areas, cleaning routines are usually frequent but not always immediate, so the system needs to tolerate short periods of buildup without losing function.
A Wholesale Floor Drain used in these environments is not only judged by how it works on installation day, but more by how it behaves after repeated cycles of use and cleaning.
How Can Wholesale Buyers Evaluate Floor Drain Durability for Long Term Project Planning
Durability is not always visible at first glance. In project planning, it is usually closer to how the product behaves after repeated exposure to water, cleaning agents, and physical handling during maintenance.
Instead of focusing on appearance alone, buyers often look at how stable the structure remains after repeated use. Parts that stay aligned and do not loosen easily tend to support more consistent performance.
A few practical points often used in evaluation:
- Whether removable parts stay stable after repeated installation and removal
- Whether surface condition changes noticeably after regular cleaning
- Whether internal structure keeps its alignment under continuous use
- Whether water flow remains steady after extended use cycles
Practical check What it usually reveals Reassembly behavior Ease of maintenance over time Surface response Resistance to routine cleaning wear Structural fit Long term stability of components Flow consistency Overall system behavior in daily use A Wholesale Floor Drain for long term planning is often selected based on these practical signals rather than only technical descriptions.
Which Installation Details Have the Most Impact on Floor Drain Sealing and Leakage Prevention
Installation quality often affects drainage performance just as much as product design. Even a well structured unit can show weak points if the surrounding setup is not handled carefully.
One key area is the contact between the drain body and the floor surface. If the connection is not even or tightly supported, small gaps can form over time, especially after repeated water exposure.
Another important factor is pipe alignment. When the outlet does not match the drainage pipe direction properly, water flow may become uneven, which can gradually affect sealing stability.
Waterproof layer handling is also critical. If the membrane is not properly integrated with the drain edge, moisture can slowly move into surrounding layers, particularly in areas with frequent washing or rinsing.
In practical installation work, a Wholesale Floor Drain depends heavily on how these small but important details are managed on site. The product design provides the base, but the final performance is often shaped during installation.
-
Wholesale Water Meter Brackets: MOQ, Lead Time and Pricing Explained
May 13, 2026
Buying water meter brackets in bulk is straightforward — once you know the right questions to ask. Whether you're a European distributor sourcing for a full season or a plumbing wholesaler trialling a new product line, understanding MOQ, production timelines, and pricing structures will help you negotiate better deals and avoid costly surprises.
This guide covers everything you need to know when working with a Chinese OEM manufacturer like JINYI.
What Is MOQ and Why Does It Exist?
MOQ stands for Minimum Order Quantity — the smallest number of units a manufacturer will produce in a single order. MOQs exist because tooling setup, material procurement, and production scheduling all carry fixed costs that need to be spread across a sufficient number of units to make production economically viable.
For water meter brackets, MOQ typically varies depending on:
- Product complexity:simple stamped brackets have lower MOQs than multi-piece adjustable assemblies
- Material and surface treatment:powder-coated or stainless steel finishes may require larger batch runs
- Customizationlevel: standard catalog models allow lower MOQs than fully custom OEM designs
At JINYI, we offer flexible MOQ arrangements — small trial orders are welcome for buyers testing a new line, while larger volume orders benefit from tiered pricing. Contact our sales team to discuss your specific requirements.
Typical MOQ Ranges for Water Meter Brackets
Product Type
Standard MOQ
Custom/OEM MOQ
Standard catalog models (JY-7001~7005)
100-200 pcs
200–500 pcs
Powder-coated / coated variants (JY-7008)
100–200 pcs
300–500 pcs
Full custom OEM (new tooling)
500+ pcs
Negotiable
Lead Times: What to Expect
Lead time is the period from order confirmation (and deposit payment) to goods ready for shipment. For water meter brackets, typical lead times are:
- Standard in-stock models:7–15 business days
- Made-to-order standard models:25–35 business days
- Custom OEM with new tooling:35–50 business days (includes tooling development and sample approval)
Factors that can affect lead time include raw material availability, surface treatment queue (especially for galvanised or epoxy-coated finishes), and pre-shipment inspection requirements. Always confirm lead time in writing when placing your order, and build in buffer time for peak seasons such as Q3–Q4 when factory capacity is high.
Pricing Structure: How It Works
Water meter bracket pricing from a Chinese OEM factory is typically quoted as FOB (Free On Board) from the nearest port — in JINYI's case, Ningbo or Shanghai. The unit price depends on:
- Order volume:higher quantities unlock lower unit prices through tiered pricing
- Material specification:galvanised steel is most cost-effective; stainless steel commands a premium
- Surface finish:plain, powder-coated, and electroplated finishes carry different processing costs
- Packaging requirements:neutral bulk packing vs. branded retail packaging affects per-unit cost
- Tooling fees:one-time cost for custom moulds or jigs, usually amortised over the first production run
As a general benchmark, standard galvanised water meter brackets from a reputable Chinese factory range from USD 1.50 to USD 6.00 per unit at mid-volume quantities, depending on size and complexity. Request a formal quotation for accurate pricing based on your specific requirements.
Payment Terms
Standard payment terms with JINYI follow common industry practice:
- 30% depositupon order confirmation
- 70% balancebefore shipment (or against copy of Bill of Lading for established accounts)
- Letter of Credit (L/C)available for larger orders — discuss with our sales team
For new buyers, T/T (bank transfer) is the most common method. We also accept trade finance arrangements for qualified importers.
Quality Control and Pre-Shipment Inspection
Before goods leave the factory, all JINYI water meter brackets go through:
- Dimensional checksagainst approved drawings
- Surface treatment inspectionfor coating thickness and adhesion
- Load and fit testingon representative samples
- Packaging integrity check
Third-party inspections can be arranged at the buyer's request. Having a pre-shipment inspection report is particularly useful when importing to markets with strict compliance requirements.
Ready to Place an Order?
Whether you need 100 pieces or 5,000, JINYI's sales team can prepare a detailed quotation within 24–48 hours. Provide us with your required model, quantity, material specification, and destination port, and we'll handle the rest.
yh-jinyi.com/product/bracket-of-water-meter
[email protected] | +86-13750801289
-
How Does a Shower Tray Support Frame Improve Bathroom Installation and Stability
May 11, 2026
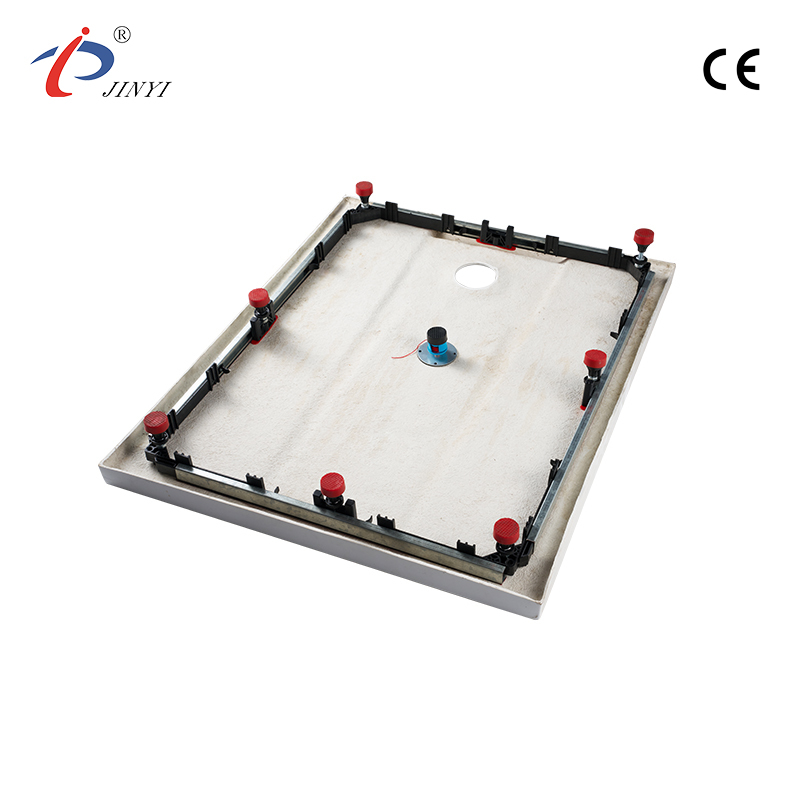
Shower tray installation has gradually moved toward support systems that focus on steadiness, alignment, and easier on-site handling. In many bathroom projects, what sits underneath the tray matters just as much as the visible surface. A base that is uneven or poorly supported can affect how the tray sits, how it drains, and how it holds up over time.
Within that setting, the Shower Tray Support Frame has become a practical part of installation planning. It is not only there to carry weight. It also helps the tray stay in position, works with the floor condition, and supports the drainage layout. For installers and project planners, that makes the support structure one of the points worth checking early rather than late.
What is a Shower Tray Support Frame and how it changes modern shower installation methods
A Shower Tray Support Frame is a structural base placed under the shower tray to help hold it steady during installation and daily use. Instead of relying only on traditional bedding materials, it gives the tray a clearer structure to sit on. That can make the whole setup feel more controlled from the start.
In practice, the frame changes the way the tray is installed. The position is easier to manage, the height can be adjusted with more precision, and the tray is less dependent on manual shaping at the site. When the floor is not fully even, this kind of support can make the process smoother and reduce the back-and-forth that often comes with traditional base preparation.
Which material choices are commonly used in Shower Tray Support Frame production and what they affect
Different materials give the frame different behavior. Some are chosen for light handling and moisture resistance, while others are used when a firmer structure is needed. The material choice affects how the frame feels during installation, how it reacts to load, and how well it works with the rest of the bathroom build.
Material Type Practical Characteristic Typical Effect Polymer-based Lightweight and moisture aware Easier handling during installation Metal-based More rigid structure Strong support behavior Hybrid design Balanced construction Flexible fitting response What matters in real use is not just the material itself, but how it behaves once the tray is in place. A frame needs to stay stable, resist moisture exposure, and keep its shape under repeated use. That is why material choice often becomes part of the early discussion rather than an afterthought.
How drainage positioning helps reduce installation alignment issues
Drainage alignment is one of the parts that can create trouble if the setup is not handled carefully. Even a small shift in position can affect the way water moves through the tray. A support frame helps by keeping the tray steady while the drainage components are being connected.
- It reduces unwanted movement during setup
- It helps keep the tray level while the drain is aligned
- It gives room for small positioning changes before final fixing
- It lowers the chance of stress at the connection point
In real installation work, that kind of stability makes a difference. The tray is easier to place, the drainage parts are easier to line up, and the installer has a little more control before everything is secured.
Why adjustable legs in a Shower Tray Support Frame matter for different floor height conditions
Floor surfaces are not always as even as they should be. In renovation projects especially, the base may have slight height changes that are hard to ignore once the tray is in position. Adjustable legs help deal with that by giving the installer a way to fine tune the height at different points.
Instead of forcing the floor to match the tray, the frame can be adjusted to suit the floor conditions. That makes it easier to keep the tray level without extra correction work. When the surface has small irregularities, the frame can be brought into line step by step until the tray sits properly and feels stable.
Condition Frame Adjustment Response Slight floor unevenness Minor individual leg adjustment Moderate level difference Multi-point adjustment across frame Irregular surface areas Combined adjustment and repositioning A Shower Tray Support Frame is useful here because it gives a more practical way to handle real site conditions. It allows the installation to adapt without making the process overly complicated.
How weight distribution works on uneven bathroom floors during installation
In real installation conditions, floors are not always perfectly even, especially in renovation spaces where the original base has already aged or shifted slightly over time. When a tray is placed directly on such a surface, some areas may end up carrying more pressure than others. That uneven load is usually what leads to a feeling of instability when stepping into the shower area.
A Shower Tray Support Frame changes that contact pattern by spreading the load through multiple support points instead of relying on one continuous surface. The tray is held in a way that the weight is shared more evenly, even when the floor beneath has small variations. This does not eliminate the floor condition itself, but it helps the tray behave in a more controlled way once installed.
How Shower Tray Support Frame supports long term stability and reduces movement under daily use
After installation, a shower tray is exposed to repeated stepping, water exposure, and temperature changes. Over time, these conditions can cause slight movement if the base is not consistent. The issue is usually not obvious at the beginning, but it can show up later as minor shifting or a less solid feel underfoot.
A Shower Tray Support Frame helps reduce that tendency by keeping the tray supported across a fixed structure rather than a single bedding layer. Because the support points are defined, the tray tends to stay in position more consistently during daily use. In practice, this means the installation feels more settled over time, with less gradual loosening of position.
What installation steps are involved in bathroom renovation projects
In renovation work, the installation process often has to adapt to existing conditions rather than ideal ones. The frame is usually placed first so that the installer can work from a stable reference point. Once positioned, small adjustments are made until the frame sits evenly relative to the floor condition.
After that, the tray is carefully placed on top and checked for alignment. Drainage connection is completed while the position is still adjustable, which allows minor corrections before everything is fixed in place. The process is generally more controlled because the support structure gives a clearer base to work from, even when the original floor is not fully predictable.
How Shower Tray Support Frame compares with traditional bedding methods in installation efficiency and structure behavior
Traditional bedding methods rely on forming a base layer directly on the floor and shaping it manually before the tray is installed. That approach depends heavily on how evenly the material is applied and how well it sets in place. Small differences in application can lead to variations in tray positioning.
A frame-based system works differently because the support structure is already defined before the tray is placed. Instead of shaping material on site, the installer adjusts the frame and then fits the tray onto it.
Aspect Frame-based support Traditional bedding approach Base formation Pre-structured support points Manually shaped base layer Adjustment process Controlled mechanical leveling Dependent on material handling Installation behavior More consistent positioning Varies with site conditions On-site flexibility Easier to adapt to uneven floors Requires more correction work In practical use, a Shower Tray Support Frame tends to reduce the amount of rework caused by uneven surfaces, while traditional methods rely more on achieving accuracy during the initial base formation stage.
-
Water Meter Bracket Supplier in China: What to Look for Before You Order
May 09, 2026
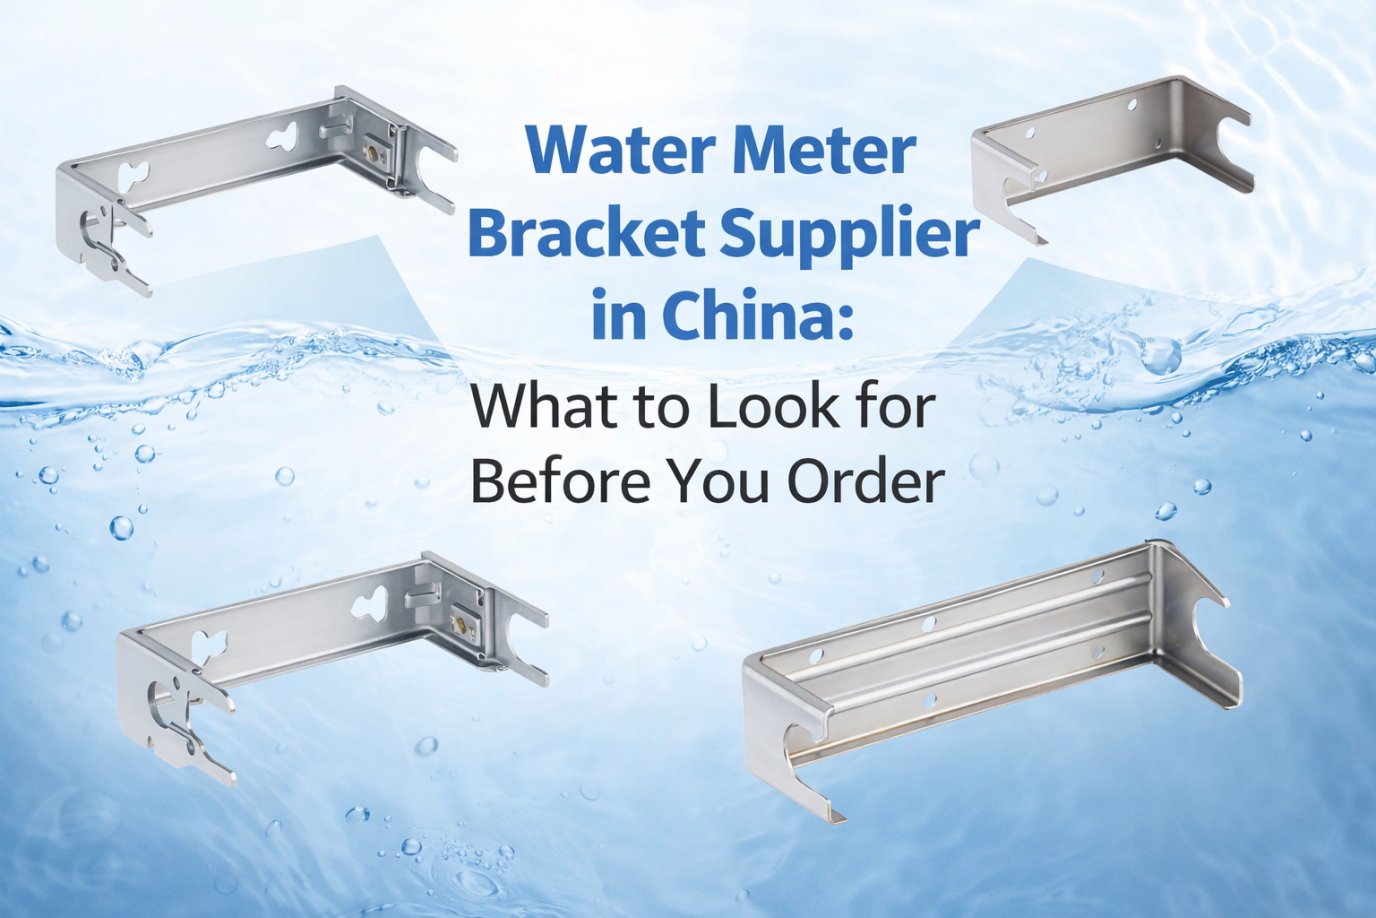
China is the world's largest producer of plumbing hardware, and water meter brackets are no exception. For European buyers, sourcing from a Chinese supplier can deliver significant cost advantages — but only if you choose the right partner. The wrong supplier means delayed shipments, quality inconsistencies, and certification headaches that cost far more than you saved on unit price.
This guide gives you a practical framework for evaluating Chinese water meter bracket suppliers before committing to an order.
1. Verify Manufacturing Capability — Not Just Trading
One of the most common pitfalls for first-time importers is buying from a trading company that claims to be a manufacturer. Trading companies add margin, have less control over production quality, and cannot accommodate custom requests the way a real factory can.
When evaluating a supplier, ask for:
- Factory address and registration documents
- Photos or a video tour of the production floor
- Details of in-house equipment (stamping, bending, welding, coating lines)
- The option to conduct a factory audit (in person or via a third party)
JINYI is a direct manufacturer based in Yuhuan, Zhejiang Province — China's hardware manufacturing hub — with full in-house production capacity since 1995. We welcome factory audits and can provide complete documentation of our facilities.
2. Check Certifications and Quality Standards
For the European market, quality documentation is not optional. At a minimum, your supplier should be able to provide:
- ISO 9001 quality management certification
- Material test reports (mill certificates) for steel or stainless steel used
- RoHS compliance documentation if required for your market
- Product-level certifications or test reports relevant to water system components
Ask specifically whether their certifications are current and whether the scope covers the product category you're buying. A certificate that covers clamps may not automatically cover water meter brackets.
3. Assess Product Range and Customization Capability
A supplier with a broad, well-documented product range is more likely to have genuine manufacturing depth. Look for:
- Multiple model variants covering different pipe sizes (DN15–DN50)
- Different material options (galvanised, stainless steel, coated)
- Evidence of OEM/custom work — existing custom models in their catalog
- In-house engineering or design support for new product development
JINYI's water meter bracket range includes seven standard models (JY-7001 through JY-7008) covering the most common European installation requirements, with OEM capability for custom dimensions, finishes, and private label packaging.
4. Evaluate Communication and Responsiveness
Poor communication is one of the biggest operational risks in international sourcing. Before placing an order, test your supplier's responsiveness:
- Send a detailed enquiryand note how long they take to reply and how thoroughly they answer
- Ask a technical questionabout a specific product specification to gauge engineering knowledge
- Request a sample— their handling of sample requests reveals a lot about their process
- Clarify payment and delivery termsand check for clarity and professionalism in their response
A supplier who is vague, slow, or uses heavily templated responses during the sales stage will not improve once you've paid a deposit.
5. Review Export Experience to Europe
Shipping to Europe involves specific logistics, documentation, and compliance requirements. Your supplier should be familiar with:
- Incoterms (FOB, CIF, DAP) and which terms suit your logistics setup
- Export documentation: commercial invoice, packing list, bill of lading, certificate of origin
- Customs HS codes for water meter brackets and associated tariff rates
- Any applicable CE marking or EN standard requirements for your target market
JINYI has been exporting to European markets for many years. Our team is familiar with European import documentation requirements and can work with your freight forwarder to ensure smooth customs clearance.
6. Start with a Sample Order
No matter how convincing a supplier's presentation is, always request physical samples before committing to a production order. A sample order allows you to:
- Verify dimensions against your specification
- Assess surface finish quality and coating durability
- Test fit with your existing meter and pipework configurations
- Evaluate packaging quality for retail or installation use
At JINYI, sample orders can typically be arranged within 7–15 business days. Sample costs are credited against your first production order for qualified buyers.
The JINYI Difference
Yuhuan JINYI Hardware Co., Ltd. has been supplying hardware to international markets since 1995. Our water meter bracket range is in active use across Europe, and we work directly with distributors, wholesalers, and OEM brands to deliver:
- Consistent quality backed by certifications and patents
- Flexible MOQ for both trial and volume orders
- Full OEM capability including custom design, branding, and packaging
- Transparent communication and reliable lead times
yh-jinyi.com/product/bracket-of-water-meter
[email protected] | +86-13750801289
-
How Does a Water Meter Bracket Keep Water Systems Stable and Accurate
May 08, 2026
In a water system, small parts often carry more responsibility than they first appear to. A meter may do the measuring, but it still needs steady support around it. That is where the Water Meter Bracket comes in. It keeps the meter in place, helps limit movement from the pipe line, and makes the whole setup easier to keep in order over time. When the support is well matched to the system, the meter sits more naturally in the line and the chance of trouble from strain or shifting is lower.
What Is a Water Meter Bracket and How It Supports Stable Water Measurement in Real Systems
A Water Meter Bracket is a support piece used to hold the meter in a fixed position between the inlet and outlet pipes. Its job is simple on the surface, but in practice it does more than just carry weight. It helps keep the meter lined up with the pipe run, so the connection stays steady instead of being pulled off balance by nearby movement.
In real installations, the meter can be affected by pipe expansion, small vibrations, and pressure changes moving through the line. A solid support helps the meter stay where it should be, which makes the overall setup feel more stable and easier to manage.
Functional roles in practical use
- Keeps the meter aligned with the pipe direction
- Helps reduce uneven force at the joints
- Supports a steadier flow path through the meter section
- Makes later servicing a little easier because the layout stays clear
In many setups, the support around the meter matters just as much as the meter itself.
Why Water Meter Alignment Depends on Proper Water Meter Bracket Installation Practices
Alignment is one of those details that can be easy to overlook during installation, yet it has a direct effect on how the system behaves later. If the pipes do not meet the meter in a clean line, the joints can end up carrying more strain than they should. That strain may not show itself right away, but it can slowly affect the connection points and make the assembly feel less stable.
A proper support helps the parts sit in a straight, natural position. That gives the pipe line a better chance to stay steady under normal use, instead of being forced into a shape it does not naturally take. It also leaves less residual tension when the system is opened again for inspection or replacement.
How Water Meter Bracket Design Helps Reduce Pipe Stress and Maintain Long Term Accuracy
Pipes are always moving a little. Heat, pressure, and nearby vibration can all cause small shifts, even when the system seems still from the outside. If that movement reaches the meter directly, the result can be extra load at the connection points and a less stable working condition.
Stress reduction mechanism
- Spreads pipe weight across support points
- Limits bending force on the meter body
- Helps keep joint strain from building up
- Holds the meter and pipes in a more fixed relationship
Installation condition Effect on piping system Role of bracket Unsupported meter More strain at joints No support control Partial support Uneven force along the line Limited stability Proper support More even load sharing Helps hold position and reduce stress When the forces move through the system in a calmer way, the meter has a better chance of staying in a stable working condition.
How Water Meter Bracket Structure Influences Long Term System Reliability and Maintenance Needs
The shape and build of the support affect more than the first installation. Over time, the structure can influence how much the setup shifts, how easy it is to reach for service, and how often the parts need adjustment. A frame that stays firm gives the rest of the assembly a more dependable base.
If the support holds its shape well, the pipes are less likely to drift out of line during use. That means fewer small corrections later and a cleaner path when the meter needs attention. A practical Water Meter Bracket does not call attention to itself; it simply helps the system stay steady and easy to work with.
How to Choose a Water Meter Bracket Based on Pipe Size Pressure and Installation Conditions
Selecting a support structure for a meter connection is usually guided by the physical conditions of the piping system rather than appearance or form alone. Different pipe sizes create different spacing and force patterns, and internal pressure levels can influence how much movement the system experiences during operation.
In practice, a Water Meter Bracket should match the pipe line in a way that keeps the meter sitting naturally between the inlet and outlet. If the fit is too loose, small shifts may appear during use. If the fit is too tight, installation may introduce unnecessary stress into the joints. The surrounding installation environment also plays a role, since confined spaces or exposed areas can change how much protection and support the system needs.
Key selection considerations
- Pipe size compatibility
The bracket spacing and structure should match the actual pipe diameter and connection layout to avoid forced alignment.
- Internal pressure behavior
Systems with stronger internal flow movement may require more stable support to reduce shifting during operation.
- Installation space condition
Limited or narrow spaces require compact designs that still allow secure fixing without stressing the pipe line.
- Connection alignment requirement
The bracket should allow the meter to sit in a straight line between inlet and outlet without bending or tension.
- Environmental exposure level
Indoor and outdoor locations can influence how much structural support and protection is needed over time.
Which Materials for Water Meter Bracket Perform Well in Different Indoor and Outdoor Environments
Material choice affects how the support behaves over time, especially when exposed to moisture, temperature change, or general wear from the surrounding environment. Indoor installations usually face more stable conditions, while outdoor or semi-exposed setups tend to experience more variation in humidity and temperature.
Different materials respond differently to these conditions. Metal-based options are often used where strength is a priority, while coated or treated surfaces are used to slow down surface wear. In some cases, composite materials are considered when reducing weight or limiting corrosion response is part of the design goal.
Environment condition Common material behavior Practical consideration Indoor stable space Lower exposure to moisture changes Focus on structural fit Outdoor exposed area Higher chance of surface wear Emphasis on protective treatment Semi-covered installation Mixed exposure conditions Balance between strength and protection A Water Meter Bracket chosen with the surrounding environment in mind is less likely to require frequent replacement or adjustment.
Where Water Meter Bracket Should Be Installed to Support Easy Maintenance and System Access
Placement has a direct influence on how easy it is to work with the meter later. Even if the support itself is stable, a poorly chosen location can make inspection or replacement more difficult than expected. Ideally, the meter and its support should be positioned in a way that allows enough space for tools and hand access without disturbing nearby pipe sections.
In many installations, the goal is to keep the system accessible without exposing it to unnecessary external contact. That balance helps reduce the chance of accidental force being applied to the assembly while still allowing maintenance work to be carried out without major disruption.
A Water Meter Bracket placed with access in mind can also reduce the time needed for routine checks, since components can be reached without dismantling surrounding structures.
What Installation Tips for Water Meter Bracket Help Reduce Vibration and Improve System Stability
Vibration in a piping system often comes from normal flow changes, nearby equipment, or small structural movements in the building. Over time, these small movements can transfer into the meter area if there is no proper support control. That is where installation technique becomes important.
A steady installation approach focuses on keeping the meter and pipes in a relaxed, neutral position rather than forcing them into alignment. The support should hold the assembly without adding extra tension into the line. In many cases, allowing slight natural tolerance between components helps reduce long term mechanical stress.

![]()
- 210 Jinhai Avenue, Lupu Economic Development Zone, Yuhuan City, Taizhou City, Zhejiang Province.
- +86-576-87423248 / +86-576-87499120
- +86-17769979117 / +86-13750801289
- +86-576-87425996
- [email protected] / [email protected]

