

 русский
  Español
 -
How Does a Shower Bases Support Frame Work

Mar 16, 2026
Why a Shower Bases Support Frame Deserves More Attention Than You Think
A small piece that saves big headaches
A shower base support frame is not glamorous. It does not make glossy catalog covers or headline product launches. Yet it quietly decides whether a shower feels solid underfoot or creaks the first time someone steps in. Install the right frame, and the finished shower behaves predictably for years. Skip that step or get it wrong, and repairs, leaks, and unhappy customers show up sooner than anyone expects.
What a shower base support frame actually does
At its broadest, a support frame does three things:
- Provide stable support so the base does not flex under load.
- Distribute load across the substrate to reduce point stresses on tiles, mortar beds, and the waterproofing membrane.
- Lock in geometry, keeping the intended slope to the drain and maintaining the long-term performance of the drainage system.
A support frame turns a thin, sometimes flexible base into a predictable platform. It controls how forces travel through the floor assembly and how the base reacts to the inevitable small movements and thermal cycles that every building experiences.
Put another way: a support frame is an insurance policy against unforeseen movement. It's a low-tech item that prevents high-cost consequences.
Why stability matters more than you might assume
People use showers multiple times daily. They step, they kneel to wash a child, someone may move a heavy shampoo bottle across the base. Those everyday actions create loads that accumulate and explore any weakness in the installation.
When a base flexes:
- Tile adhesives and grout experience shear and fatigue, which leads to cracking and delamination over time.
- Drain geometry changes slightly, creating low spots where water pools instead of draining.
- Waterproofing membranes can be stressed at fixings or seams, increasing the risk of leaks.
- Noise becomes an issue as planking or hollow spaces amplify small movements into audible creaks.
These symptoms show up as callbacks: tile repairs, re-grouting, resealing, and investigations into moisture. From a project budget perspective, investing a little in proper framing saves more than the initial cost of rework.
Different frame types and where each fits
Not all frames are created equally. Picking the right style depends on the base material, the subfloor, the service access needs, and the traffic the shower will see.
Adjustable metal frames
Features:
- Threaded legs or shims for fine leveling.
- Good for uneven substrates.
- Strong and durable.
Use when:
- The substrate varies in height.
- You need precise leveling without shimming dozens of spots.
- The base is medium to heavy weight (stone resin, composite).
Preformed foam or polymer supports
Features:
- Lightweight and easy to cut on-site.
- Fast to install, often used with factory-made acrylic bases.
Use when:
- Speed is important.
- Substrate is fairly flat and not subject to large temperature swings.
- Budget and quick turnaround matter.
Welded or custom metal frames
Features:
- Custom dimensions and shapes for large-format or heavy stone bases.
- Allow integration with drains and access panels.
Use when:
- Commercial or high-traffic installations require extra robustness.
- Stone or thick solid-surface bases are used.
- Access to plumbing needs a purposeful hatch or trap cover.
Pedestal or modular raised systems
Features:
- Provide clearance for plumbing below the base.
- Allow easy access for servicing without pulling tile.
Use when:
- Raised floors or service cavities are required.
- Building design prioritizes concealed serviceability.
Choosing a frame type is a practical match-making exercise: list your constraints, then select the frame that solves them with the least compromise.
How to plan installation so the frame performs well
Plan the installation like a small engineering job. Small mistakes at this stage cause big ripple effects later.
1. Confirm the substrate condition
Measure flatness and identify where the substrate deviates from level. Fix large hollows or ridges before frame placement. A few millimeters of high or low spots matter.
2. Coordinate with the drain layout early
The frame must not obstruct the drain trap or the maintenance access. If the drain needs adjustment, do it before tiling or screw-fixing the frame.
3. Allow service clearances
Install the frame where vents, drains, or removable panels are reachable. Crowded plant rooms—or tiny bathrooms—make future service expensive.
4. Avoid placing elbows and disruptions right at the frame inlet/outlet
Turbulence and chaotic flows near the drain can defeat careful grading. Keep piping straight and accessible for inspection.
5. Use non-compressible support where recommended
Some installers try to use soft mortars as a support medium; that can compress over time. Prefer the frame's legs and rigid structural elements as the designed supports.
6. Provide an access panel or removable cover when valves or traps are expected to be checked
Don't force a tiler to break tile to reach a clog.
These steps are routine on well-run projects but get skipped when schedule pressure or cost-cutting squeezes the build. Schedule them into your project plan.
Maintenance: what to inspect and when
A support frame is mostly maintenance-light, but a few checks every year or two prevent surprises.
Routine checks:
- Inspect the base perimeter for grout gaps or tile movement.
- Ensure drain performance remains brisk; slow drainage can indicate a loss of slope or debris buildup.
- If the frame offers access, remove the hatch and inspect for settled debris or signs of corrosion.
- Check for signs of movement at fasteners or leveling points—if they are loose, tighten according to the manufacturer's guidance.
If your site experiences significant temperature swings, inspect twice a year. If it's a high-traffic public facility, increase the cadence.
Procurement checklist — what to ask suppliers and why
When buying frames, keep the conversation practical. Ask suppliers for:
- Compatibility statement with the shower base model you plan to use. A mismatch is a common cause of failures.
- Adjustment range of legs or shims (minimum and maximum) so you can accommodate the expected substrate variance.
- Material and finish details, including corrosion protection and coatings.
- Access features: size of removable panels, trap access, and vent points.
- Pressure or load ratings when dealing with heavy stone or public facilities.
- Installation guide including recommended torque values and any recommended adhesives or mortars.
- Lead times and delivery format—is the frame skidded, sectional, or welded?
- Warranty and service terms, and whether the supplier provides start-up or commissioning support.
Make all bidders respond to the same checklist so you can compare apples to apples.
Common mistakes and how to avoid them
Having seen enough projects, a short list of recurring traps helps teams avoid them.
Mistake 1: trusting a flat floor without measuring
Sometimes laborers assume a floor is flat. Measure it. If it isn't flat, rely on adjustable frames, not shims stuck in place.
Mistake 2: burying access under tile
Design so important access points remain reachable. If the trap or cleanout is inaccessible, every small clog becomes a demolition job.
Mistake 3: undersizing the frame for future loads
Know whether the base or floor may later support heavier finishes or a seat. A little margin in structural capacity avoids later retrofits.
Mistake 4: ignoring water chemistry and corrosion risk
Salt or aggressive water can degrade fasteners and frames. Match materials to the environment—or plan for sacrificial parts.
Mistake 5: over-tightening fasteners
This crushes foams or warps thin bases. Follow the manufacturer's recommended torque values.
Avoid these and much of the warranty work vanishes.
Case study — a renovation that stayed on budget thanks to the right frame
Consider a mid-scale renovation where the owner wanted a new low-profile composite base but the existing concrete subfloor had uneven areas and a slight crown near the old drain. The contractor could have ripped out the substrate and poured a new screed—a slow, dusty, and costly path. Instead they chose an adjustable metal frame with threaded leveling feet.
Process highlights:
- The frame was sized with extra adjustment range to handle the crown.
- The team installed the frame, aligned the drain collar, and confirmed slope with a simple water test.
- A removable access panel over the trap allowed the plumber to align waste without cutting tile.
- The job finished on schedule and cost less than substrate replacement. After six months the owner reported no pooling and no drafts under the threshold.
That outcome is common: frames solve tricky site conditions sensibly when used correctly.
Design tips for acoustic and thermal performance
Shower bases can be points of heat loss and sound transmission. Good frame choice helps both.
- Acoustic: Add soft pads or neoprene isolators between metal frame elements and structural substrates to damp vibrations and reduce creaks.
- Thermal: For heated floors or cold climates, consider frames with thermal breaks or insulation pads to avoid creating a cold bridge that chills the tiles.
- Composite bases: Pair with frames that allow a thin layer of insulating foam underneath without compressing it under load.
These small design choices improve occupant comfort and perceived quality.
Materials and finishes — make choices based on conditions, not habit
Common materials include galvanized steel, stainless steel, or corrosion-resistant painted carbon steel. The right choice depends on exposure.
- Stainless steel for wet, coastal, or chemically aggressive environments.
- Galvanized or coated steel for standard interior baths where water contact is limited to occasional splash.
- Polymer-based supports for quick commercial fit-outs or where weight and speed matter.
Ask suppliers for life-cycle guidance rather than marketing slogans. A real-world recommendation will consider service intervals and local conditions.
How to document and hand over installations to users and maintenance teams
A good handover reduces calls. Provide the building owner or facilities manager with:
- A short installation record including the frame model, adjustment positions, and any non-standard details.
- Photos showing how the access panels open and where the drain trap is located.
- A simple maintenance checklist (annual drain test, visual perimeter check).
- The supplier's contact and any spare-part numbers for common wear items.
This little folder avoids confusion later and helps maintenance teams act quickly.
Frequently asked questions (practical answers)
Q: Can I use mortar alone under a base instead of a frame?
A: Mortar beds work but rely on excellent substrate preparation and consistent compaction. A frame adds predictable mechanical support and simplifies leveling, especially on uneven floors.
Q: Will a frame interfere with underfloor heating?
A: Not if you coordinate locations. Some frames include insulation or thermal breaks to reduce heat loss; always check compatibility with your heating plans.
Q: Do frames require special fasteners?
A: Typically the manufacturer specifies fastener types and torque values. Use those, and avoid generic on-site substitutions without approval.
Q: How do I clean under a framed base?
A: If the design includes access panels or removable covers, cleaning is straightforward. If not, consider adding access provisions as part of the installation.
Quick reference for procurement and installation
- Measure substrate flatness and record deviations.
- Choose a frame suitable for the base material and expected live loads.
- Confirm drain alignment and include an access panel over the trap.
- Specify material and finish appropriate for the environment.
- Ensure adjustable range meets site variation with margin.
- Follow manufacturer torque and fixing recommendations.
- Commission with a drain alignment and water test before tiling.
- Provide handover documents and a short maintenance checklist to the client.
Small care, steady results
A Shower Bases Support Frame is one of those low-profile decisions that make building life smoother. It doesn't grab attention in the sales brochure, but it saves time, money, and reputation when projects go into service. Treat it like part of the structural system it is—specify it early, install it carefully, and document it for the team that will care for the building daily. The result is a shower that behaves as intended, not one that demands attention.
-
What Does a Hydraulic Separator Tank Do
Mar 13, 2026
Why a Hydraulic Separator Tank Actually Makes Plant Life Easier
Opening thought — small device, noticeable difference
You don't notice a hydraulic separator tank until the day you add one — and then you notice everything it fixes. Pumps stop fighting each other. Room temperatures stop swinging. Control valves stop hunting. That's not magic; it's hydraulics behaving better because someone gave the system a small, calm place to sort itself out.
I've seen this play out more than once: a campus with constant zone complaints, an office tower where pumps cycled oddly every time a boiler fired, a retrofit that suddenly stopped spiking differential pressures. In each case a separator smoothed things out. The device is simple. The benefits are practical. Let's talk about why, where, and how to use one without getting lost in theory.
What the separator actually does — plain language, no diagrams required
Think of the separator as a local buffer. On one side you have the plant — boilers or chillers and their pumps. On the other side you have the building distribution — pumps, zones, and valves. If those two sides are tied too tightly, a change on one side ripples through the other. The separator gives the water a quiet pool where flows can mix without forcing every pump to match every other pump's behavior.
What this buys you:
- Pumps run against more predictable flow conditions.
- Short-circuiting between circuits is reduced.
- Controls measure and react to real load changes, not hydraulic noise.
- Small amounts of air and debris can settle out in slower zones designed for that purpose.
It's not a cure-all. It's a practical fix for a very common class of problems.
How that smoothing helps day-to-day operations
In the plant I used to service, operators hated one thing above all: nuisance alarms at odd hours. After a separator was installed, the alarm count dropped. Why? Because the separator reduced transient shocks and pressure swings that had been tripping sensors.
On the shop floor that means fewer emergency callouts, fewer motor starts and stops, and less time chasing false problems. For an operator, a calmer control panel is a better night's sleep. For the owner, calmer operation means fewer repairs and longer pump life. For engineers, it means control loops that actually stabilize.
Projects that commonly benefit — where you should look first
Not every system needs one. But here are the situations where a separator often becomes the sensible choice:
- Systems with multiple pumps working in parallel or in separate loops.
- Plants where variable-speed drives change flow frequently.
- Multi-zone buildings with very different zone dynamics (conference rooms versus storage areas, for example).
- Retrofitted systems where new pumps or zones were added to an existing piping layout.
- Process systems where sudden starts or stops create frequent transients.
If you find yourself tuning controls to chase hydraulic problems, a separator is worth evaluating.
Where to put it — practical installation advice that saves headaches
Location matters more than you might think. The common rule is: put it between the primary plant and the building distribution, where you can access it. But a few extra points make installation less painful later:
- Give service clearance. Don't squeeze the unit into a tight corner where no one can remove covers or open drains.
- Keep air vents and sludge drains accessible. These ports need attention during startup and periodic maintenance.
- Avoid putting elbows and complex piping right next to the separator inlet/outlet; turbulence defeats part of the calming effect.
- Provide a few isolation valves so you can take the separator offline for cleaning without shutting the whole plant.
- Coordinate control wiring and sensors neatly—temperature and flow probes work better when not heat-biased by nearby equipment.
A tidy installation saves time and reduces the chance of commissioning errors.
Choosing size and type — not mystical, just deliberate
Sizing is about matching expected flows and leaving a little headroom for change. In practice that means checking the number and behavior of pumps and considering growth. If you're planning future expansion, allow a margin rather than buying exactly what the current design calls for.
Material choice follows environment: stainless where corrosion is a risk, coated carbon steel where budget matters and water chemistry is controlled. Also look for features that make life easier: removable covers, inspection ports, integrated vents and drains. These don't sound sexy, but they cut service time dramatically.
Ask about the unit's pressure drop at your nominal flow. Excess loss forces pumps to work harder. A separator should calm the hydraulics, not introduce a new parasitic head loss problem.
Commissioning — the part where projects succeed or stall
Installation is half the job. Commissioning is where you prove it. A short checklist at startup will save debate later:
- Check all isolation valves and vents are in the correct position.
- Verify that instrumentation is reading sensible baseline values before you start load cycling.
- Run a few typical operating sequences and watch for valve hunting or pump interaction.
- Purge air slowly; don't try to rush bleeding at full flow.
- Record baseline temperatures and pressures for future troubleshooting.
A proper initial flush and venting often avoids weeks of weird behavior that people otherwise blame on controls.
Maintenance and what to look for in service life
Maintenance is low effort if designed for it. Inspect vents and sludge traps periodically. If your system carries particulate, adopt a schedule to drain settled material before it clogs drains or re-entrains into the system.
Watch for signs that the separator is undersized or misapplied: persistent temperature swings, pumps cycling unexpectedly, or unusual vibration in pumps downstream. These usually mean the hydraulic buffering is insufficient for the load profile.
Make the unit part of your routine checks. The few minutes spent inspecting access ports pay off big later.
Real-world pitfalls I've seen — and how to avoid them
- Undersizing: people choose a unit that fits the mechanical room but can't handle peak flows. Result: continued problems and a second retrofit. Fix: check flows realistically, include occasional peak conditions, and size with margin.
- Bad piping near the inlet: elbows and back-to-back fittings create turbulence. Fix: plan straight runs and gentle transitions.
- Inaccessible vents/drains: install the unit where techs can reach ports comfortably. Fix: relocate or add extended valves/handles.
- Ignoring water quality: if the system has debris, separators get dirty fast. Fix: install upstream strainers or schedule more frequent cleanouts.
These are avoidable with a bit of forethought.
Procurement checklist — make supplier quotes comparable
When you request proposals, ask for these items explicitly:
- Recommended flow range and a note on expected pressure drop.
- Material and coating specification for the shell and internals.
- Details about access: inspection port size, cover removal method.
- Built-in air vent and sludge drain details.
- Any available P&ID and CAD files for coordination.
- Guidance on expected maintenance actions and service intervals.
- Lead time and delivery options.
A clear procurement package reduces surprises at installation.
A short comeback story — one retrofit, big calm
A university plant had three boilers and dozens of building pumps. They had odd temperature swings and nuisance alarms that everyone assumed were control bugs. After some analysis they installed a properly sized separator with a few vents and a one-time flush. Commissioning took a morning. The result: far fewer alarms, stable temperatures across lecture halls, and the operations team stopped chasing phantom failures at night. The hardware was modest; the operational benefit was immediate.
What you can do next
If your plant has more than one pump or frequent control tuning chores, add a separator to your shortlist. Start by collecting actual pump curves and nominal flows; then talk to suppliers about units that match those flows with some headroom. Prioritize access and vents. Plan commissioning with a short checklist and a controlled purge. And finally, make the separator part of your routine maintenance plan.
It's a small part of the plant, but it makes daily life noticeably smoother. That's why engineers and operators who've lived through systems without one tend to keep them when they rebuild.
-
Reliable Plumbing Installation Hardware from a Professional Manufacturer in China
Mar 11, 2026
In today's plumbing industry, reliability, efficiency, and long-term durability are no longer optional-they are essential. Whether for residential buildings, commercial projects, or industrial plumbing systems, the quality of installation hardware plays a critical role in system performance and lifecycle cost.
As a professional plumbing hardware manufacturer in China, JINYI (Yuhuan Jinyi Hardware Co., Ltd.) specializes in supplying cost-effective, customizable metal components that support modern plumbing and water systems worldwide.
The Growing Demand for High-Quality Plumbing Hardware
With increasing standards for building safety, water efficiency, and installation speed, plumbing contractors and brands are paying more attention to hidden components—such as brackets, clamps, and supports—that ensure system stability.
Poor-quality plumbing accessories can lead to:
- Pipe vibration and noise
- System leakage and maintenance issues
- Higher installation and labor costs
- Reduced lifespan of water systems
That's why sourcing from a reliable plumbing hardware factory has become a strategic decision for many brands and wholesalers.
What Plumbing Products Can JINYI Manufacture?
As an experienced OEM & ODM manufacturer, JINYI focuses on metal installation hardware for plumbing and heating systems, including:
- Pipe clamps & pipe brackets (for copper, PEX, multilayer, and steel pipes)
- Water meter brackets & supports
- Manifold brackets and stainless steel manifold supports
- Valve brackets and mounting frames
- Floor drains & shower channel drain components
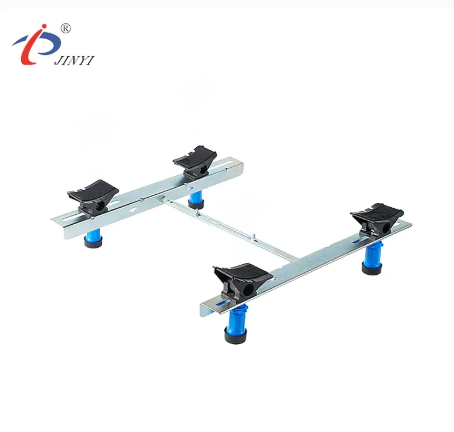
- Shower base support frames & structural brackets
- Customized metal brackets based on drawings or samples
All products are designed to meet the practical needs of installers, ensuring easy mounting, strong load capacity, and long-term corrosion resistance.
Why Global Buyers Choose JINYI as Their Plumbing Hardware Supplier
- Manufacturer Direct -Better Cost Control
As a factory-based supplier, JINYI offers competitive pricing without compromising on quality—ideal for wholesalers, distributors, and brands seeking stable long-term supply.
- Strong Customization Capability
We support OEM and ODM projects, including:
- Material selection (carbon steel, stainless steel, galvanized steel)
- Surface treatments (zinc plating, powder coating, polishing)
- Logo marking and private labeling
- Custom packaging for retail or project use
- Quality Focused on Real Installation Scenarios
Our products are developed with real plumbing applications in mind, ensuring:
- High load-bearing strength
- Precise dimensions for easy installation
- Consistent quality across mass production
- Experience in European & North American Markets
JINYI has experience supplying plumbing hardware to customers in Europe and North America, understanding market expectations for quality, documentation, and communication.
A Reliable Partner for Plumbing Brands and Projects
Whether you are a plumbing brand looking to expand your product range, a distributor sourcing reliable accessories, or an engineering company seeking stable installation hardware, JINYI provides practical, scalable solutions.
We don't just manufacture metal parts-we help our partners improve supply chain efficiency and product competitiveness in the plumbing market.
Looking for a Trusted Plumbing Hardware Manufacturer?
If you are sourcing plumbing brackets, clamps, supports, or custom metal components, JINYI is ready to support your next project.
Visit our official website: www.yh-jinyi.com
Contact us to discuss samples, drawings, or OEM cooperation
-
How Can Bathroom Brackets Last Longer and Work Better
Mar 09, 2026
How to Pick, Install, and Maintain Bathroom Brackets — A Practical Field Guide
Brackets look small. Their problems grow big.
Get the wrong bracket and you get leaks, noise, and repeat service calls. Choose the right one and a plumbing run stays quiet and maintenance-free for years.
Why a bracket matters
You stack a system from pipes, valves, and equipment. Brackets decide how loads move through that stack. A poor bracket lets motion spread. Motion becomes vibration. Vibration loosens bolts. Loose bolts lead to leaks. Leaks lead to callbacks.
A good support does five things:
- Carry the load without bending.
- Allow thermal motion where needed.
- Isolate vibration where required.
- Keep valves and instruments accessible.
- Resist the local environment — moisture, chemicals, or salt.
If a bracket does those well, the piping system behaves predictably. That reduces downtime and cost.
Before you buy: five essential numbers
Don’t guess. Measure and document.
- Static load — the weight of pipe, fluid, valves, and attachments. Calculate the filled weight.
- Dynamic allowance — pumps, compressors, and flow surges create extra forces. Add 25–40% for general cases. Use higher margins where vibration is known.
- Span length — the distance between supports. This controls deflection and bending.
- Substrate type — concrete, steel beam, pre-cast, or thin partition wall. Anchors differ by substrate.
- Environment — interior dry room, washdown area, rooftop, or corrosive plant. This decides material and finish.
A small table on site saves big money later. Fill it before you call the supplier.
Materials: pick what fits the environment
Material determines life and maintenance.
- Carbon steel + coating — cheap and strong for dry, indoor areas. Needs good surface prep and coating.
- Galvanized steel — for mild outdoor exposure. Zinc helps, but scratched areas will corrode.
- Aluminum — light but softer; not ideal for heavy loads. Use only for light fixtures or where weight matters.
If you can’t access the bracket easily later, favor stainless. Cost in exchange for peace of mind often pays back.
Design features that save time on site
Tiny details matter. They save hours.
- Slotted holes instead of fixed holes. They allow field alignment without redrilling.
- Reinforced bearing plates where bolts clamp. Thin plates bow.
- Split saddles or open clamps let you place the pipe without flipping the whole manifold.
- Integrated isolation pads to reduce vibration.
- Service clearance built in so valves and actuators can be removed without disassembling the bracket.
Ask for these features on your drawing. If they won't include them, ask why.
Anchors and fasteners: match to the substrate
One anchor type does not fit all.
- Concrete: mechanical expansion anchors for static loads. Chemical anchors for high dynamic loads.
- Steel beam: through bolts with washers and locknuts. Through-bolting spreads the load best.
- Thin sheet or hollow block: use backing plates or sleeve anchors that spread force.
- Precast: confirm embedment depth and use proper inserts or adhesive anchors.
Always specify torque values. Record them at handover. Hand-tight is not quality control.
Support spacing and geometry
How far apart you place supports affects deflection and fatigue.
- Near elbows, tees, and valves: place supports closer. Local bending moments spike here.
- Avoid single-point suspension for long runs. Use at least two or three supports to distribute load.
If you must span long distances, add a carrier beam or truss to move the load to the structure.
Thermal expansion: allow motion, don't fight it
Pipes expand and contract. If you clamp them rigidly, stress builds up and finds the weakest point — usually a flange or weld.
Two practical approaches:
- Sliding supports — use low-friction pads so the pipe can move axially.
- Guided supports + fixed anchors — fix one point and allow guided sliding elsewhere. That controls where stress concentrates.
Draw a thermal movement map for all lines longer than a few meters. Mark fixed points and sliding areas on the as-built.
Vibration control: small fixes, big results
Vibration causes fatigue and noise. It also loosens screws and nuts.
- Use neoprene or elastomer pads under bearing plates. Cheap and effective.
- Install flexible connectors on pump lines to break vibration paths.
- Consider spring isolators for heavy vibrating assemblies.
Don't isolate everything. You still need positive location in at least two axes. Isolation reduces transmission; it does not remove the need for alignment.
Coating and surface protection
Finish matters for life and appearance.
- Powder coating — durable and neat for indoor brackets.
- Hot-dip galvanizing — thicker zinc layer, good for outdoor exposure.
- Epoxy or marine coatings — for aggressive chemical or coastal sites.
Surface prep is vital. Poor cleaning before coating leads to early failure. If the job is spot-painted, expect trouble sooner.
Common installation mistakes and how to avoid them
These are recurring problems on projects. Prevent them early.
- Wrong anchor type — use the anchor appropriate for the substrate and dynamic loading.
- No thermal plan — fails happen when thermal movement is not allowed.
- Blocking access — design must preserve valve and instrument access.
- Thin plates in high-load spots — add ribs or thicker plates where loads concentrate.
- Mismatched holes — dry-fit before drilling. Slotted holes help.
Mock-up the assembly with straps or clamps before drilling or welding. It saves rework.
Commissioning checklist you can use
Make installers sign this. Keep the record.
- Confirm load calculations with installed assemblies.
- Torque all anchors to specified values and record them.
- Verify level and alignment within tolerance.
- Verify sliding supports move freely.
- Check isolation pads are seated correctly.
- Inspect coating for damage.
- Confirm valves and gauges are accessible.
A signed checklist stops "it looks okay" from becoming a warranty problem.
Inspection and maintenance schedule
Routine checks stop failure. Use a simple calendar.
- Weekly: visual check for loose bolts, heavy corrosion, or visible movement.
- Quarterly: torque test critical bolts, inspect isolation pads for hardness or cracking.
- Annually: remove and inspect welds and plates, check coating condition, and measure any deformation.
Record each check. Trends show problems before they break.
When to repair and when to replace
Repair when surface rust or minor deformation is present. Replace when:
- Structural plate has permanent deformation.
- Weld cracks are visible.
- Coating has failed to the point of deep corrosion.
- Bolts repeatedly loosen even after proper torque — indicates fatigue.
Plan replacements during low-use windows. Prefabricate replacement pieces to cut shutdown time.
Procurement checklist for buyers
When you order brackets, include these in the purchase specs:
- Exact pipe diameters and weights.
- Expected dynamic allowances and safety factors.
- Base material of substrate and its characteristics.
- Coating type, thickness, and prep standard.
- Required adjustability (slots, removable clamps).
- Delivery schedule and spare parts availability.
- Test and inspection documentation required on delivery.
Ask for fabrication drawings and a small sample if the order is large.
Field tips installers swear by
- Dry-fit the bracket before cutting holes. Temporary straps show real fit.
- Use a torque wrench and record the numbers. It's part of QA.
- Label spare gaskets, bolts and pads by location to simplify later fixes.
- Keep a small field kit of spare bolts, one gasket set and a vibration pad — saves hours.
These small moves reduce calls and keep the crew moving.
Retrofit traps and how to avoid them
Old buildings hide surprises.
- Don't use old anchor holes without testing their pull-out strength.
- Don't assume old runs had thermal allowances. They often didn't.
- Check for embedded utilities before drilling. Coordination with other trades prevents costly mistakes.
When retrofitting, use temporary supports and a clear isolation plan.
Small innovations that pay off
Add these and you cut work later:
- Leveling studs so the bracket comes in exactly at height without shims.
- Wear indicator slots machined into plates — you see when material loss approaches limit.
- Quick-release clamps for maintenance without removing anchors.
These features cost little to add at fabrication but save labor on site.
Safety and compliance basics
Follow local codes and standards.
- Use certified anchors rated for loads.
- Use traceable materials with mill certificates if required.
- Provide installation and commissioning records.
- Keep clearances per code for valves and emergency equipment.
Good documentation protects everyone.
Case study
A mid-sized office building had repeated valve leaks and noise. The cause: thin, poorly coated brackets and no sliding supports. Fix: replaced plates with reinforced units, added sliding pads and neoprene isolation at pump connections. Result: noise dropped, leaks stopped, maintenance visits declined. Payback came inline with typical service savings.
Small change. Big difference.
Checklist before signoff
- Loads verified and recorded.
- Anchors matched to substrate and torqued; records kept.
- Thermal movement planned and tested.
- Vibration isolation installed where specified.
- Service access confirmed.
- Coating inspected and touched up.
- Maintenance schedule handed over.
If all boxes are checked, the bracket will behave. If not, expect a call.
Brackets are small. Their performance is not. Spend a little time on load calculations. Pick the right material. Allow for movement. Fasten correctly. Inspect regularly. Do these and a bracket becomes one less thing to worry about.
-
How Can a Manifold Bracket Improve System Performance
Mar 06, 2026
How a Manifold Bracket Really Helps HVAC Systems Stay Stable — A Practical Guide
When people design HVAC systems they often spend most time on pumps, valves and controllers. That's natural. But if the supporting parts aren't right, all that careful equipment selection can be undone by vibration, misalignment, leaks or frequent maintenance. A small steel support — the manifold bracket — is one of those quiet parts that does a lot of heavy lifting. Pick the right design, install it carefully and maintain it, and the whole system runs smoother for years. Ignore it, and you get headaches: noisy operation, more pipe stress, more callbacks.
Why the manifold support matters more than its size suggests
At first glance a bracket is just a bracket. In practice it controls how forces move through the piping network. Consider these simple outcomes when the support is wrong:
- Pipes vibrate and fasteners loosen.
- Joints and valve seats wear faster.
- Thermal expansion causes unexpected stresses.
- Access for inspection and repair becomes a problem.
All of those raise maintenance cost and risk. A smart support design spreads loads, controls motion and simplifies inspection. In short: good support turns variable loads into predictable behavior.
The practical parameters you must check before choosing a bracket
Don't treat the spec sheet like a shopping list. Apply it to the job:
- Actual load (kg / lb) — include manifold weight + water or refrigerant volume. If the manifold holds heavy valves or filters, add their mass.
- Dynamic load factors — pumps cause pressure spikes and vibration; motors and compressors add intermittent forces. Add a safety margin.
- Mounting substrate — will you bolt to concrete, steel frame, or a stud wall? Anchor choice changes allowable load.
- Environment — indoor dry room or rooftop exposed to weather? Corrosion risk changes material choice.
- Service access — will techs need to remove the manifold without dismantling a wall? Consider quick-release or modular attachments.
A rule of thumb I use on site: calculate static weight, then add 25–40% to cover dynamic effects unless you've measured vibration levels. If the site is seismic or highly industrial, go higher.
Material choices: what works where
Materials are not just about corrosion resistance. They influence stiffness, weldability and price.
- Carbon steel with coating — widely used indoors. Economical, strong, easy to weld. Needs finishing (paint, powdercoat) for moisture zones.
- Galvanized steel — good for mild outdoor exposure. Zinc layer helps but can wear if scratched.
- Stainless steel — for humid, salty or chemical environments. More expensive but reduces replacement cycles and maintenance.
- Aluminum — lightweight; used in some lightweight frames but less common for heavy manifolds because it's softer and less stiff.
Pick stainless where access for repair is difficult or the bracket will see salt spray or corrosive condensate. For screens and plant rooms we usually use painted carbon steel unless specified otherwise.
Design features that actually make installation faster and more reliable
Not all brackets are equally easy to work with. Look for these practical design features:
- Adjustable slots (not just fixed holes). Slotted holes allow small alignment changes in the field.
- Reinforced mounting plate where loads concentrate — prevents deformation under heavy weight.
- Removable clamps or split saddles so you can mount piping without turning the manifold assembly upside down.
- Integrated vibration isolators (rubber pads, neoprene) if vibration is a concern — reduces transmission to structure.
- Service clearance built in — leave space for valve actuators, filters and gauges.
If a bracket forces you to do awkward welds or block access to a flanged joint, it's the wrong bracket — even if the steel is thicker.
Fasteners and anchoring — options that survive real life
Fastener choice depends on substrate and load. Don't default to the same bolt for everything.
- Concrete anchors — use expansion anchors for static loads, chemical anchors for higher loads or vibration.
- Through-bolting into steel beams is robust — pair with washers and locknuts.
- Threaded inserts in precast panels can work but check pull-out ratings.
- Sleeved anchors degrade in cycles — prefer mechanical anchors rated for dynamic loading.
Torque settings matter. A common field failure is a "hand-tight" bolt that later loosens. Specify torque values and document them during commissioning.
Spacing and support points — the installation geometry that controls bending
How far apart should you put supports? It depends on pipe stiffness and load.
- Shorter spans mean less deflection but more anchors.
- Longer spans save anchors but increase bending and vibration.
General approach:
- Near elbows, valves, or branching points, place supports closer — these locations see higher local moments.
Avoid one-point suspension of a long manifold; use two or three supports to distribute loads and avoid a cantilever effect.
Thermal expansion: allow for motion without stress
Piping expands and contracts with temperature. Brackets must either permit movement or deliberately restrain it with anchor points and expansion loops.
Two practical methods:
- Sliding supports — support the pipe but allow axial movement. Use sleeves or low-friction pads.
- Guided supports — permit movement in one direction while restricting others.
Never clamp a heated run rigidly every few meters. That creates stress concentrations at the anchors or at the next fixed point (and leaks follow).
Vibration control: small measures, big impact
Vibration transmits forces to the building and to adjacent equipment. Simple fixes reduce wear:
- Add rubber pads or neoprene washers under bracket plates.
- Use spring isolators for heavy, vibrating manifolds.
- Install flexible connectors (hose loops) on pump connections to isolate pump vibration from the manifold.
Don't over-isolate: you still need positive location in at least two axes; isolates should be designed, not guessed.
Surface protection and finish: practical choices
Surface finishes matter less for internal dry rooms and more for service life in wet or outdoor locations.
- Powder coating gives a durable finish for indoor use and looks good.
- Hot-dip galvanizing provides thicker corrosion resistance for exterior mounting.
- Epoxy coatings resist chemical exposure and are used in many industrial facilities.
If painting on site, specify surface prep (blast or brush) and primer type to avoid premature flaking. Coating is only as good as surface preparation.
Installation mistakes I see on site (and how to avoid them)
Here are the common errors and straightforward fixes:
- Mistake: Bracket holes don't align, so pipe is forced into position.
- Fix: Use slotted brackets or shims; re-check layout before drilling.
- Mistake: Anchors selected for static loads only; vibration loosens them.
- Fix: Choose anchors rated for dynamic loading and add lock washers.
- Mistake: Zero allowance for thermal movement.
- Fix: Review thermal expansion calculations and add sliding supports.
- Mistake: Brackets block access to valves and gauges.
- Fix: Mock up assemblies or use CAD to verify service access.
- Mistake: Using a thinner plate to "save cost" — it bows under load.
- Fix: Use reinforced plates or ribs where loads are concentrated.
A practical tip: before cutting or drilling any structure, mock up the manifold with straps or temporary supports to confirm clearances.
Commissioning checklist that actually gets used
A one-page commissioning checklist prevents the "we tightened it so it's done" problem. Include:
- Confirmed load calculation with installed components.
- Anchor torque verified and documented.
- Level and alignment checked within tolerance.
- Movement allowance verified for thermal expansion.
- Vibration isolation installed where specified.
- Coating integrity inspection.
- Service clearance verified.
- Signed acceptance by installer and mechanical engineer.
Make the installer sign the checklist and keep it with the project records.
Inspection and maintenance: schedules that matter
Routine inspection avoids surprises. Simple cadence:
- Weekly: visual check for loose bolts or visible corrosion.
- Quarterly: torque test critical fasteners, check rubber isolators for hardening or cracking.
- Annually: remove and inspect coating, repaint or recoat as required, check welds and plate deformation.
When vibration monitoring is present, set alarm thresholds for sustained increases that suggest loosening or fatigue.
How to know when replacement is necessary
Replace a bracket when you see:
- Structural bending or permanent deformation.
- Coating failure with rust deeper than surface scale.
- Crack formation near welds.
- Repeated fastener failure after proper torqueing (indicates fatigue).
If replacement is likely, plan it with minimal system interruption: drain and isolate only the affected run, prepare a prefabricated replacement mounting assembly, and schedule work during low usage windows.
Costing decisions: initial spend vs lifecycle cost
People often choose the cheapest bracket on price alone. Instead, do a simple lifecycle cost comparison:
- Purchase price.
- Expected maintenance frequency and cost.
- Expected replacement interval.
- Downtime cost per hour (lost production, labor).
- Energy or efficiency impact (minor but real if vibration causes efficiency loss).
In many projects, a slightly higher upfront cost for better material and design pays back in fewer service calls and less downtime. Run a quick payback for your project assumptions.
Customization and modular options
Many manufacturers now offer modular bracket systems:
- Pre-cut slots for common pipe sizes.
- Pre-drilled plates to match common anchor patterns.
- Quick-release clamps for fast maintenance.
If you design multiple buildings or repeat projects, standardize on one modular system. It simplifies spares and speeds field work.
Case study, simplified and practical
A medium-sized office tower replaced older manifold supports during an HVAC upgrade. The original supports were thin plates bolted to block walls; over time they had bowed and corroded. The upgrade involved:
- Replacing with welded reinforced plates mounted to a steel sub-frame.
- Adding sliding pads to accommodate thermal expansion.
- Installing neoprene pads at contact points to reduce vibration.
- Recoating all exposed surfaces with epoxy finish.
Outcome: after six months there were no leaks, minimal noise complaints and planned HVAC checks were easier because valves were accessible.
Procurement checklist for buyers
When ordering, include these in the purchase specification:
- Exact pipe diameters and manifold dimensions.
- Load assumptions and dynamic factors used.
- Anchor type and substrate details.
- Required finish type and coating spec (including surface prep).
- Required adjustability (slots, removable clamps).
- Welding or fabrication tolerances.
- Delivery and lead time expectations.
- Warranty terms and test certificates (material and coating).
Don't buy off a photo alone. Ask for drawings and a fabrication plan.
Practical field tips for installers
- Always dry-fit before drilling anchors.
- Use a torque wrench and record readings.
- If the bracket is to be welded in place, ensure welders use certified procedures and that heat doesn't affect nearby components.
- When bolting to thin metal, distribute load with backing plates.
- Label each support position during assembly so post-install checks match the installation drawings.
Traps to avoid when retrofitting old systems
- Reusing old anchor holes without verifying integrity.
- Assuming old pipe runs had correct thermal allowance — they may not.
- Neglecting to coordinate with other trades (electrical raceways often pierce the same walls).
- Overlooking the need to isolate vibration sources (pump mounts etc.) when upgrading supports.
A measured, staged retrofit avoids surprises.
Small innovations that pay off
- Integrated leveling studs let you adjust the bracket on site to exact elevation without shims.
- Removable guard plates let technicians access valves without removing the main support.
- Wear indication slots machined into plates reveal when material loss reaches service threshold.
These practical features are cheap to add in design but save real labor later.
Checklist before you sign off
- Load calc reviewed and signed by engineer.
- Bracket design has slots/adjustability where needed.
- Fasteners and anchors specified for dynamic loads.
- Thermal movement plan agreed.
- Coating and material match environmental exposure.
- Commissioning and inspection checklist included in handover.
If all those boxes are ticked, the manifold will stay where you put it — and your maintenance team will thank you.
Manifolds and supporting brackets are not glamorous, but they matter. The right bracket design reduces maintenance, keeps valves reachable, reduces vibration problems and saves money over the life of the system. Spend a little time on load calculations, choose suitable materials, specify adjustability and service clearance, and set a realistic maintenance cadence. Those straightforward steps make a big difference in reliability.
-
OEM Decoupling Tank: What to Ask Your Chinese Supplier
Mar 04, 2026
Meta Description: Planning to source OEM decoupling tanks from China? Here are the key questions to ask your supplier before placing an order.
Keywords: OEM decoupling tank, China supplier, custom decoupling tank, hydraulic separator OEM
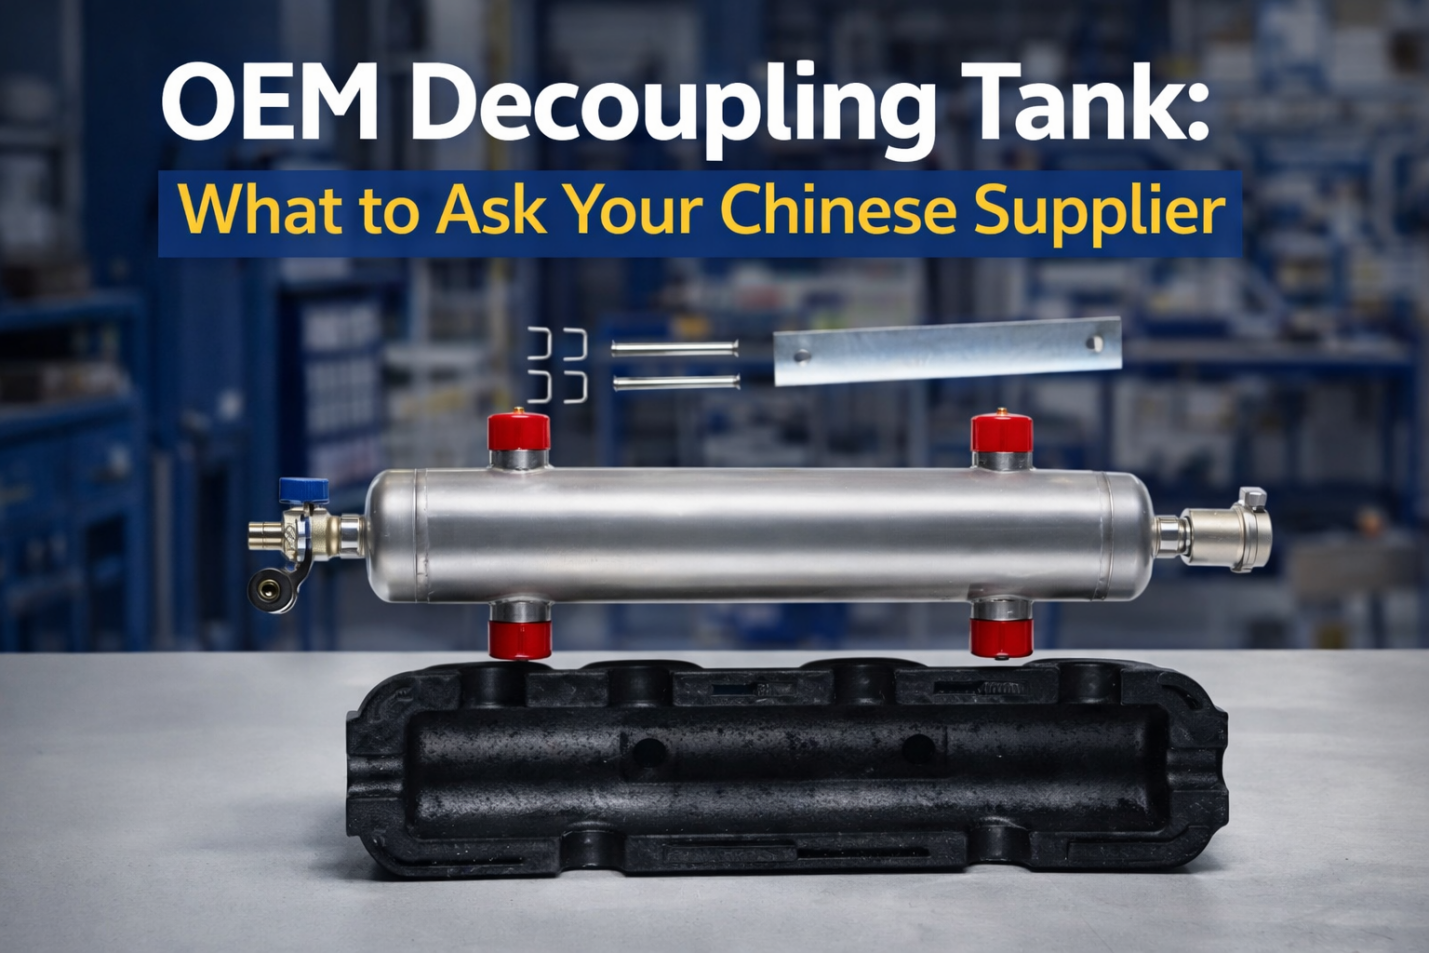
Sourcing an OEM decoupling tank from China can offer significant cost advantages — but only if you ask the right questions before committing. Whether you need custom dimensions, specific materials, or private-label branding, understanding what your Chinese supplier can deliver is essential to avoiding costly mistakes.
-
What Materials and Certifications Do You Offer?
Ask whether the supplier works with stainless steel, carbon steel, or brass, and confirm which materials suit your application — heating, cooling, or industrial fluid systems. Request documentation such as CE, ISO, or material test reports to ensure compliance with your target market standards.
-
Can You Customize Dimensions and Connections?
Standard decoupling tanks may not fit your system design. A reliable OEM partner should be able to adjust tank volume, connection sizes (BSP, NPT, or flanged), and port configurations based on your technical drawings or specifications.
-
What Is the MOQ and Sample Lead Time?
For OEM orders, understanding minimum order quantities and sample timelines is critical. Most Chinese manufacturers offer pre-production samples within 7–15 business days. Confirm this before signing any agreement.
-
How Is Quality Controlled?
Ask about in-house pressure testing, weld inspection processes, and third-party audit availability. Reputable suppliers will welcome quality checks and provide inspection reports with each shipment.
-
Can You Apply Our Branding or Packaging?
OEM typically includes private-label services. Confirm whether the supplier handles custom logo printing, packaging design, and labeling in-house or outsources it — this affects both lead time and quality consistency.
At JINYI, we support full OEM customization for decoupling tanks, from design to delivery. Contact us to discuss your project requirements.
Visit our official website: www.yh-jinyi.com
Contact us to discuss samples, drawings, or OEM cooperation
-
-
Which Manifold Bracket Improves Stability and Installation Efficiency
Mar 02, 2026
What You Need to Know About Manifold Bracket Applications in Industry
Manifold Bracket sits quietly behind the scenes in almost every serious piping system. You probably don't notice it — until something goes wrong. Then suddenly everyone's looking at the supports and asking why a relatively small piece caused a big headache. That's why, when professionals choose components, they don't just look at price or appearance. They want parts that behave predictably day after day, in messy, hot, vibrating industrial environments.
What factors affect the durability of a manifold bracket in industrial systems
Let's be blunt: a bracket's lifespan is decided more by the environment than by marketing claims. Put the same piece in a dry warehouse and in a salt-spray coastal plant, and you'll get very different results. So start by asking three simple questions about the site:
- What's the atmosphere like? If you're dealing with salt air, acidic fumes, or aggressive process fluids, corrosion is the main enemy. In those situations, plain carbon steel will start to look tired fast; stainless or coated steels are worth the extra upfront cost.
- How hot does it get — and how often? Thermal cycling (heating then cooling repeatedly) is stealthy: it works metal back and forth and eventually causes fatigue. Brackets near heat exchangers or steam lines need to allow for expansion.
- How much vibration or shock is present? Pumps, compressors, and nearby machinery punch the pipework repeatedly. That means you should consider both the clamp design and any vibration-damping options — rubber inserts, spring clamps, or tuned supports.
A few manufacturing details matter too. Welding quality, hole positioning, and the thickness of the load-bearing plates all change how the part behaves under load. I've seen brackets from different suppliers that look identical on paper but behave differently on the job — because one maker used a slightly thinner plate and cheaper weld fillets. The lesson: ask for drawings, check weld samples if you can, and when possible request supplier inspection photos or short test reports.
Finally, don't underestimate maintenance. Even the "right" bracket will fail early if it's ignored. Simple things — loose bolts, paint chips, or minor corrosion creeping in — are the usual culprits. A scheduled inspection, even a quick visual check once a quarter, will extend service life far more than swapping to a more expensive metal.
How can proper installation improve the performance of a manifold bracket
Installation is where theory becomes reality. A correctly chosen bracket can be rendered useless by a poor install. Here are the practical steps that save time and avoid rework.
Check alignment before you tighten anything. Sounds obvious, but it's a repeat offender. If you torque down bolts with a misaligned pipe, you introduce bending stress. Next heating cycle, and the pipe may shift or the welds crack. Use a straightedge or laser level where possible — it takes five minutes and prevents a week of headaches later.
Mind the torque. Many crews either under-tighten or over-tighten (cracking brackets or crushing gaskets). Follow the torque specs for the fasteners and remember: fastener grade matters. Use proper torque wrenches, and mark the bolts afterward so you can see if anything has worked loose in service.
Plan for thermal expansion. If your piping sees temperature swings, do not clamp everything rigidly. Leave expansion loops or provide sliding supports at calculated intervals. In steam lines, for example, a fixed support every few meters with sliding supports in between is a standard layout for a reason.
Use the right accessories. In high-vibration zones add damping pads; where corrosion is an issue, use isolation sleeves or sacrificial coatings. These small add-ons rarely cost much but reduce stress on the main support dramatically.
Check the substrate. Don't forget the structure you're attaching to — walls and frames need to be capable of taking the load. Too often, brackets are blamed when the real issue is a weak anchor point. Use chemical anchors or through-bolts where needed, and confirm the base material is in good condition.
One quick field note from experience: during a plant shutdown, I once watched a crew re-install a bracket and tighten bolts in a quick, sequential pass without re-checking alignment. The result: a pipe stressed so badly that a flange gasket failed two weeks later under normal load. The fix cost hours and a production hit. The moral — slow down at the install stage and save the plant time later.
Which materials are recommended for manifold brackets in harsh environments
Material choice isn't glamorous, but it's where most decisions either pay off or bite you later. Think of it this way: you wouldn't buy a winter coat for the tropics. The same logic applies when picking metals and finishes for supports that live in wet, hot, or chemical-splashed spaces.
Here are the materials you'll see most often — and when each makes sense:
- Carbon steel with protective coating: When you need strength at a lower cost, carbon steel with galvanizing or epoxy powder coating is a practical compromise. It's strong and economical, but don't treat the coating as invincible — scratches and welds can expose bare metal, so plan maintenance checks.
- Aluminum alloys: Lightweight and corrosion resistant, aluminum fits where weight matters — mobile skids, temporary rigs, or lightweight ductwork. But remember: aluminum can gall or wear differently when clamped against steel pipe, so isolate contact points if dissimilar metals touch.
- Duplex steels or specialty alloys: For highly aggressive chemical environments or very high temperatures, you'll see duplex stainless or nickel alloys specified. They're pricier, but sometimes unavoidable for safety and longevity.
A few practical notes from fieldwork:
- Coatings matter — but substrate matters more. A thin protective coat won't save a cheap base metal. If the environment is genuinely aggressive, start with the right alloy and then add coatings as backup.
- Think about dissimilar metal contact. When you clamp stainless to copper or aluminum, galvanic corrosion can appear. Use insulating sleeves or nylon washers where metals differ.
- Ask for test certificates. If you're buying brackets for a critical system, it's fair to request mill or material certificates. Good suppliers will share them — and you'll spot mis-matches early.
- Cost vs lifecycle math. A more expensive alloy can save maintenance cycles, downtime, and replacement costs. Run a quick payback check: if swapping to stainless reduces outages and rework, the upfront says yes pretty fast.
Quick material checklist (practical)
- Salt or coastal? Prefer 316 stainless.
- High temps? Check alloy max service temp.
- Heavy load? Use thicker carbon or duplex steel.
- Dissimilar metals nearby? Add isolators.
- Budget constrained? Carbon with coating + inspection plan.
Why regular inspection of manifold brackets prevents costly equipment issues
People often treat brackets like plumbing afterthoughts. That's a mistake. Small failures at supports are cheap to catch, but expensive to fix if they cascade into leaks, flange failures, or misaligned heat exchangers.
Here's a realistic inspection approach you can adopt today — it's the sort of routine our field teams use when they're trying to keep a plant running without surprises.
What to check, fast:
- Bolts and fasteners: Any loose or corroded bolts? Mark torque settings when installed and re-check after the first operational hours, then at regular intervals.
- Visible corrosion or paint loss: A small rust spot today can eat through a bracket next quarter. Address chips and recoat or replace as needed.
- Deformation or cracking: Heat cycles and vibration produce tiny cracks. When you find one, don't shrug — record it and assess if it's local or systemic.
- Insulation and isolation cuffs: Are rubber or nylon isolators intact? Compression here can signal over-torque or thermal growth issues.
- Alignment and sag: Pipes move slowly. Check for sagging between supports and verify expansion allowances are working.
Frequency
- High-stress areas: Monthly to quarterly (areas near pumps, compressors, expansion loops).
- Standard runs: Quarterly to biannually.
- Critical services (hazardous fluids): Monthly and after any abnormal event (pressure spike, shutdown).
An inspection story
At a waterworks plant we worked at, a maintenance tech noticed a fastener trending loose on a pump discharge bracket. Small thing — turned into a lead for a more serious truth: the pump's anchor bolts were shifting under thermal cycles. Because they caught the loose fastener early, the team reinforced anchors before a seal failed and caused an unplanned outage. Quick catch, big savings.
Tools & documentation
- Use torque wrenches and a simple straight edge.
- Keep a digital log (photos help). Note torque values, torque marks, and any remedial actions.
- Add inspection tasks into your CMMS with alerts based on operating hours, not calendar dates, when possible.
Regular inspections don't have to be labor-intensive. A short walk with a checklist prevents the small things from becoming process-stopping problems.
Tips for choosing a manifold bracket that fits your application needs
Buying a bracket isn't complicated — until the day you find it doesn't fit your field reality. To avoid that, treat the selection like a mini engineering exercise. Here's a practical roadmap.
Understand the load and environment
- Measure pipe diameter, weight per meter (or estimated when filled), and the maximum operating temperature.
- Note vibration sources, proximity to rotating equipment, and whether the pipe is insulated.
Pick the right family
- Standard clamps for routine runs. Economical and quick to source.
- Adjustable or slotted brackets when you need alignment tolerance on installation day. They save rework time.
- Spring or dynamic supports in lines with heavy vibration or thermal movement.
- Rubber-lined supports when you want to reduce metal-to-metal wear and dampen vibration.
Plan for thermal movement
Make sure your plan includes fixed points and sliding supports arranged so thermal expansion doesn't fight against your anchors. A good rule of thumb: select one fixed support every few meters in long runs, with sliding supports between — but adjust for your pipe material's expansion coefficient.
Maintenance and spare parts
- Order a few spare brackets per common size. It's surprisingly cost-effective.
- Get spares for isolators, fasteners, and pads too. They're the little parts that fail first.
Vendor checks
- Ask for dimensional drawings and check hole centers.
- Request a sample if it's a critical service. Install it and see how it fits.
- Verify the supplier can provide replacement parts and lead times.
Quick buyer's checklist
- Pipe specs documented? Yes / No
- Vibration present? Yes / No
- Thermal expansion considered? Yes / No
- Spares ordered? Yes / No
- Vendor drawings approved? Yes / No
If you can tick these boxes, you've likely saved yourself a rework or emergency order down the line.
Where should manifold brackets be placed for optimal system efficiency
Placement is more art than brute math. Poorly spaced supports will let pipes sag, develop stresses, and put extra load on flanges. Well-placed supports make the whole system feel solid — and they reduce noise, leaks, and maintenance.
Here's a practical guide to placement decisions.
Critical spots to support
- At changes in direction (elbows, tees) — these points transmit forces.
- Near equipment connections (pumps, valves, heat exchangers) — support close to flanges but leave space for alignment and maintenance.
- Across long unsupported spans — if you see sag, you underestimated spacing. Add supports.
- At transitions (insulated to bare pipe) — insulation changes how a clamp holds the pipe; design accordingly.
Don't overdo it
Too many supports create a different issue: they restrict expansion. You need a mix: some fixed supports to locate the run, and sliding supports to allow thermal growth. Think of supports as a choreography — some hold position, others let things move.
Practical placement workflow
- Start at fixed anchors (near pumps or structural constraints).
- Add sliding supports between anchors at intervals per the span table.
- Place intermediate supports at elbows, valves, or where the pipe changes direction or material.
- Revisit after a short test run — if the pipe moves oddly when hot or under pressure, adjust.
Field note
On retrofit jobs, I've seen teams place brackets where workers could easily reach with a wrench, not where the pipe needed support. The result: sagging and vibration. Don't shortcut placement for convenience — plan access, but prioritize structural need.
Practical takeaways and next steps
Brackets don't argue for attention. But they deserve it. Get the material, mounting, placement, and maintenance right and your piping system will stay quieter, leak less, and need fewer emergency fixes. Ignore them, and small problems become big ones, often at inconvenient times.
Here's a short action plan you can use on your next project or inspection round:
Survey your critical runs. Note environmental conditions and vibration sources.
Choose materials deliberately. Match alloy/coating to the environment — don't assume a one-size-fits-all metal.
Install with care. Check alignment, torque to spec, and allow for expansion.
Inspect regularly. Use a simple checklist and log findings. Early fixes cost less.
Buy spares. The few brackets you keep in inventory usually pay for themselves.
-
Why Does HVAC Mounting Clamp Selection Matter
Feb 27, 2026
A Practical, No-Fluff Guide to Choosing, Installing, and Caring for HVAC Support Hardware
Let's be blunt: a tiny piece of metal can make or break an HVAC job. We've all been on sites where big equipment works fine but a run of ducts sags, hoses shake, or a pipe joint leaks because the support was wrong. That's not glamorous, but it's where systems fail.
Why support hardware matters—short version
Think of supports as the skeleton for your piping and ductwork. If the skeleton's off, everything else gets stressed. Two quick consequences of bad support design:
- Mechanical stress — joints, flanges, and connections pay the price.
- Noise and vibration — which annoy occupants and loosen parts over time.
Fix those two and you avoid most callbacks. It's that simple.
A quick field story
On a mid-rise retrofit, the chilled-water main kept leaking at welds. Contractor blamed piping until we found eight poorly spaced straps — insulation water collected between pipe and metal, causing corrosion and fatigue. We added three more saddles, swapped to rubber-lined split clamps, re-routed an elbow by 200 mm, and the leaks stopped. The moral: small fixes, big payoff.
Common mistakes I still see (and exact fixes)
These are the repeat offenders. If you solve these, you're already above average.
Fasteners finger-tight or inconsistent torque
- Why it's bad: vibration backs out screws.
- Fix: torque wrenches on every critical fastener. Mark torque values on drawings. Use lock washers or Loctite where needed.
Clamps too close to fittings or moves
- Why it's bad: stiffer points near elbows cause stress.
- Fix: support straight runs, keep at least 150–300 mm from bends on small piping; distances grow with diameter.
One support carrying everything
- Why it's bad: multiple runs or branches concentrate load.
- Fix: distribute loads. Use trapeze hangers for groups, or add intermediate supports.
Material mismatch causing corrosion
- Why it's bad: galvanic corrosion between steel and stainless accelerates failure.
- Fix: match metals or isolate with sleeves, washers, or coatings.
Anchoring into non-structural materials
- Why it's bad: pull-through, deformation, or early failure.
- Fix: verify substrate, use backing plates, or tie into primary framing.
Ignoring thermal movement
- Why it's bad: rigid supports across long runs cause bending and stress.
- Fix: add sliding saddles, guides, or expansion loops at design intervals.
Skimping on isolation where vibration matters
- Why it's bad: chatter, noise, faster fatigue.
- Fix: rubber-lined clamps, spring hangers, or pipeto-flex connectors at equipment.
How to pick the right support — practical steps
Skip vendor catalogs until you answer these questions on the site.
What's the load per meter
- Quick calc: weigh a 1 m sample or use catalog weights. Add insulation and a 25% safety margin.
How much movement to expect
- Thermal growth on long runs? Choose sliding supports or allow an expansion loop every X meters (calculate from coefficient of thermal expansion).
What environment
- Indoor dry office vs. coastal plant vs. chemical exposure — pick materials accordingly.
Is vibration present
- Yes - add isolation. No - standard supports might do.
How often will you need access
- Frequent access - split clamps or quick-release designs.
When those are clear, select parts with ratings above your calculated loads. If in doubt, choose the next higher capacity model — the price difference is tiny compared with a service call.
Materials — what really works where
Short, honest rundown.
- Stainless steel (304/316): Go-to for coastal, chemical, or outdoor exposure. Lasts. Costs more. Worth it where replacement is hard.
- Galvanized steel: Cheap-ish and fine indoors. Not great in salt air.
- Aluminum: Light and non-rusting but not for heavy loads. Watch for galvanic contact with steel.
- Polymers/composites: Good for electrical isolation or chemical compatibility, but check temperature and load limits.
- Rubber-lined or neoprene pads: Essential for vibration dampening and to protect insulation.
A practical tip: if you're replacing failed galvanized parts in a coastal plant, upgrade to 316 stainless in the wet zones and keep galvanized on dry interior runs. That hybrid approach controls cost but fixes the weak points.
Installation tips that save time and reduce rework
Some of these are obvious, some are not. They all work.
- Pre-mark support locations on the actual installed route — not on the as-built drawing only.
- Use calibrated torque tools and record torque values on your punch list.
- For split clamps, slide the lower half under the pipe and align before tightening the top half — it saves awkward lifts.
- Always use anti-seize on stainless fasteners in high-temp zones.
- Temporary braces for overhead work: use them until the final fasteners are torqued. Don't rely on hand-tight positioning.
- If the clamp design includes a rubber liner, make sure the liner sits fully; partial liners trap water and grit.
One crew I worked with used colored paint marks on bolts after torquing — a quick visual check for inspectors that the fastener was set to spec.
Maintenance and inspection — what to actually do
A little routine goes a long way.
Frequency guide
- Harsh environments (coastal, chemical): inspect every 3–6 months.
- Normal commercial interiors: yearly.
- After events (earthquake, major overhaul): immediately.
Quick inspection checklist
- Fasteners: any backed-out or missing
- Corrosion: pitting, flaking, or deep rust
- Liners: cracked, flattened, or displaced
Movement: signs of unexpected pipe drift or new noise under operation?
If you find evidence of movement, add a temporary support and schedule a permanent fix. Don't wait.
Troubleshooting — fast fixes on site
Short problems, short solutions.
- Sagging between supports - add an intermediate saddle and verify insulation/wet weight.
- Vibration transmitted to structure - retrofit rubber-lined clamps or spring hangers; check flexible connectors.
- Corrosion at contact points - isolate dissimilar metals; consider replacing with same-alloy parts.
- Repeatedly loose fasteners - investigate thermal cycling or use locknuts/threadlocker.
If a pattern of failures shows up on multiple supports, step back and evaluate the whole route — often it's a spacing or material choice issue, not a single bad clamp.
Two short case studies from the floor
These aren't marketing blurbs — they're real and repeatable.
Retrofit office building
- Problem: sagging chilled-water with corrosion near supports.
- Fix: replaced thin metal saddles with rubber-lined split clamps and increased spacing density.
- Outcome: no sagging or leaks after 24 months.
Small coastal hotel
- Problem: brackets in mechanical room corroded within a year.
- Fix: swapped exterior-exposed brackets to 316 stainless and applied sacrificial anodes on nearby conduits.
- Outcome: bracket replacement interval extended from 12 months to 5+ years.
Quick procurement checklist (what to order)
When buying, have this ready:
- Exact pipe/duct diameter and insulation thickness.
- Total calculated load per support (include insulation and liquid).
- Environment classification (indoor dry / outdoor coastal / chemical exposure).
- Access requirement (split clamp? quick-release?).
- Any code / seismic / fire-rating requirements.
Give that to your supplier and ask for part codes for alternatives: standard, lined, split, seismic-rated.
If you search suppliers, using HVAC Mounting Clamp as the part keyword gets clean matches; don't forget to cross-check for lined or split versions.
Checklist for the crew — what to do before sign-off
- Verify all specified clamps installed and torqued to spec.
- Check alignment and measure any deflection under static load.
- Re-torque after 30–90 days of operation.
- Document with photos and a brief log: part codes, torque values, and installation notes.
- Add supports where insulation or condensate could accumulate.
A one-page install log with photos saves hours when something goes wrong later.
Straight from the field
Support hardware is boring until it's not. The jobs that run quietly for years are the ones where someone paid attention to these details. If you want a single rule: design like you'll be back for maintenance. Pick durable parts where replacement is hard, use lined supports where noise or condensation is possible, and always plan for thermal movement.
And remember: a well-chosen and properly installed support is cheap insurance against call-backs. It's not glamorous. It pays.
-
The Hardware Behind Every Reliable HVAC System
Feb 25, 2026
When people talk about HVAC systems, the focus is usually on boilers, heat pumps, air handlers, or smart controls. Yet in every successful installation, there is a quieter but equally important element working in the background — installation hardware.
From pipe clamps hidden behind walls to brackets supporting radiators and manifolds, these components play a critical role in system stability, safety, and long-term performance.
Why Installation Hardware Matters More Than You Think
A well-designed HVAC system is only as reliable as the parts holding it together. Poor-quality brackets or improperly designed supports can lead to vibration, noise, misalignment, and even system failure over time.
That is why installers, engineers, and HVAC manufacturers increasingly pay attention to:
- Structural strength and load capacity
- Corrosion resistance in different environments
- Installation efficiency on-site
- Long-term durability and maintenance costs
Supporting HVAC Systems, One Component at a Time
Yuhuan JINYI Hardware Co., Ltd. is a manufacturing company focused on metal installation hardware for HVAC and plumbing systems. We work closely with customers in Europe and North America to produce components that support both standard installations and customized system designs.
Our product range covers:
- Pipe clamps and fixing brackets
- Radiator brackets and supports
- HVAC mounting brackets for ducts and piping
- Manifold brackets and stainless steel manifolds
- Valve components and custom metal parts
Each product is manufactured with attention to fit, strength, and consistency, helping installers work more efficiently and systems perform more reliably.
Built for Real-World HVAC Environments
HVAC installations operate under constant temperature changes, pressure, and mechanical stress. To meet these challenges, JINYI uses materials such as carbon steel and stainless steel, combined with surface treatments like zinc plating and powder coating, to extend product lifespan and improve resistance to corrosion.
Our manufacturing process focuses on:
- Stable quality across batches
- Precise dimensions for easy installation
- Compatibility with common HVAC system designs
- A Manufacturing Partner, Not Just a Supplier
Many of our customers are HVAC brands, system integrators, and distributors looking for a long-term manufacturing partner. As a direct factory, JINYI supports:
- OEM and ODM projects
- Custom designs based on drawings or samples
- Flexible production volumes
- Consistent lead times and export experience
We understand that behind every order is a system that must perform reliably in real buildings, for real users.
Quietly Supporting Better HVAC Systems
Installation hardware may not be the most visible part of an HVAC system, but it is one of the most important. At JINYI, we focus on producing components that do their job quietly and reliably, so HVAC systems can perform as designed — today and for years to come.
To learn more about our HVAC and plumbing hardware solutions, visit: https://www.yh-jinyi.com/
-
Which China Shower Head Reduces Maintenance Costs
Feb 23, 2026
How to Choose and Use a China Shower Head That Cuts Operating and Maintenance Costs
A well-chosen shower fitting combines user comfort with predictable service performance. With many projects relying on fixtures sourced from overseas suppliers, procurement teams and installers need clear guidance that balances aesthetics, water economy, and long-term reliability. This guide helps building owners, designers, and contractors evaluate models made in China, test samples in local systems, and set purchasing and installation processes that reduce maintenance calls and keep bathrooms functioning smoothly over years of use.
The phrase China Shower Head appears deliberately in this guide because many buyers will encounter that label in catalogs and trade listings. The steps below explain how to treat such listings pragmatically: verify materials and finish, confirm flow characteristics in situ, and plan for spare parts and straightforward servicing.
Why the choice matters: small parts, large consequences
On a single-family scale, a faulty fitting is an annoyance. On a hotel or multi-unit residential site, it becomes a recurring expense. A wrong material choice, a finish that reacts poorly to local cleaning agents, or a spray pattern unsuited to low pressure systems can require replacements, frequent descale operations, or guest complaints. Avoiding those outcomes starts before orders are placed — with focused sample testing and supplier verification.
Key areas where a poor choice shows up quickly:
- Seal and hose wear from incompatible elastomers or aggressive water chemistry.
- Finish degradation on exposed surfaces when the coating method is not robust enough for coastal or industrial areas.
- Perceived weak flow in low-pressure systems, causing retrofit changes that add labor and parts.
- Part interchangeability problems when non-standard fittings require special adaptors.
Thinking in terms of lifecycle cost rather than unit price helps teams avoid reactive spending later.
Product families and their practical trade-offs
Shower fittings come in a few core families. Understanding these families helps narrow selections quickly and select a model that suits the real-world conditions of the project.
- Fixed overhead (rain) heads: Provide a broad, immersive coverage. They tend to work best with higher supply capacity and can require larger ceiling mounts.
- Wall-mounted fixed heads: Compact and simpler to install; they usually pair well with conventional shower valves in apartments.
- Handheld assemblies: Offer flexibility for cleaning and assisted bathing; hoses and brackets become additional maintenance items to monitor.
- Multi-function models: Allow switching spray modes; useful for varied preferences but introduce moving parts that require occasional servicing.
- Eco or low-flow designs: Aim to cut consumption while maintaining a pleasant spray; effectiveness varies by nozzle design and local water pressure.
When specifying, match family to use case: a hospitality suite may prioritize guest experience and choose a multi-function set, whereas a public facility could favor low-flow, easily maintained heads.
Materials and finishes: match choices to exposure and use
Material choice underlies durability. Avoid generic descriptors and require concrete information from suppliers.
Metals and alloys
- Stainless alloys are common for internal components and exterior bodies where corrosion resistance matters.
- Brass is frequently used for valve components because it machines well and resists many common forms of corrosion.
- Zinc and plated steels may appear in budget lines; careful attention to coating method is necessary to ensure reasonable life in humid or salty environments.
Surface treatments
Finishes vary from polished chrome plating to brushed treatments and powder coatings. The durability of a finish depends on the base material and the process used. Hot-dip or well-controlled electroplating processes, followed by passivation where required, will perform differently in the field. Ask suppliers to describe their finishing process rather than rely on visual samples alone.
Elastomers and hoses
Seals, O-rings, and flexible hoses should be specified by elastomer family when possible. EPDM, silicone, and certain nitrile compounds have different resistances to temperatures, chlorine, and cleaning agents. A simple statement of compound family and operating temperature range provides far more clarity than generic "rubber" labels.
A short procurement tip: require the supplier to list all key material families and the process used for finishes. This reduces ambiguity and helps maintenance teams plan replacements.
Water performance: flow, feel, and site reality
Flow rate and the user's perception of water pressure differ. Two devices with the same liters-per-minute figure can feel different because of nozzle geometry and whether air is entrained into the stream.
Considerations for performance
- Local pressure profile: Fixtures that feel generous in high pressure may feel weak in systems with low static head. Match design to measured supply pressure.
- Nozzle design: Aerated or multi-jet nozzles can deliver fuller sensation at lower flow. Ask suppliers for qualitative descriptions of nozzle behavior, and test sample units under local pressures.
- Balance of conservation and comfort: For projects with water restrictions, low-flow heads with proper nozzle design can satisfy both targets but must be verified on-site.
A practical approach is to test samples in the actual plumbing during the pilot stage rather than relying on lab data alone. The subjective experience matters to users and drives complaint volumes.
Type Best for Service points Typical maintenance Fixed overhead head Luxury feel in suites Mounting, seals Occasional descaling, verify mount tightness Wall-mounted head General residential use Seal and valve Routine cleaning, seal check Handheld assembly Assisted use and cleaning Hose, bracket, seals Hose inspection, replace seals as needed Multi-function head Variety of user preferences Selector mechanism, seals Check selector for smooth action, replace seals periodically Low-flow head Water-limited environments Nozzle blockage Regular descaling, check flow pattern Sample testing: a non-negotiable step
A pilot sample tested in real conditions reveals far more than photos or showroom demonstrations. Include these checks in on-site trials:
- Fit and threads: Confirm compatible thread types and that adaptors are not needed.
- Operational testing at low and high pressure: Run hot and cold cycles and test shower response.
- Spray uniformity and feel: Validate that nozzle design provides acceptable coverage and sensation.
- Seal behavior under temperature: Cycle hot water through the fitting to ensure seals remain pliant and leak-free.
- Nozzle cleaning access: Confirm that jets are serviceable without removing the whole head.
Sample evaluation prevents large-scale rollouts of a product that does not match local conditions.
Installation practices that reduce early service calls
Quality installation matters as much as product choice. Consider these practical recommendations:
- Pre-verify thread types and water connections. Pre-check material compatibility and thread sizes.
- Avoid over-tightening. Use recommended sealing materials and torque settings to prevent stress damage.
- Provide clear commissioning steps. A brief checklist helps contractors avoid missed items and clarifies acceptance responsibilities.
- Ensure good mounting support. Solid support prevents movement that accelerates wear on seals and connectors.
- Conduct a water quality check. High mineral content or chemical additives can change maintenance cycles; note this on handover docs.
Training installers on the manufacturer's basic recommendations reduces avoidable call-outs in the first months after handover.
Cleaning and routine care guidance
Simple, light maintenance extends service life significantly:
- Use soft cloths and mild detergents. Abrasive cleaners and pads damage finishes and accelerate wear.
- Schedule periodic nozzle cleaning. Soak removable nozzle plates in mild vinegar solution where calcium deposits accumulate.
- Inspect hoses and seals annually. Proactive replacement before failure lowers the risk of water damage.
- Avoid aggressive disinfectants on finishes. Some agents can dull or pit coatings; label compatible cleaning products where fixtures are in commercial use.
Providing a concise care card with each unit reduces missteps by end users or cleaning contractors.
Evaluating suppliers and protecting the project
Supplier selection is as important as product choice. Key checks that reduce later maintenance needs:
Documentation and traceability
Require material descriptions and batch traceability for key metal and elastomer components. Production batch records simplify root cause analysis if a defect appears.
Finishing and testing records
Ask for evidence of finishing control — bath chemistry, coating thickness checks, or salt-spray logs where corrosion resistance matters. Quality records show the producer's discipline.
Spare parts and support
Confirm that common wearable items — hoses, O-rings, cartridge inserts — are available for several years. Delivery speed for spares is often as important as unit price for operational continuity.
Pilot and warranty terms
Negotiate a pilot order and ensure warranty language addresses premature failures. Include practical remedies and turnaround times.
A procurement checklist that covers these points prevents surprises and spreads accountability.
Logistics, packaging, and transit protection
Damage in transit creates avoidable service costs. Specify packaging terms:
- Internal separators or foam to prevent units from rubbing and scratching.
- Anti-corrosion paper or VCI for long ocean voyages.
- Batch labeling on cartons for rapid receiving and traceability.
- Handling instructions to prevent damage when unpacking on-site.
Agreeing these details in advance reduces the need for on-site rework and keeps replacement units in stock.
Sustainability and regulatory considerations
Many public and commercial projects now include sustainability criteria. Consider:
- Water performance certifications recognized in your region.
- Material sourcing transparency to meet procurement policies.
- End-of-life considerations such as recyclability of metals and hoses.
Selecting products that align with project sustainability goals helps with approvals and ongoing operational reporting.
Procurement strategies that smooth operations
Adopt a staged procurement approach:
- Sample and pilot: Validate performance in real conditions.
- Staged rollouts: Phase deliveries by building or floor to reduce risk.
- Safety stock: Maintain a small buffer of spare parts for critical venues.
- Dual sourcing: For large deployments, qualify an alternate supplier to mitigate production or shipping delays.
These measures smooth installation schedules and reduce emergency spending.
Common pitfalls and how to avoid them
Avoid these frequent mistakes:
- Buying on appearance alone. A polished finish can hide thin plating or incompatible base alloys.
- Neglecting local water chemistry. Hard or aggressive water shortens nozzle life and affects seals.
- Skipping sample validation. Large orders without pilot testing often reveal unforeseen issues in the field.
- Assuming universal hose and valve compatibility. Small variations can cause stress on connections and lead to leaks.
Clear technical specifications and sample testing close most of these gaps.
Measuring outcomes: what to track post-installation
Track a few simple metrics to judge if choices are reducing maintenance load:
- Number of service calls per installed 100 units over the first 12 months.
- Average time to repair or replace a failed part.
- Frequency of nozzle cleaning or descaling required.
- Rate of part interchange or adaptor usage during installations.
Trends in these measures indicate whether the pilot and specification approach are working.
Checklist for selecting and installing fixtures from China suppliers
- Obtain sample units and test them in local plumbing.
- Request clear material descriptions and finishing process summaries.
- Confirm availability of spare hoses, seals, and cartridges.
- Specify transit packaging and labeling requirements.
- Include pilot, staged rollouts, and small safety stock in procurement.
- Provide installers with a concise commissioning checklist and care card.
Applying these steps converts a procurement decision into an operationally stable outcome.
A thoughtful approach to selecting fixtures — whether the product is labeled China Shower Head or carries another origin descriptor — prevents repeated service visits and reduces lifecycle expense. Testing samples, verifying materials and finishes, and setting robust procurement and installation practices turn a fixture into a predictable element of building operations rather than a recurring problem source. With modest planning and a pilot-first mindset, teams deliver bathrooms that satisfy users and stay dependable for years.
-
What Makes a Clamps Manufacturer the Right Choice for You
Feb 20, 2026
How to Source a Reliable Clamps Manufacturer: A Practical Guide for Buyers and Engineers
Small components can cause big problems. Clamps are a case in point: they are inexpensive on a unit basis but they interact directly with piping, hoses, and structural supports. Wrong choices show up as leaks, damaged coatings, frequent replacements, or time-consuming on-site fixes. It focuses on what matters when you source clamps manufacturers: material and finish, manufacturing controls, inspection and testing, logistics and packaging, procurement tactics, and lifecycle cost thinking. A single comparison table helps you match clamp families to typical uses. Use the checklists and RFQ language provided to make supplier responses easier to compare.
Why clamps deserve engineering attention
It's easy to assume clamps are trivial. In practice, they are mechanical interfaces that must resist environmental attack, mechanical load, and installation variation. Three practical consequences of under-specified clamps:
- Installation rework when dimensions don't match pipe fittings or brackets.
- Early corrosion and replacement when the coating or material is inappropriate for the environment.
- Functional failures under vibration or thermal cycling when the clamp family lacks the required design features.
Addressing these risks early — before purchase orders are issued — reduces downtime and prevents cascading project delays.
Understanding clamp families and their typical applications
Clamp Type Typical Environments Typical Materials Primary Strength Common Limitations Worm-gear hose clamp Plumbing, low-pressure hoses, indoor systems Zinc-plated steel, 304 stainless Cost-effective, flexible fit Not ideal for high vibration or hot, high-chloride environments T-bolt clamp Heavy-duty hoses, turbo lines, industrial flexible connections 304/316 stainless, hardened steel High clamping force, resists loosening Larger profile and higher cost Ear (Oetiker) clamp Small diameter hoses, tamper-evident assemblies Stainless steel Compact, permanent fit Single-use; no adjustability Rubber-lined pipe clamp Coated pipes, vibration-prone installations Steel body + EPDM/NBR lining Protects coatings, reduces vibration and noise Elastomer temperature limits require attention Repair clamp Buried or exposed pipeline emergencies Cast iron, stainless + gasket Fast leak containment Often a temporary repair; check pressure rating Pipe support clamp Suspended piping, HVAC, process lines Hot-dip galvanized steel, stainless Structural support for loads and alignment Must be matched to load and thermal movement requirements Material and finish: not all "stainless" or "galvanized" are equal
The material under the surface defines long-term behavior. A generic “stainless” note in an RFQ allows suppliers to substitute grades that look similar but perform differently. Be specific.
What to require in specs
Demand mill/material certificates tied to heat numbers or batch IDs. Specify coating type and minimum coating thickness where relevant. For rubber linings, require compound name, shore hardness range, and maximum continuous service temperature. These details avoid confusion and make supplier offers comparable.
Manufacturing steps where variation commonly appears
Understanding the production flow helps you see where problems arise and what to check in a factory audit.
- Incoming material control — Reliable suppliers test strips and hardware on arrival. Ask for incoming inspection processes and sample documentation.
- Stamping and forming — Tooling precision controls hole spacing, band width, and repeatability. Tool life and maintenance schedules reduce dimensional drift.
- Welding and assembly — Qualified welds and correct heat treatments are critical on heavy-duty clamps and structural supports.
- Surface finishing — Plating, galvanizing, and passivation need proper chemistry and thickness control; require test logs.
- Assembly and testing — Adhesion checks for rubber lining, torque tests for fastening clamps, and packaging control help prevent transit damage.
When problems arise in the field, they often trace back to lapses at one of these production stages.
Quality control and testing: specify what you will accept
Testing must be contractual, not optional. Typical test and documentation items you should require:
- Material certificates (MTCs) referencing specific batch or heat numbers.
- Salt spray testing (ASTM B117 or comparable) for coated parts where corrosion resistance is important.
- Dimensional inspection reports for critical tolerances; CMM reports for tight-dimension parts.
- Torque retention testing for worm and T-bolt clamps, to verify the clamp holds under vibration cycles.
- Elastomer adhesion/peel testing for rubber-lined clamps, with minimum adhesion values.
- Pre-shipment inspection report with photos and sampling records; allow third-party inspection if needed.
Define sampling plans (for example, 5% samples with acceptance criteria), and clearly state who bears remediation costs for nonconforming shipments. Clear acceptance criteria avoid disputes and speed resolution.
Factory audits and remote verification
A factory visit provides direct information; if travel is not feasible, require live video or third-party audits. What to look for:
Onsite indicators of reliability
- Tooling room and spare die inventory — presence of maintenance logs and spare dies signals control of repeatability.
- IPQC checkpoints — in-process quality control stations with logged results show process discipline.
- Plating and finishing lines — control of bath chemistry, drying ovens, and thickness measurement devices.
- Welding station evidence — welding procedure specs and welder qualifications.
- Final inspection reports — evidence that the factory performs and records final checks before packing.
Remote audit approach
- Request a live video walk-through showing the production line and QA documentation with timestamps.
- Ask for recent pre-shipment photos and test results from lots similar to your expected order.
- Use independent inspection firms (e.g., SGS, Bureau Veritas, Intertek) for high-risk orders.
Procurement tactics that reduce risk
Several practical procurement measures help turn a supplier relationship into predictable supply:
Pilot and staged ordering
Start with samples, then a pilot batch, before committing to full-volume production. This allows fit and function testing on actual assemblies.
Multi-sourcing for critical parts
Qualify two suppliers for critical clamp families. Dual sourcing reduces the risk of a single factory disruption halting field work.
Clear contractual acceptance criteria
Spell out pre-shipment inspection, rejection remedies, lead times, and penalties for repeated late deliveries. Hold back a portion of payment until acceptance to incentivize compliance.
Maintain safety stock
Keep a small buffer of frequently used or critical clamps. This guards against shipping delays and production hiccups.
Lock in spares and packaging
Require spare hardware availability for an agreed number of years and firm packaging requirements to protect finish and geometry in transit.
Packaging, labeling and logistics: small items that save time
Transit damages and poor labeling cause unnecessary site work. Agree packaging and labeling requirements up front:
- Use separators between stacked clamps to prevent deformation and scratches.
- Include anti-corrosion papers or VCI packs for long sea voyages.
- Label cartons with part number, batch number, and quantities for fast receiving.
- Pack crates to prevent movement in container transit; specify internal bracing if necessary.
Also confirm HS codes and required export documents with your supplier so customs surprises are minimized.
Common failure modes and how to prevent them
Anticipating failure modes lets you specify features that avoid them:
- Corrosion and coating flake — specify proper material grade or thicker coating and require salt spray evidence.
- Loosening under vibration — choose T-bolt clamps, vibration-resistant fasteners, or include lock features; require torque retention testing.
- Rubber liner delamination — specify compound and adhesion testing; require proper curing and surface prep.
- Dimensional mismatch — require sample fit tests and clear tolerances; demand CMM reports for tight fits.
Failure mode prevention is largely about clarity in specs and confirmation through testing.
Lifecycle cost thinking: beyond the unit price
Unit price is one input; total cost over the life of installed clamps is what matters. Consider:
Total lifecycle cost = purchase price + transport + installation labor + expected replacements × replacement cost + downtime cost per failure
A higher-priced clamp that lasts longer and reduces downtime often has a lower lifecycle cost. Model scenarios for large installations and factor in replacement frequency and labor cost.
Why Choosing the Right Clamps Manufacturer Reduces Maintenance Costs
Small fittings are often overlooked during design and procurement. Yet hardware used to secure piping, hoses, and conduits has a disproportionate effect on service continuity. Selecting an appropriate manufacturer for these components can lower the total cost of ownership by reducing the frequency of repairs, simplifying servicing, and improving operational predictability.
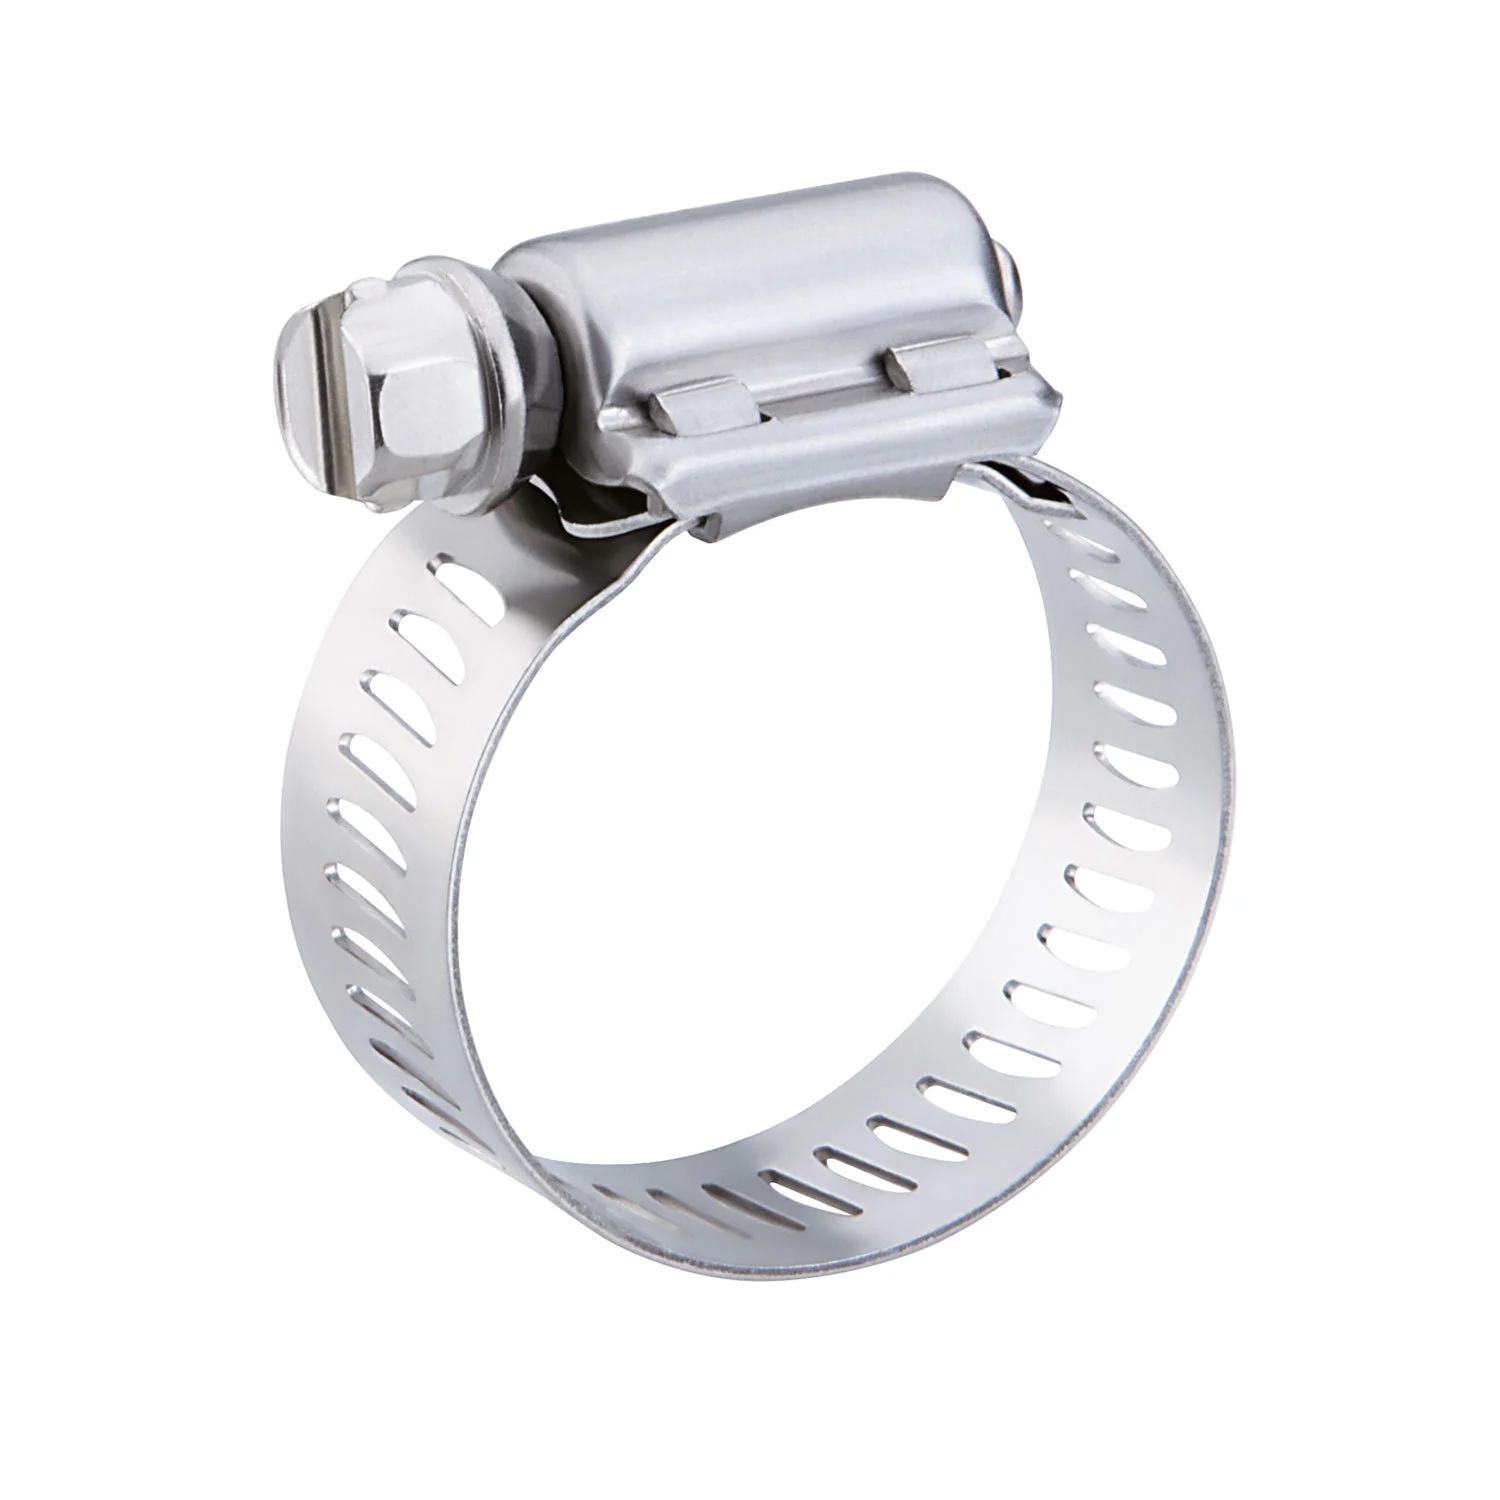
How component sourcing affects long-term expense
At first glance a band or bracket is inexpensive. Over the life of an installation, however, repeated replacements and emergency fixes multiply that initial outlay many times. Several mechanisms explain why:
- Mismatch with operating conditions. Parts built from unsuitable materials or finishes wear faster in corrosive, high-temperature, or abrasive environments.
- Dimensional inconsistency. Poor manufacturing tolerances lead to installation rework and the use of non-standard fasteners or shims, increasing labor hours.
- Frequent loosening or failure. If a component does not hold in vibration-prone systems, it may require recurring tightening or replacement, leading to repeated site visits.
- Damage during transport and storage. Inadequate packing or poor handling instructions can arrive as scratched, bent, or contaminated items, which then need rework before installation.
A thoughtful supplier selection process addresses these sources of recurring cost before the first component is fitted on site.
What to assess in a supplier to limit upkeep demands
Choosing a producer is not just about price and lead time. The following supplier attributes translate most directly into fewer maintenance events:
1. Material sourcing and traceability
A producer with documented material provenance and batch records enables precise matching of component metallurgy to the installation environment. Traceability supports failure analysis and helps avoid repeated use of non-suitable batches.
2. Process control and tooling maintenance
Stable dimensions depend on well-maintained tooling and routine calibration. Factories that schedule die maintenance and log replacements tend to ship parts with consistent geometry, reducing on-site fitting adjustments.
3. Surface treatment discipline
How an item is finished matters more than its raw alloy in many real-world contexts. Consistent application of protective coatings, documented bath chemistry, and drying procedures reduce early corrosion, which otherwise leads to costly replacements.
4. Assembly and functional testing
When components are shipped after functional checks — such as torque retention for screw-type fastenings or adhesion tests for cushioned parts — installers face fewer surprises and system downtime falls.
5. Support and spare availability
A supplier that can supply spare parts quickly or has a clear plan for small-batch reorders helps operations avoid prolonged outages when a part does fail.
Design and specification choices that cut upkeep bills
Procurement teams and engineers can write specifications that make it easier for manufacturers to deliver durable parts and for maintainers to keep systems running smoothly.
- Specify material families rather than generic descriptors. Ask for specific grades and acceptable alternatives tied to the application environment.
- Require documented finishing processes. Stating the type of finish and a qualitative expectation reduces interpretation and ensures consistent protection.
- Define functional acceptance tests. Include simple, non-numeric checks such as the ability to hold a secure clamp under a simulated vibration cycle or a basic adhesion test for linings.
- Include labeling and batch IDs. When cartons and parts include batch identifiers, replacements and corrective actions are quicker and more accurate.
These measures help the supply chain deliver components that meet operational needs rather than cause ongoing maintenance work.
Field experience: common problem areas and supplier-linked remedies
Over many installations, certain failure patterns appear repeatedly. Below are frequent pain points and the supplier-side practices that reduce their incidence.
- Corrosion on exposed parts. Remedy: insist on appropriate material or finish and request recent, documented test evidence for the finish method.
- Fasteners seizing or stripping. Remedy: require compatible fastener grades and pre-shipment torque checks or lubrication where appropriate.
- Rubber lining deterioration. Remedy: specify elastomer family for the expected fluid and temperature exposure and require adhesion or cure records.
- Dimensional mismatches. Remedy: ask for sample fit tests and dimensional inspection reports ahead of large orders.
Having these checks in purchase agreements shifts the burden of performance onto production processes rather than on-site repairs.
Supplier Attribute How It Reduces Maintenance Needs Field Outcome Material traceability Ensures correct alloy use for environment Fewer corrosion-related replacements Tooling and process control Promotes dimensional repeatability Lower installation labor and rework Consistent finishing Extends surface life against exposure Reduced frequency of part change-outs Functional pre-tests Verifies performance before shipment Fewer emergency call-outs Spare parts planning Ensures quick replacements Shorter downtime windows Procurement practices that convert supplier quality into savings
Turning capable manufacturing into lower upkeep costs requires actions during purchasing and contract management:
Pilot testing and phased rollouts
Begin with a controlled sample run or short pilot installation. Verify performance under real conditions before scaling up. This prevents systemic issues across broad deployments.
Staged delivery and safety stock
Accept deliveries in stages aligned with installation phases while keeping a modest safety buffer of critical fasteners. This reduces pressure to accept a compromised batch in a hurry.
Warranty and remediation terms
Write clear clauses that require remediation, rework, or replacement when items fail before an agreed service life. While not a substitute for good quality, such clauses incentivize the supplier to meet expectations.
Third-party inspection where risk is high
Independent checks, whether in-process or pre-shipment, add assurance for high-value or mission-critical projects. They also provide documented evidence should warranty or corrective action be needed.
These tactics help avoid the repeated cost of emergency fixes and rework.
The role of communication and technical partnership
A supplier willing to engage technically — reviewing drawings, suggesting minor design adaptations for manufacturability, or advising on alternate finishes — often becomes a partner in reducing long-term expense. That partnership is pragmatic:
- Engineers gain access to production knowledge that avoids design choices known to cause wear.
- Buyers benefit from realistic lead-time and testing plans that align production with installation windows.
- Maintenance teams receive parts and documentation that simplify routine checks and repairs.
Open, detailed communication short-circuits many maintenance drivers by addressing root causes upstream.
Measuring success: metrics procurement teams can track
To see if supplier selection is lowering upkeep costs, monitor a few simple indicators:
- Rate of on-site replacements per 1,000 installed units.
- Average time-to-replace a failed item (minutes or hours).
- Incidence of emergency maintenance calls related to fastening or support hardware.
- Percentage of shipments accepted without rework after pre-shipment inspection.
A downward trend in these measures typically signals that supplier and specification choices are delivering the intended benefits.
Practical checklist: questions to ask before final supplier approval
- Can you provide batch-level material documentation and traceability?
- How do you control tooling wear and dimensional drift?
- What finishing methods do you use and how are they validated?
- Are functional checks performed for each batch and are records retained?
- Can you guarantee availability of spare parts for the expected project lifetime?
- Will you accept staged orders and support pilot testing?
Having affirmative answers — and supporting evidence — from a potential partner places the power to reduce future upkeep costs into the hands of procurement and engineering teams.
Reducing upkeep expense begins long before the first pipe is installed. It starts with supplier selection, clear technical specifications, and contractual terms that make quality measurable and verifiable. By prioritizing material traceability, process discipline, finishing consistency, and practical testing, teams convert a routine procurement decision into a strategic measure that lowers repair frequency, shortens downtime, and improves predictability for operations. The right partner makes maintenance planning simpler and less expensive; the right process makes failures rarer and easier to resolve.
Documentation and traceability: what to demand
Insist on documentation as part of delivery:
- Batch traceability and packing lists mapped to MTCs.
- Coating thickness and salt-spray logs for coated items.
- IPQC and FQC records for production hold points.
- Pre-shipment inspection report and photographs.
- Installation guidance including recommended torque settings and maintenance notes.
Digital certificates (PDFs with batch numbers) and QR-coded carton labels shorten approval and audit cycles.
Quick checklists you can use now
Pre-RFQ checklist
- Define environment, loads, and movement.
- Select clamp family and draft initial material and finish requirements.
- Plan pilot batch and acceptance criteria.
Factory audit quick checklist
- Tooling room and die maintenance records.
- IPQC logs and sample test results.
- Plating/galvanizing line evidence and bath records.
- Final inspection process and packing photos.
On-receipt inspection quick checklist
- Random measurement of critical dimensions vs drawing.
- Visual check of coating and plating thickness measurement.
- Torque check on sample clamps.
- Packaging and batch ID verification.
Use these short lists in RFQs and as a guide for inspectors.
Make clamps predictable parts of your supply chain
Clamps will never be glamorous, but they can be predictable. The difference between frequent site rework and smooth installations often comes down to clear specifications, early sample verification, and contractual test requirements. Require material traceability, insist on practical tests, stage your orders, and maintain a small safety stock. Those steps convert clamps from a potential source of delay into routine supply items.
-
Radiator Wall Brackets: A Key Component in Heating System Installation
Feb 18, 2026
Radiator wall brackets play a critical role in the stability and performance of modern heating systems. Although often considered a small accessory, the quality of a radiator bracket directly affects installation efficiency and long-term safety.
In most HVAC installations, radiator wall brackets must provide accurate positioning and sufficient strength. Poorly manufactured brackets may cause uneven mounting, vibration, or even wall damage over time. This is why many European contractors and system integrators prioritize high-quality mounting hardware.
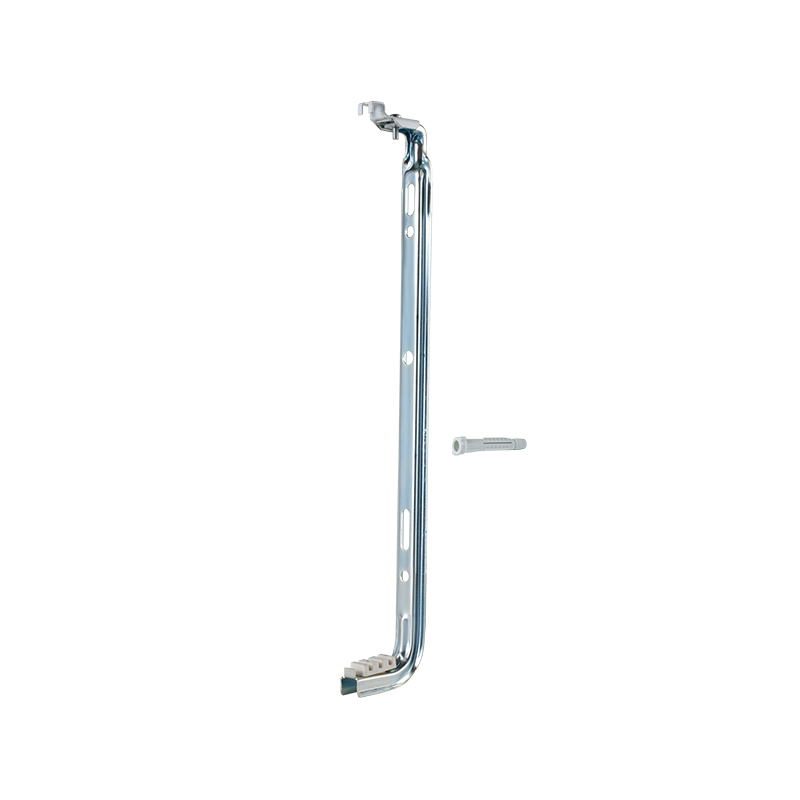
Another important aspect is adjustability. Adjustable radiator brackets allow installers to compensate for wall irregularities and ensure proper radiator alignment. This reduces installation time and improves overall project efficiency.
JINYI, a Chinese manufacturer specializing in HVAC installation hardware, offers multiple models of radiator wall brackets designed for different radiator types and installation requirements. From fixed brackets to adjustable support solutions, JINYI provides stable quality, consistent dimensions, and reliable surface finishes.
With experience supplying European and North American markets, JINYI supports OEM and private label projects for radiator manufacturers, distributors, and HVAC brands. Reliable radiator wall brackets are not just accessories—they are essential components for professional heating system installations. Discover more about our products and global supply solutions at https://www.yh-jinyi.com

![]()
- 210 Jinhai Avenue, Lupu Economic Development Zone, Yuhuan City, Taizhou City, Zhejiang Province.
- +86-576-87423248 / +86-576-87499120
- +86-17769979117 / +86-13750801289
- +86-576-87425996
- [email protected] / [email protected]

